Repainting Carb Zen - Brick Red Colour


Thread Starter #61
Joined
Dec 13, 2011
Messages
1,714
Likes
1,083
Location
Bangalore
Body filler done, Putty begins

Thanks for the support Sir. Sure you are always welcome.

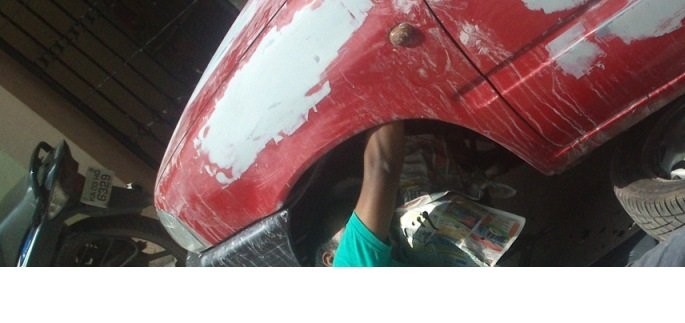
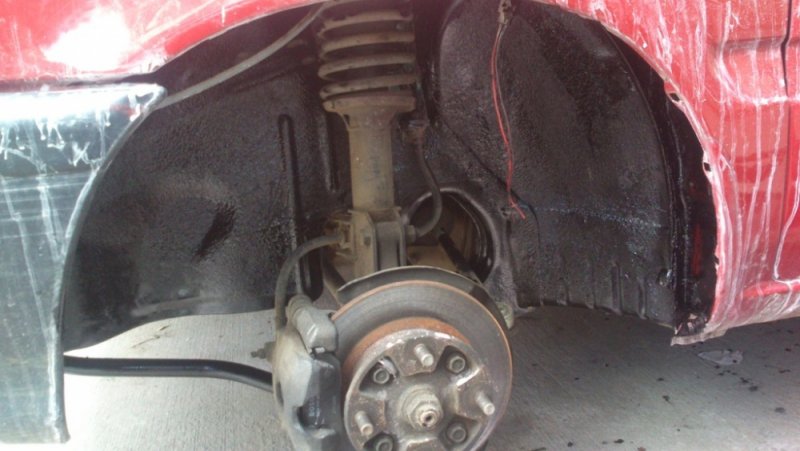
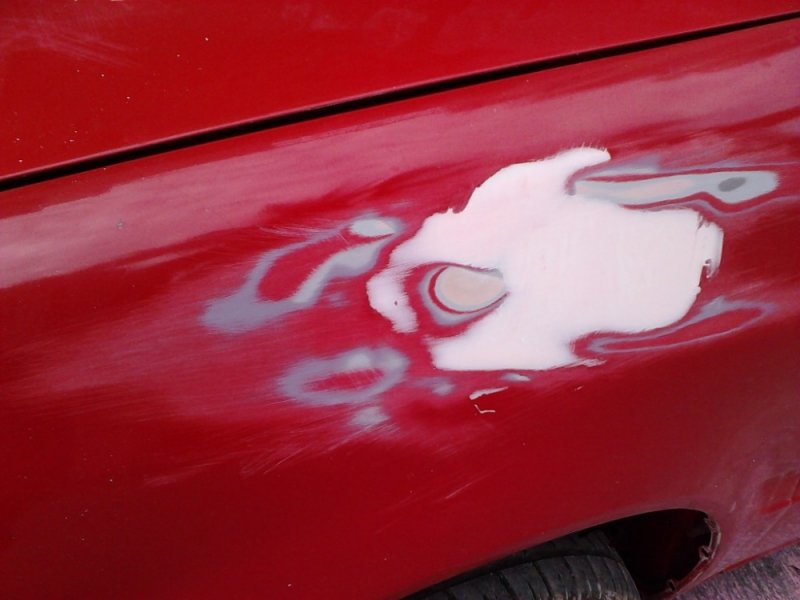
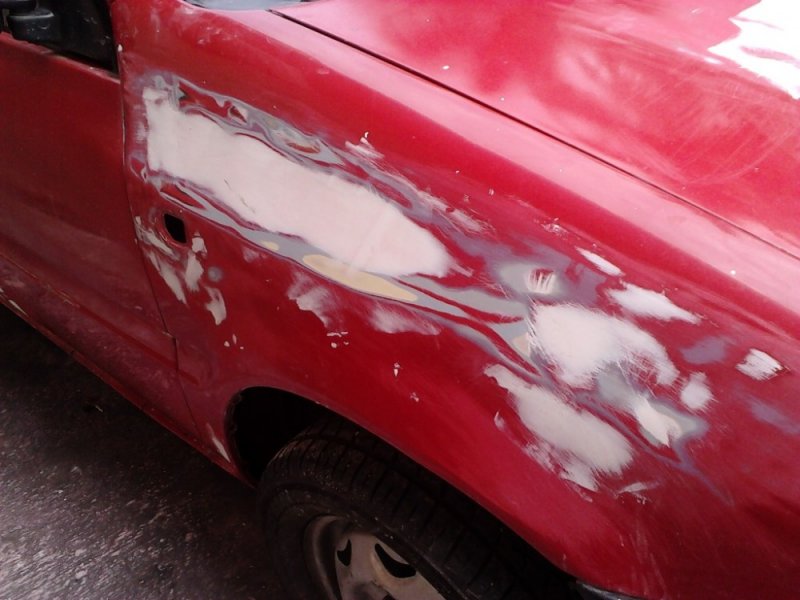
Today day started a bit early and finally managed to complete all body filler works, started with the putty work now.

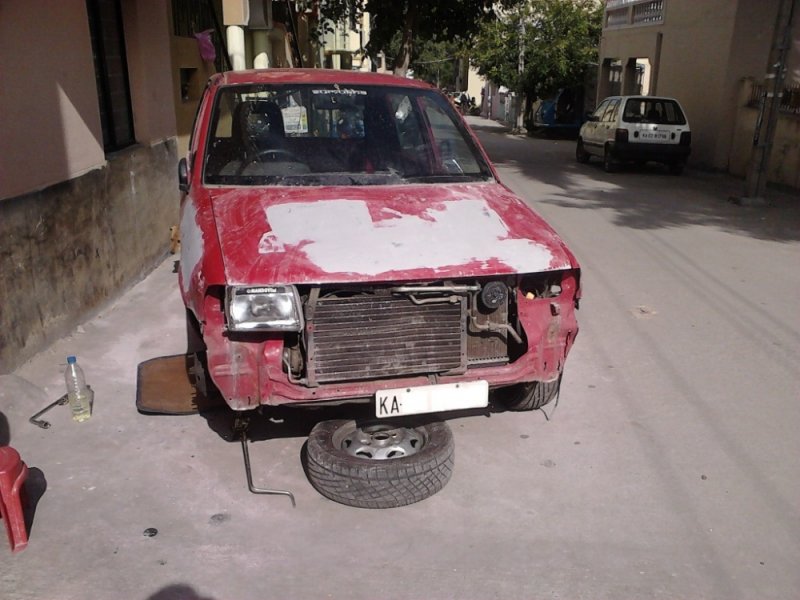
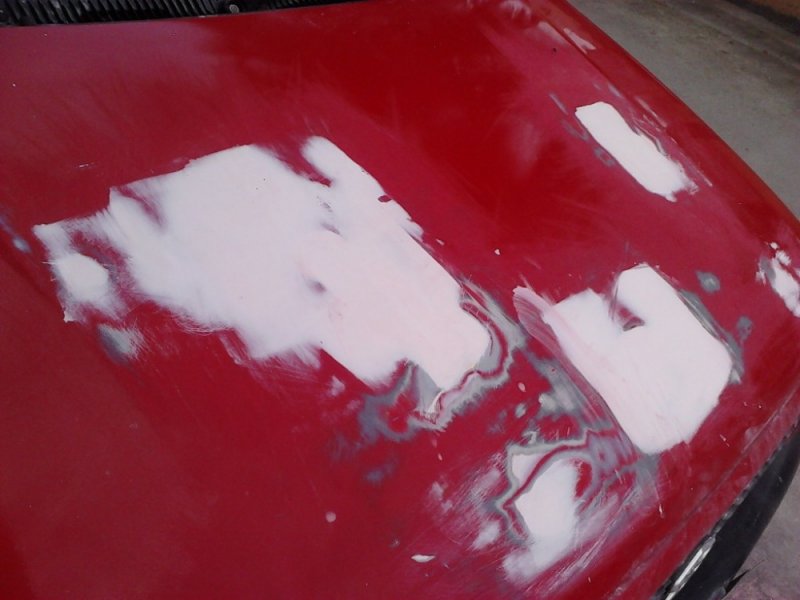
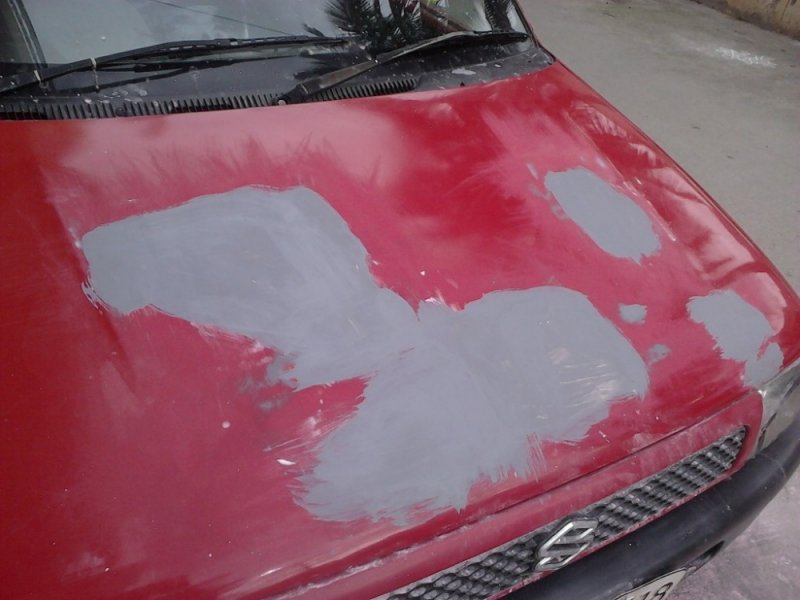
The bonnet was work is not up to my satisfaction, but the sheet metal is so thin, that it flexes very badly when I sand it using wooden block and sand paper.

bd fl 1.jpg

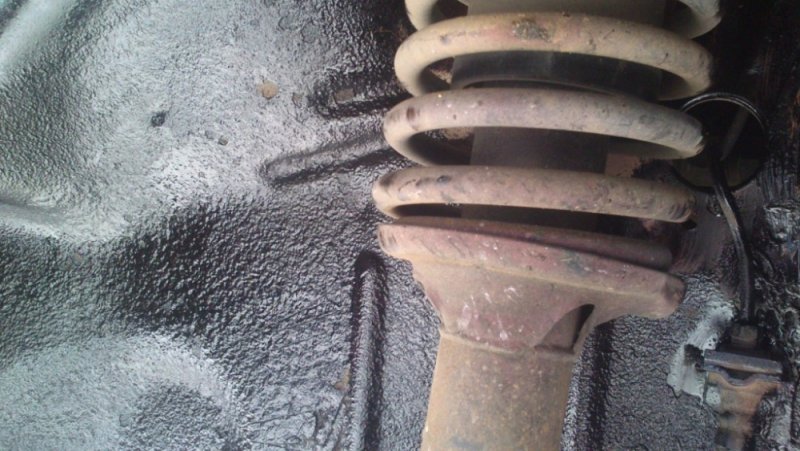
Closeup pictures of the body filler (after wet sanding)
bdfl closeup.jpg

bdfl clup (1).jpg
bd fl 1.jpg

bdfl clup (2).jpg
bdfl clup (3).jpg

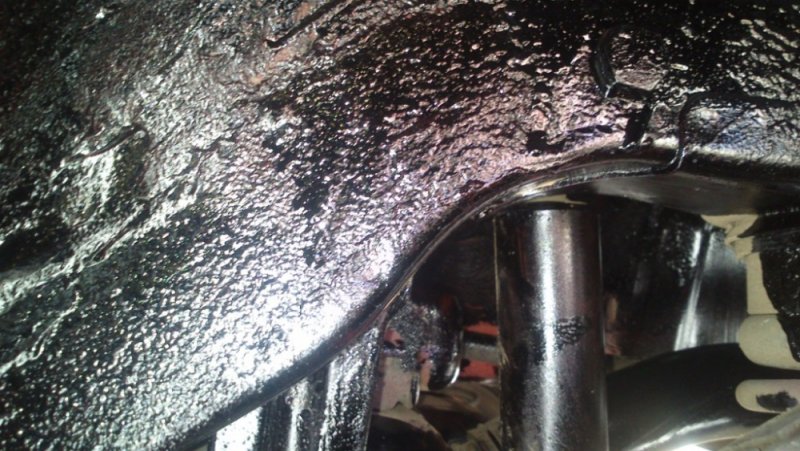
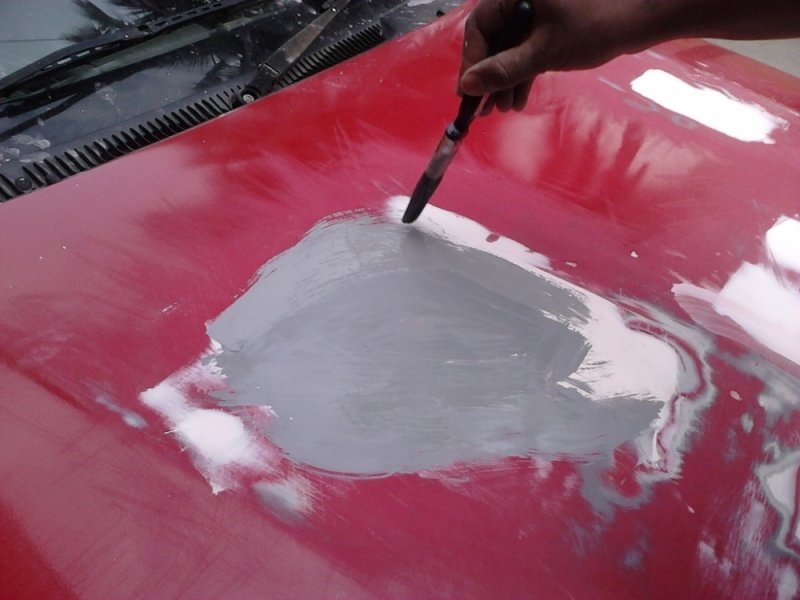
Applied the surfacer after about 2hrs of bright sunny afternoon. Used a brush instead of spray as there is brand new Swift Vxi (Silver) parked very close to this car.

surfacer applied 1.jpg

surfacer applieds (1).jpg

surfacer applieds (2).jpg

surfacer applieds (3).jpg

surfacer applieds (4).jpg
surfacer applied 1.jpg

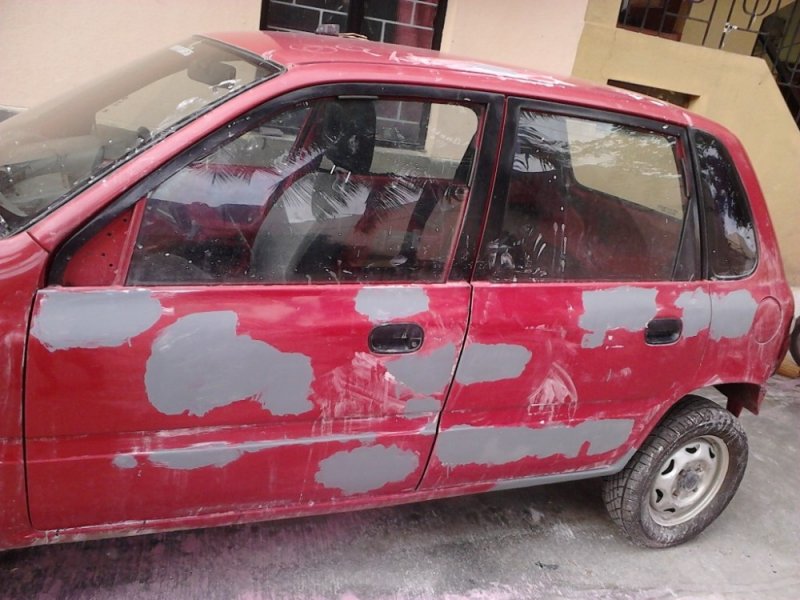
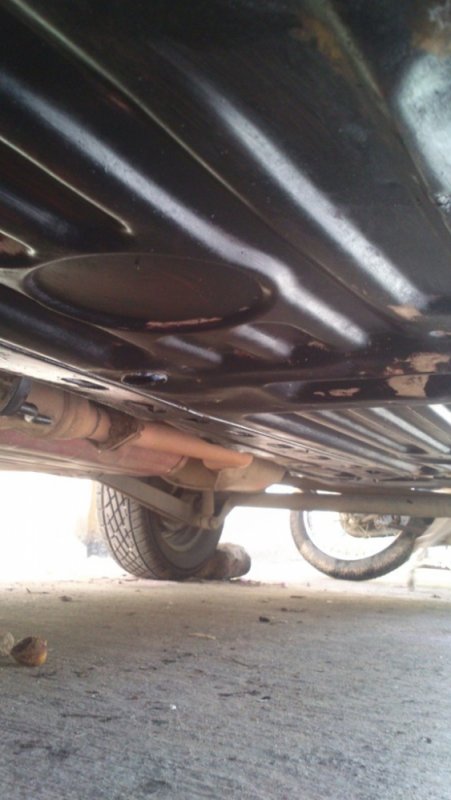
Again after a gap of about an hour, started to apply a thin coat of NC Putty followed by a thicker coat in half hour. Now its drying time till tomorrow morning.
 
Last edited:
Joined
Jun 26, 2012
Messages
102
Likes
21
Location
Bangalore
Anand,

Great coming up love to see the work is going well,
you should have used the spray instead of doing with brush it will save some primer right?

Regards,
Shashikanth NM
 
Joined
Apr 4, 2012
Messages
2,524
Likes
250
Location
Mumbai
Check the above post.He has mentioned that a new Swift Vxi (Silver) parked very close to this car.He didn't want the over spray to damage that car.

Anand is a perfectionist, he won't do anything to compromise the work until absolutely necessary.Some things are out of his control right now.
 
Thread Starter #64
Joined
Dec 13, 2011
Messages
1,714
Likes
1,083
Location
Bangalore
Today is the shopping day
Items to purchase
1. AC switch for this car
2. Cabin LAMP led
3. Door weather strips all four
4. Door rubber guard all four
5. Battery to ground cable
6. Fender Indicator (clear lens type) - 2nos
7. WagonR/EECO rear cabin lamp - 1Nos
8. Dikki mat
9. Swift wiper nozzles - 2nos
10. Floor grommets - full kit
11. WD-40 can
12. blue bulb for parking lamps

and will try to make the list a big bigger (only if required)
 
Last edited:
Joined
Jun 7, 2013
Messages
56
Likes
44
Location
Hindupur AP
Anand,
Nice work is going on. Eager to see the end result. If you don't mind, I advise to act carefully at rusted areas.
Waiting for my turn to coat the floor & underbody with 3M.
 
Last edited:
Thread Starter #66
Joined
Dec 13, 2011
Messages
1,714
Likes
1,083
Location
Bangalore
Thanks again to everyone, your advice and suggestions do help me a lot.

I could not go to Essar yesterday, instead did a little bit of preparation for the final spray of Rubberoid to the under chassy.

Used a sponge (as suggested on that tin) and applied a diluted layer to one side of the car (including the wheel wells, inner fender etc). This creates a slightly uneven sticky surface, which can hold the thicker final spray. This should make it to last longer as well.

A few pics of the same.

DSC_1756.jpg
DSC.jpg

DSC_1768.jpg

DSC_1776.jpg

DSC_1779.jpg

DSC_1780.jpg

DSC_1760.jpg
 
Thread Starter #68
Joined
Dec 13, 2011
Messages
1,714
Likes
1,083
Location
Bangalore
Rayal: Here is some info about the same (Jarpickle and Varun know about this better than me, they can add some points too)

The Rubberroid is an alternative to the 3M underbody coating that we get in most car showrooms. It is a thick glue like black rubber liquid, to apply this, you need to dilute using petrol.

Advantages:

1. Absorps road noise (noise from tyres etc will be absorped to some extent)
2. Protects the sheet metal from rust etc
3. The coat forms a mild rubber layer below the car and even if the car is not washed for months together the dirt, mud etc wont be able to come in contact with the metal, so no place for rust to begin
4. Also when you drive in rains etc the noise of water splashing inside wheel well is mildly reduced.
5. Much cheaper than paint (PU paint is approx Rs.2000/ltr, this Rubberroid is Rs.180/litre

Disadvantages:
1. Takes more time to do it properly:
This layer does not bond with the smooth painted surface if you try to apply a thick layer. Instead first apply a diluted layer, later this diluted layer forms a rough, uneven, sticky surface which can hold the thicker liquid firmly. So the coat will last for a longer time.
2. Adds weight to the underbody of the car: Although it is only 2kgs added, still it does affect your mileage on the long run.
3. This is not required for cars which have Galvanised steel body like (VW cars).
4. A lot of material gets wasted (dripping), if you try to apply using the gun.
5. Not easily available everywhere, I go to Nayandahalli signal on Mysore road (18kms from my home) to get it. Close by shops dont sell it.

Today removed bumper and headlamp, one headlamp screw is troubling so added a few drops of brake oil and waiting for it to finish.
IMG00545.jpg

IMG00546.jpg

IMG00547.jpg

IMG00548.jpg

IMG00549.jpg
 
Joined
Apr 4, 2012
Messages
2,524
Likes
250
Location
Mumbai
You have explained everything very well Anand.

Mostly rubber coating is used on the under body so that stones don't chip the paint which would lead to rust.The rubber surface causes stuff to bounce off.That is why it needs to be atleast a couple of coats, which will provide sound deadening but adds to the weight which would lead to loss in mileage.
 
Thread Starter #71
Joined
Dec 13, 2011
Messages
1,714
Likes
1,083
Location
Bangalore
Thanks Anshuman.

Today purchased all the plastic items for the car, will update by tomorrow. Total cost came close to 3000/-
 
Thread Starter #73
Joined
Dec 13, 2011
Messages
1,714
Likes
1,083
Location
Bangalore
Hopefully before 1st October I am planning to deliver the car back. Preparation mainly decides the final quality of work. As we all know painting is only a 2 hours job. But the preparation takes a lot of time.
 
Top Bottom