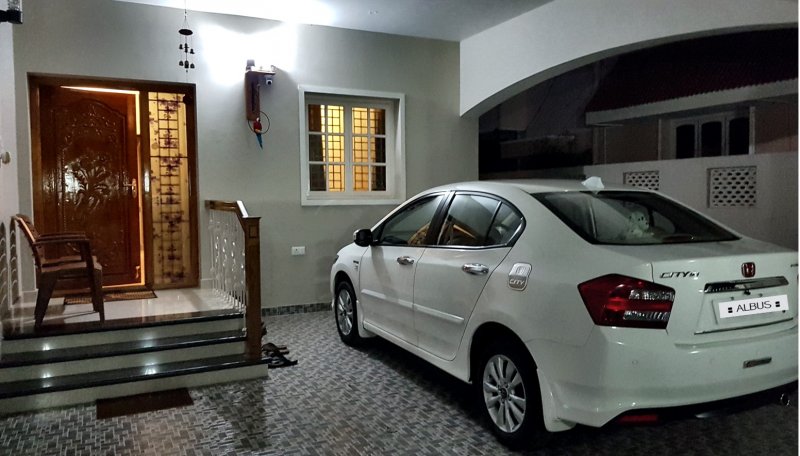
My New Honda City in White - The Albus
- Thread Starter Dr MUDHAN
- Start date
Thread Starter
#1,787
Thread Starter
#1,788
Albus's brother says hi from hyderabad!!
Attachments
-
388 KB Views: 186
What a nice home for Albus. He just blends in perfectly :)
Hello All,
Its good to see post from Doctor after ages..![Clap [clap] [clap]](https://www.theautomotiveindia.com/forums/images/smilies/Clap.gif)
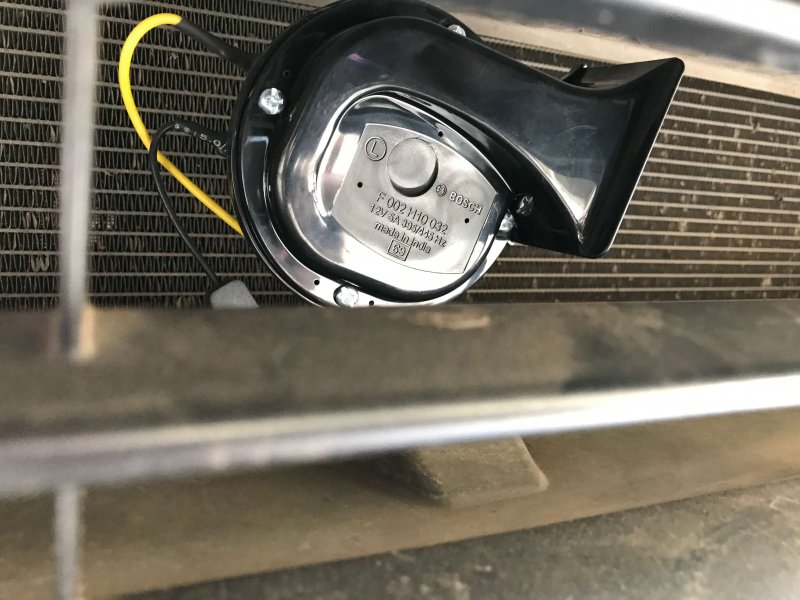
Finally I have upgrade my stock horn to Bosch Symphony and today will share the process. Horn upgrade is already shared by other guys in the thread from which I got very useful information. My sincere thanks to @cracing for his help.![Smile [:)] [:)]](https://www.theautomotiveindia.com/forums/images/smilies/Smile.gif)
Horn setup of City comes as dual horn i.e. Low and High tone which makes installation pretty straightforward. No extra wiring or relays are required for installation. Only problem is the horn connector, Its not standard one so wither you need to make connector on own or have to cut wires. Cutting stock wiring is not the way for me to install, so I searched online for connectors and got it on AliEpress. I got them around 2 years back and since then installation was pending with me.
You can see those connectors here.
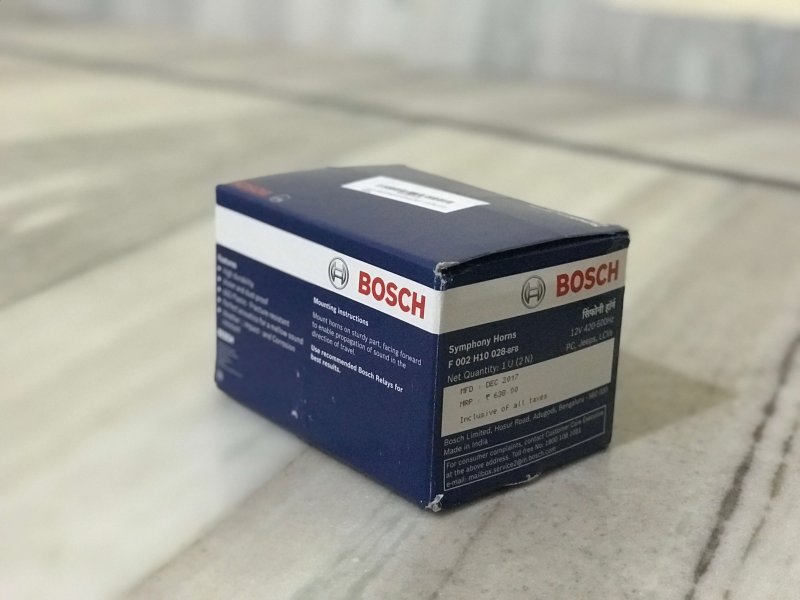
Got Bosch Horns for Amazon.in for Rs. 630/- Product Link here.
Some Pics of the actual product,
Now Installation part began,
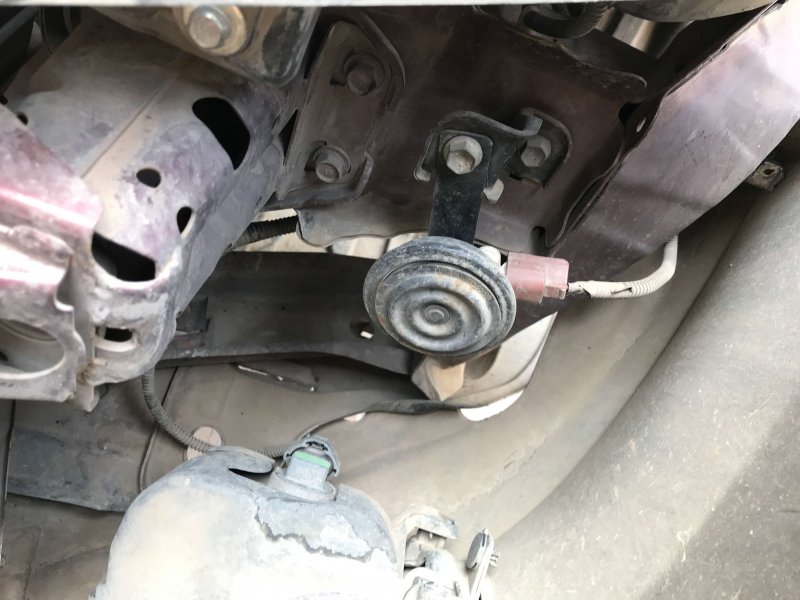
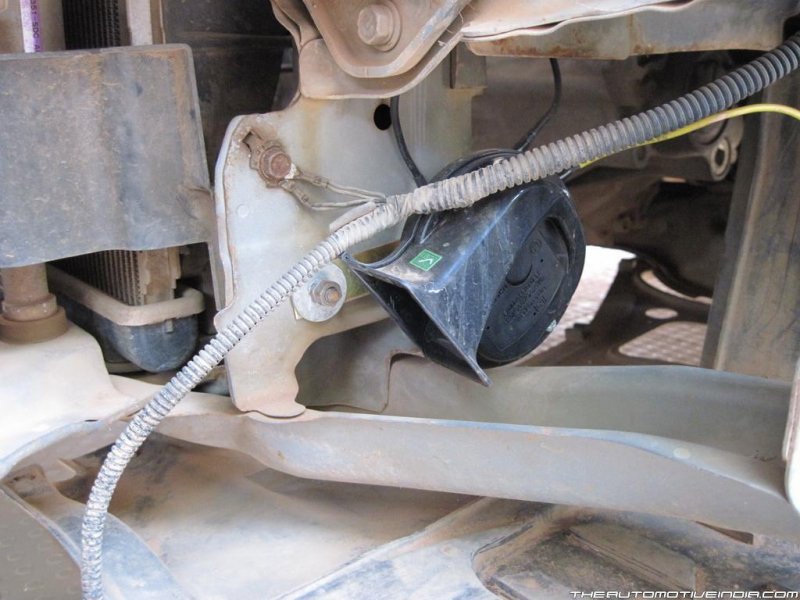
As its dual horn setup to install Horns Bumper needs to remove which is straight not that complicated IMO. High Tone Horn is located at the Passenger side and Low tone horn in the middle of car which can be seen easily.
Removal Of Bumper
Passenger Side Horn
My earlier plan was to install center horn at the driver side so that it will get protection from water and dust. Same was done by Cracing but couldn't mange to find holes and position for horn. Will figure out that sometime later, as of now I have installed both the horns on the original position of the car.
Cracing Setup L And R
To connect Bosch horns with the car wiring used connectors and for earthing made connectors which is pretty simple. As stock horns comes with single connector and other aftermarket ones with dual connector, you need to connect other connector with earthing which is done by homemade connectors.
Homemade Connector Used for Earthing
Connector for Stock Wiring
How to Earth Horns
On the Car
I forgot to click passenger side horn image on installation, Sorry.
They are very loud, I used stock horns for almost 4+ years so for me these Bosch ones are more than enough. Somehow I used to like stock horn tone, it's very different and you can tell Its Honda. But sound was very low which is not practical at all for Indian driving scene.
Another Upgrade coming soon which is,
Will update on this soon, till then cheers drive Safe..
Its good to see post from Doctor after ages..
![Clap [clap] [clap]](https://www.theautomotiveindia.com/forums/images/smilies/Clap.gif)
Finally I have upgrade my stock horn to Bosch Symphony and today will share the process. Horn upgrade is already shared by other guys in the thread from which I got very useful information. My sincere thanks to @cracing for his help.
![Smile [:)] [:)]](https://www.theautomotiveindia.com/forums/images/smilies/Smile.gif)
Horn setup of City comes as dual horn i.e. Low and High tone which makes installation pretty straightforward. No extra wiring or relays are required for installation. Only problem is the horn connector, Its not standard one so wither you need to make connector on own or have to cut wires. Cutting stock wiring is not the way for me to install, so I searched online for connectors and got it on AliEpress. I got them around 2 years back and since then installation was pending with me.
You can see those connectors here.
Got Bosch Horns for Amazon.in for Rs. 630/- Product Link here.
Some Pics of the actual product,
Now Installation part began,
As its dual horn setup to install Horns Bumper needs to remove which is straight not that complicated IMO. High Tone Horn is located at the Passenger side and Low tone horn in the middle of car which can be seen easily.
Removal Of Bumper
Passenger Side Horn
My earlier plan was to install center horn at the driver side so that it will get protection from water and dust. Same was done by Cracing but couldn't mange to find holes and position for horn. Will figure out that sometime later, as of now I have installed both the horns on the original position of the car.
Cracing Setup L And R
To connect Bosch horns with the car wiring used connectors and for earthing made connectors which is pretty simple. As stock horns comes with single connector and other aftermarket ones with dual connector, you need to connect other connector with earthing which is done by homemade connectors.
Homemade Connector Used for Earthing
Connector for Stock Wiring
How to Earth Horns
On the Car
I forgot to click passenger side horn image on installation, Sorry.
They are very loud, I used stock horns for almost 4+ years so for me these Bosch ones are more than enough. Somehow I used to like stock horn tone, it's very different and you can tell Its Honda. But sound was very low which is not practical at all for Indian driving scene.
Another Upgrade coming soon which is,
Will update on this soon, till then cheers drive Safe..
Last edited:
Hello Friends,
How are you all doing? I hope Doctor Ji is doing well.![Smile [:)] [:)]](https://www.theautomotiveindia.com/forums/images/smilies/Smile.gif) I was busy with different things in life and didn't had time to write posts in here. So far all is well with my car, thanks to Honda's reliability. I have bought few accessories for it and will give some details of them.
I was busy with different things in life and didn't had time to write posts in here. So far all is well with my car, thanks to Honda's reliability. I have bought few accessories for it and will give some details of them.
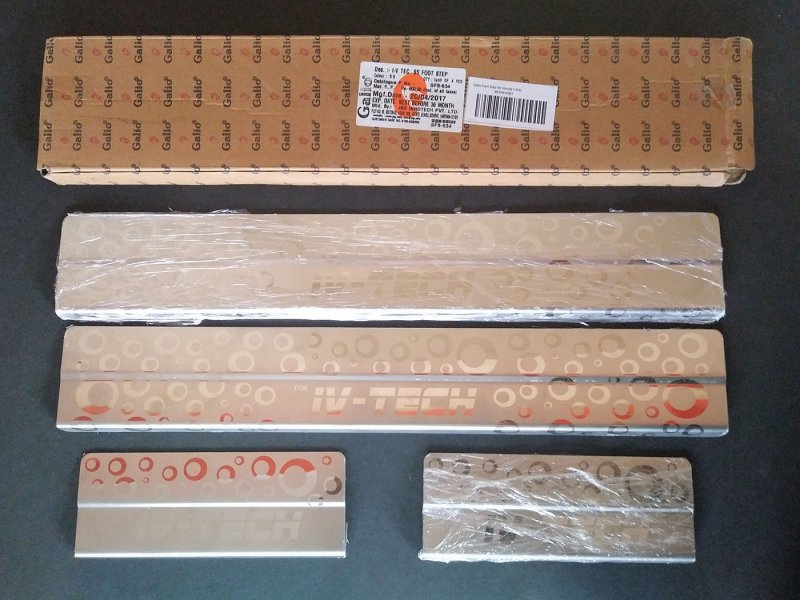
Stainless Steel Door Sills
First I bought Galio foot step thinking it would be same as shown in picture but it was entirely different. "For IV-TECH" instead of i-VTEC printing and it didn't fit properly, I guess its made for 4th Gen Honda City. I reported the issue to amazon and they took it back and refunded.
Link: Click here
Pics:

LED Door Sills
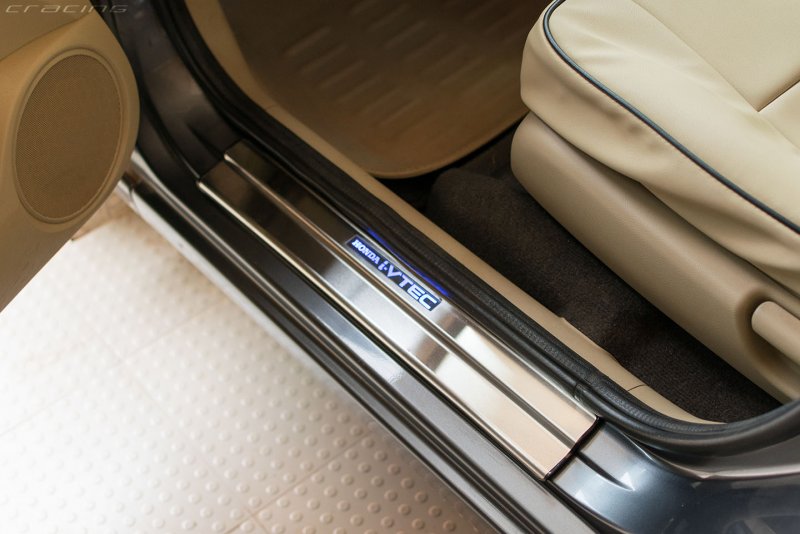
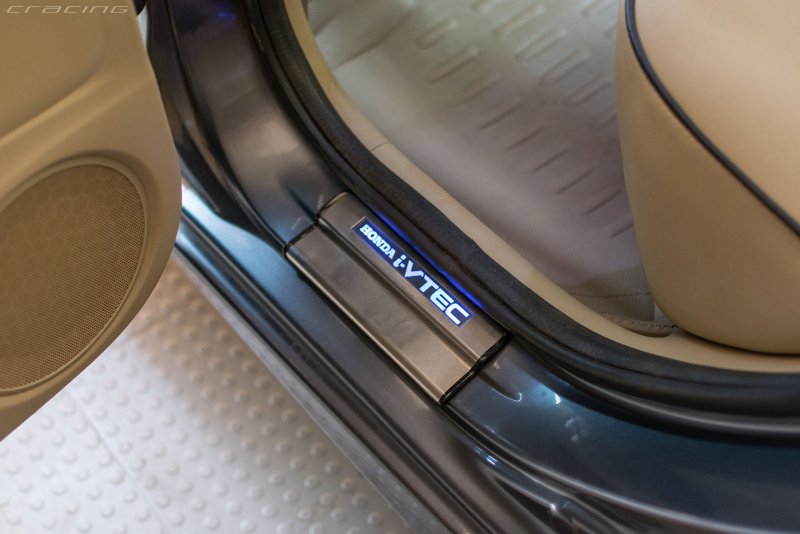
I should have stopped it there but my desire led me to search more and ended up buying LED Door Sills. It was good at fast glance and I spent several hours to install it but after few weeks, LED on one sill stopped working. I got frustrated and removed all the door sills. Name on LED panel is not aligned properly, LED panel is thick which would leave huge gap underneath the sill, 3m tapes were bad and rubber beading started to shrink. I have wasted money and time on this hopeless product.![Frustration [frustration] [frustration]](https://www.theautomotiveindia.com/forums/images/smilies/Frustration.gif)
Link: Click here
Pics:

3rd Shark Fin Antenna
First one had flat base and that left gap so I discard it and got curved base antenna. It was fine till 2 years and after that paint started to peel despite waxing regularly. I had hard time finding curved base antenna on Ali because most of sellers don't mention it and they have no idea when asked. I found one for 3 USD that had curved base but average quality. It had scratches and dents on paint. Thankfully seller sent me a replacement and it has no defects on paint.
Link: Click here
Pics:


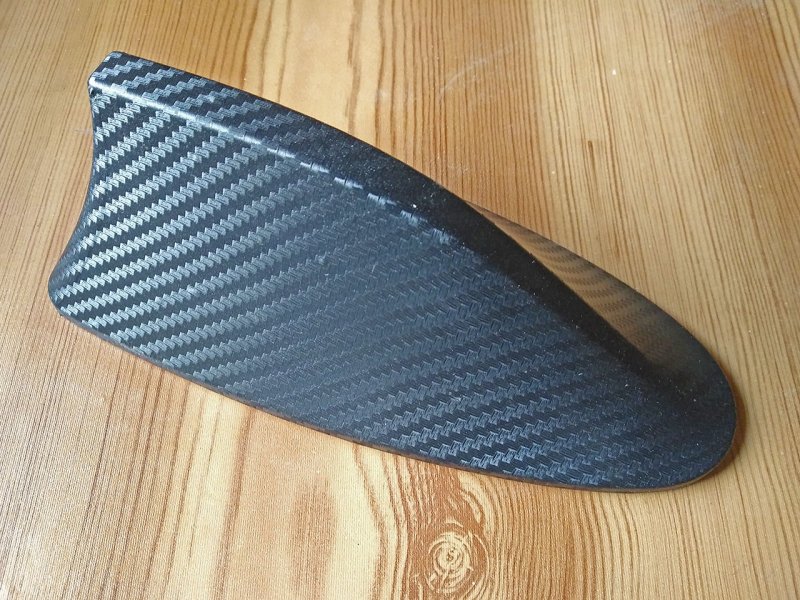
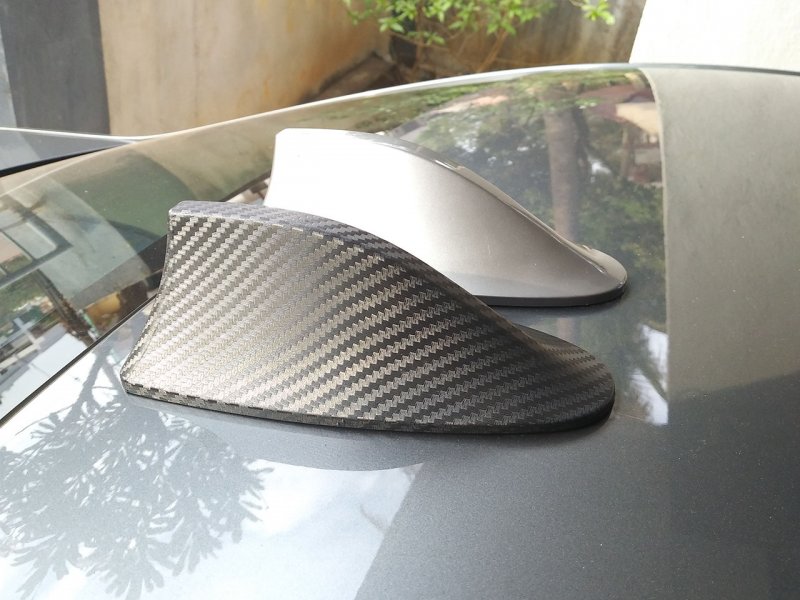
Carbon fiber Shark Fin Antenna
Meanwhile I tried to wrap the paint faded antenna and it came out well. Probably it will not last long under bad weather conditions because I had to cut the wrap and overlaps may peel. Anyway, I have kept it as spare.
Pics:
Magnetic Sunshades
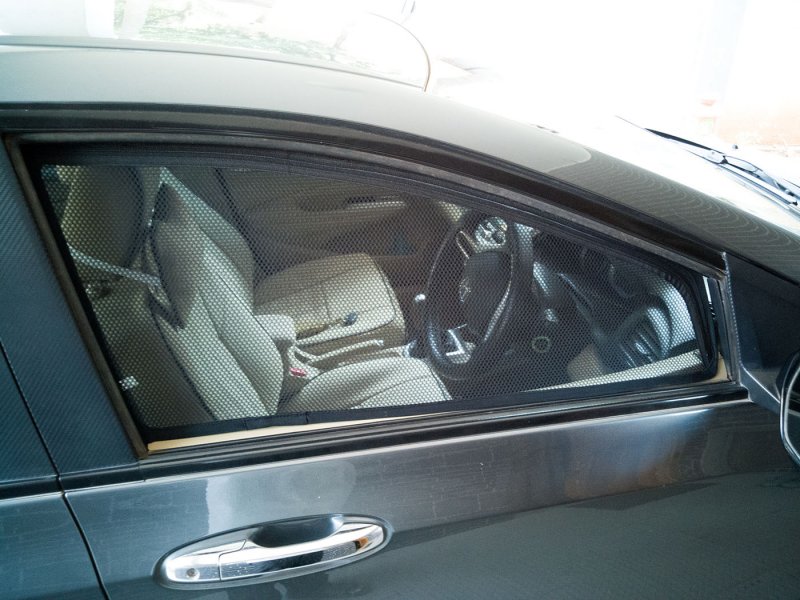
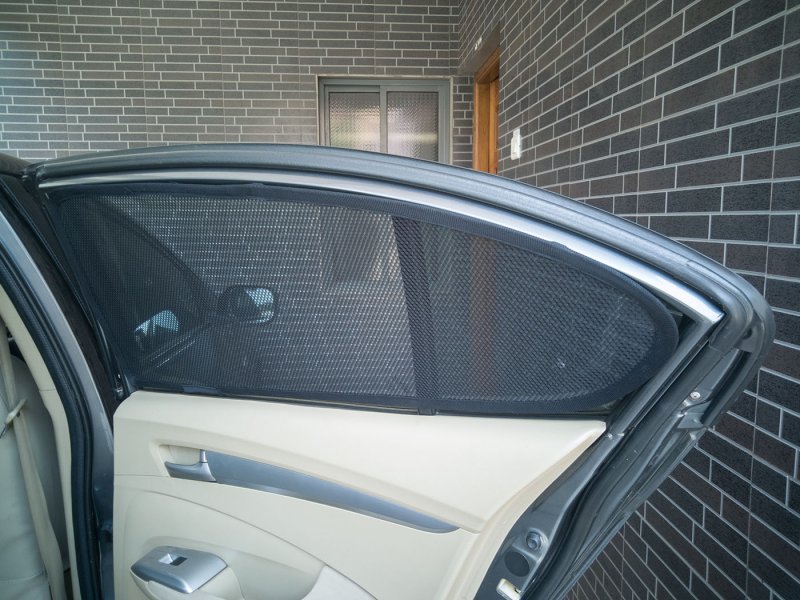
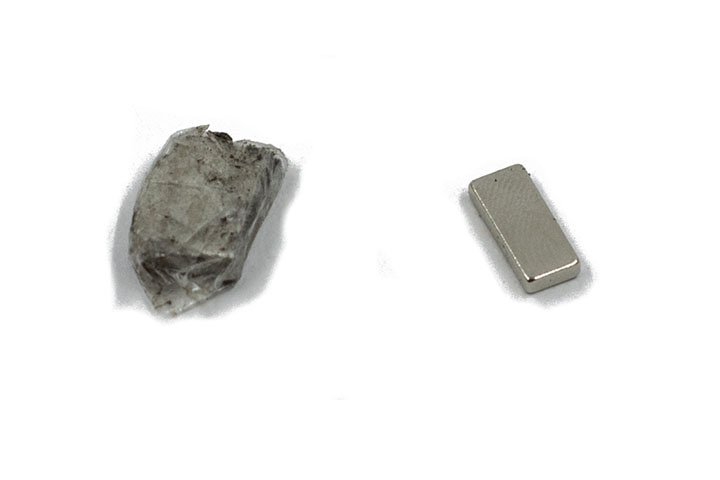
Previously I had static sunshades and those were awful. Recently I bought Kozdiko Magnetic Sunshades with zip and fortunately seller sent correct size for my car. Quality is good and fits properly but magnets were huge and sharp, which would damage weather seal. I wasn't aware about this until our member HaruH mentioned it and he has inframe window sunshades bought from Carplus. However, that site is offline now.
Anyway, I replaced those magnets to neodymium magnets and now its much better.
Links: Kozdiko Zipper Magnetic Sunshades, Neodymium Magnets
Pics:



Car Key Pouch
Link: Click here
Pics:


Alright, thats it for now. Everybody take care and drive safely.![Smile [:)] [:)]](https://www.theautomotiveindia.com/forums/images/smilies/Smile.gif)
Thanks...
Best Regards
How are you all doing? I hope Doctor Ji is doing well.
![Smile [:)] [:)]](https://www.theautomotiveindia.com/forums/images/smilies/Smile.gif) I was busy with different things in life and didn't had time to write posts in here. So far all is well with my car, thanks to Honda's reliability. I have bought few accessories for it and will give some details of them.
I was busy with different things in life and didn't had time to write posts in here. So far all is well with my car, thanks to Honda's reliability. I have bought few accessories for it and will give some details of them.Stainless Steel Door Sills
First I bought Galio foot step thinking it would be same as shown in picture but it was entirely different. "For IV-TECH" instead of i-VTEC printing and it didn't fit properly, I guess its made for 4th Gen Honda City. I reported the issue to amazon and they took it back and refunded.
Link: Click here
Pics:


LED Door Sills
I should have stopped it there but my desire led me to search more and ended up buying LED Door Sills. It was good at fast glance and I spent several hours to install it but after few weeks, LED on one sill stopped working. I got frustrated and removed all the door sills. Name on LED panel is not aligned properly, LED panel is thick which would leave huge gap underneath the sill, 3m tapes were bad and rubber beading started to shrink. I have wasted money and time on this hopeless product.
![Frustration [frustration] [frustration]](https://www.theautomotiveindia.com/forums/images/smilies/Frustration.gif)
Link: Click here
Pics:


3rd Shark Fin Antenna
First one had flat base and that left gap so I discard it and got curved base antenna. It was fine till 2 years and after that paint started to peel despite waxing regularly. I had hard time finding curved base antenna on Ali because most of sellers don't mention it and they have no idea when asked. I found one for 3 USD that had curved base but average quality. It had scratches and dents on paint. Thankfully seller sent me a replacement and it has no defects on paint.
Link: Click here
Pics:


Carbon fiber Shark Fin Antenna
Meanwhile I tried to wrap the paint faded antenna and it came out well. Probably it will not last long under bad weather conditions because I had to cut the wrap and overlaps may peel. Anyway, I have kept it as spare.
Pics:


Magnetic Sunshades
Previously I had static sunshades and those were awful. Recently I bought Kozdiko Magnetic Sunshades with zip and fortunately seller sent correct size for my car. Quality is good and fits properly but magnets were huge and sharp, which would damage weather seal. I wasn't aware about this until our member HaruH mentioned it and he has inframe window sunshades bought from Carplus. However, that site is offline now.
Anyway, I replaced those magnets to neodymium magnets and now its much better.
Links: Kozdiko Zipper Magnetic Sunshades, Neodymium Magnets
Pics:


Car Key Pouch
Link: Click here
Pics:


Alright, thats it for now. Everybody take care and drive safely.
![Smile [:)] [:)]](https://www.theautomotiveindia.com/forums/images/smilies/Smile.gif)
Thanks...
Best Regards
Last edited:
Hello,
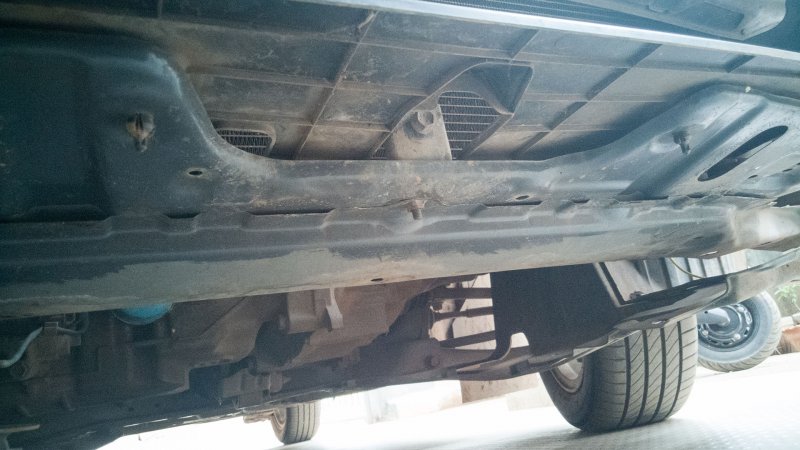
While I was discussing about rust with our member HaruH, he showed me a post on TBHP about rusting under cowl panel of Honda City and said to check the same on my car. I also had pending work of applying underbody coating on front members so I spared two days of time for both the jobs.
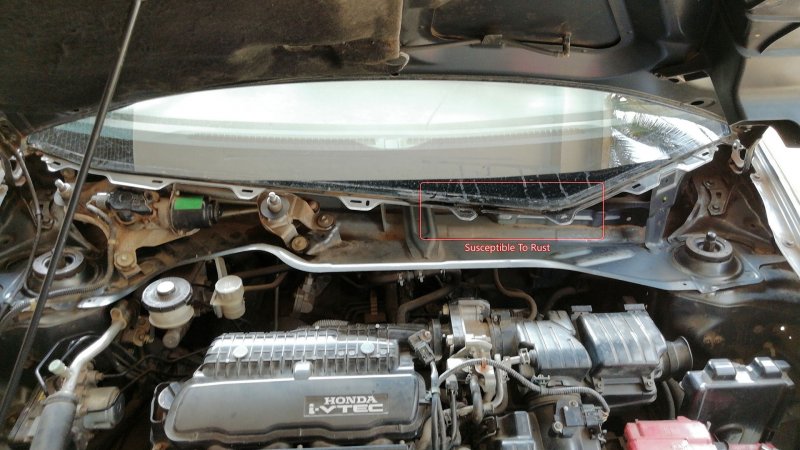
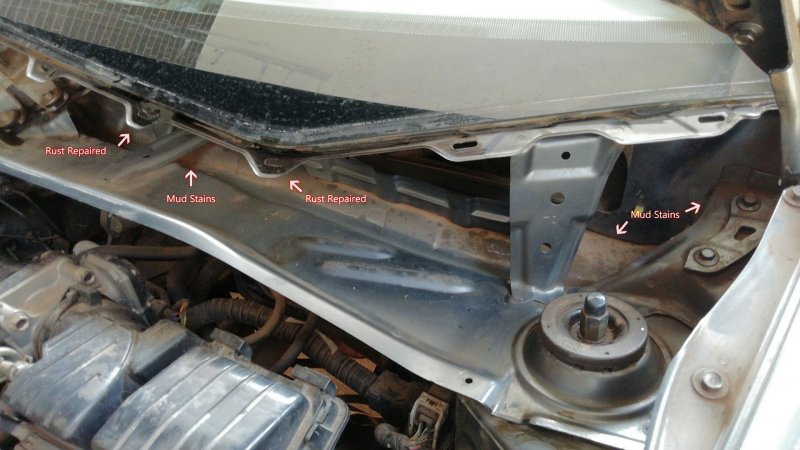
Started the work by removing the cowl panel and found some severe rust on windshield frame. Cleaned lose rust pieces and applied Tufkote Converust RC800. Next day applied underbody coating and let it dry. However, it was temporary fix because of limited time and I hope to make it better next time. I also removed the front bumper to check the condition of front members and fortunately no major rust was found and only minor spots. I have applied rust converter here and there and finished it with underbody coating.
I would highly advice other Honda City owners to check rust underneath cowl panel and repair it before it becomes worst. You can do it yourself or get it done from service center or FNG.
Steps to remove cowl panel:
1. First remove hinge covers on both sides. Push it under the cowl panel (There are two clips and you can depress them) and once its pops out, push little up and lift it from windshield side. It has notches on fender side so make sure you don't damage them.

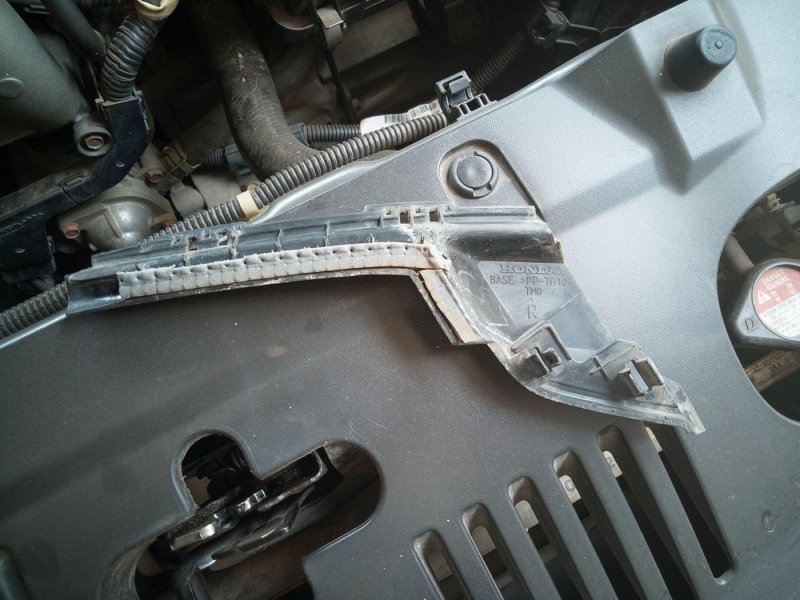
2. Next remove both the wiper arms. There is a cap on top of nut, remove it and unscrew the nut. Then lift the arm upwards. The arm has groves around the bolt so DO NOT TWIST THE ARM. If the arm is seized, use mallet and bang gently on the bolt. You can also use WD40. Sorry, I forgot to take pictures of wiper arms.
3. Finally its time to remove cowl panel. Remove two plugs on near either side of suspension upper mounts. Then gently start to lift the panel from left or right. There are 8 clips on the windshield frame and they will pop easily.

4. Once the panel is unsecured, slowly take it out though it is little tricky because of obstruction.
Meanwhile, check the condition of weather seal under cowl panel and hinge covers. Mine had become brittle so replaced them with yoga mat rubber affixed with 3m tape. Windshield beading is good though.
Here are some snapshots of rust repair work with details:





Thanks...
Best Regards
While I was discussing about rust with our member HaruH, he showed me a post on TBHP about rusting under cowl panel of Honda City and said to check the same on my car. I also had pending work of applying underbody coating on front members so I spared two days of time for both the jobs.
Started the work by removing the cowl panel and found some severe rust on windshield frame. Cleaned lose rust pieces and applied Tufkote Converust RC800. Next day applied underbody coating and let it dry. However, it was temporary fix because of limited time and I hope to make it better next time. I also removed the front bumper to check the condition of front members and fortunately no major rust was found and only minor spots. I have applied rust converter here and there and finished it with underbody coating.
I would highly advice other Honda City owners to check rust underneath cowl panel and repair it before it becomes worst. You can do it yourself or get it done from service center or FNG.
Steps to remove cowl panel:
1. First remove hinge covers on both sides. Push it under the cowl panel (There are two clips and you can depress them) and once its pops out, push little up and lift it from windshield side. It has notches on fender side so make sure you don't damage them.


2. Next remove both the wiper arms. There is a cap on top of nut, remove it and unscrew the nut. Then lift the arm upwards. The arm has groves around the bolt so DO NOT TWIST THE ARM. If the arm is seized, use mallet and bang gently on the bolt. You can also use WD40. Sorry, I forgot to take pictures of wiper arms.
3. Finally its time to remove cowl panel. Remove two plugs on near either side of suspension upper mounts. Then gently start to lift the panel from left or right. There are 8 clips on the windshield frame and they will pop easily.

4. Once the panel is unsecured, slowly take it out though it is little tricky because of obstruction.
Meanwhile, check the condition of weather seal under cowl panel and hinge covers. Mine had become brittle so replaced them with yoga mat rubber affixed with 3m tape. Windshield beading is good though.
Here are some snapshots of rust repair work with details:


Thanks...
Best Regards
Last edited:
Quick question to fellow City lovers, if not for the ASC default Idemitsu, which engine oil do you guys prefer ?
Quick question to fellow City lovers, if not for the ASC default Idemitsu, which engine oil do you guys prefer ?
If you want fully synthetic oil, then go for 5W-40. Motul 8100 Xcess is my favorite.
If you want fully synthetic oil, then go for 5W-40. Motul 8100 Xcess is my favorite.
Got the Motul 8100 Xcess. Thanks cracing.
What about oil filter, did you get OEM or 3rd party brand?



![Big Smile [:D] [:D]](https://www.theautomotiveindia.com/forums/images/smilies/Big%20Smile.gif)

