Mitsubishi Pajero Sport Limited Edition: Ownership Review


Status
Not open for further replies.
Thread Starter #106
Joined
Nov 28, 2015
Messages
427
Likes
814
Location
Roorkee
Also how tough/easy is this to install?
Questions are fine, additionally please confirm if it includes the reflective film to be placed on the windshield to avoid blur / double image. I would suggest a mock placement before actual ordering so that you are sure you are able to mount it in your field of view.
Mounting is easy and you just need to connect it to the OBD port wiring to which can be concealed easily.
 
Joined
Sep 13, 2014
Messages
41
Likes
13
Location
Bangalore

Questions are fine, additionally please confirm if it includes the reflective film to be placed on the windshield to avoid blur / double image. I would suggest a mock placement before actual ordering so that you are sure you are able to mount it in your field of view.
Mounting is easy and you just need to connect it to the OBD port wiring to which can be concealed easily.
I will ask about the reflective film, good point. I have the 3M CR70 sunscreen film on my front windshield, hopefully it wont create any issues.

Where is the OBD2 wiring port in the PS - if possible please share a pic? Also, do you know what all info is available in the PS OBD2, ie, speed, rpm, temperature, gear shift, etc etc? I will try to hunt around for a model which can display all this info - so will be good to know what all is available.

Many thanks as usual!
 
Thread Starter #108
Joined
Nov 28, 2015
Messages
427
Likes
814
Location
Roorkee
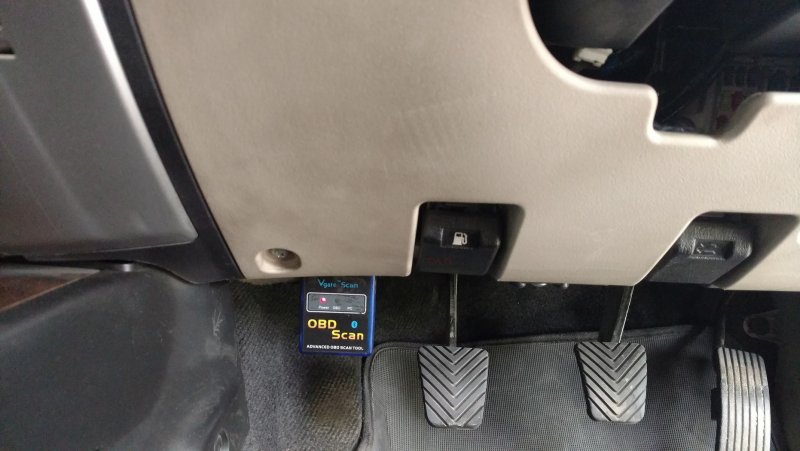
Where is the OBD2 wiring port in the PS - if possible please share a pic?
It is located near the fuel filler release lever as can be seen in picture below which shows the ELM327 based cheap but working copy connected to the port.
IMG_20160524_142728718_Small.jpg

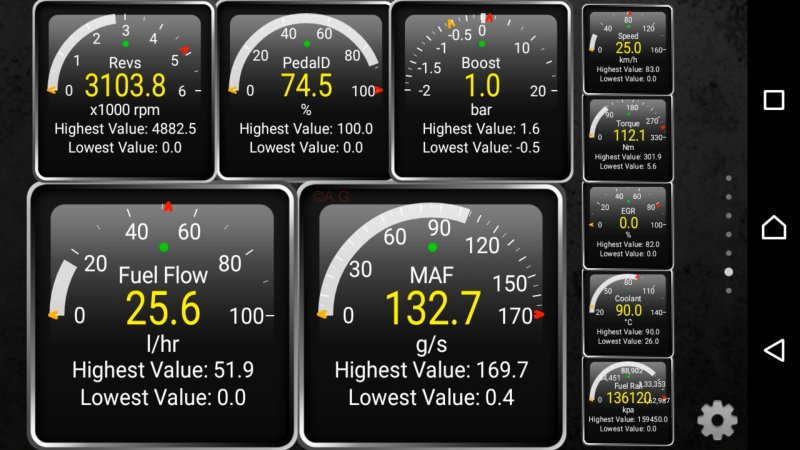
Also, do you know what all info is available in the PS OBD2, ie, speed, rpm, temperature, gear shift, etc etc?
There are many sensors available which can be read from the OBD2 port. Out of all the sensors available, sharing a screenshot of which I usually see on my phone.
S3k2_Small.jpg

The options you have listed are the ones which are there in the HUD I got from aliexperess and they vary from model to model.
 
Joined
Sep 13, 2014
Messages
41
Likes
13
Location
Bangalore

It is located near the fuel filler release lever as can be seen in picture below which shows the ELM327 based cheap but working copy connected to the port.
Excellent, this is good. What is the sensor that is in the pic, and whats the app on the phone? I might try that without the HUD stuff![;)]
 
Thread Starter #110
Joined
Nov 28, 2015
Messages
427
Likes
814
Location
Roorkee
What is the sensor that is in the pic, and whats the app on the phone?
The sensor is ELM327 based Bluetooth OBD2 reader from VGate. Don't go for the super mini which is smaller than this as I faced connection issues. App is the standard Torque App for Android.
ECU parameters like RPM, Boost pressure, etc. in the next pic are named individually but there are many more [:)].
 
Thread Starter #111
Joined
Nov 28, 2015
Messages
427
Likes
814
Location
Roorkee
Filters cleaning before 5th Service:

Cabin Air Filter cleaning:

It was cleaned when there was a considerable drop in the air flow volume. It dropped to the point where it felt that blower at full speed was giving the air flow obtained earlier at half-way mark.

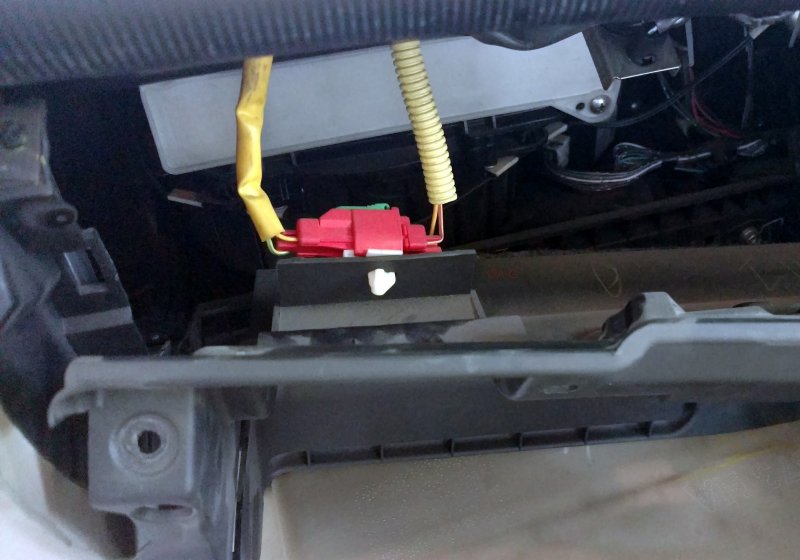
The filter was accessed by removing the glovebox and removing the screws for the covering shroud. Caution: Take utmost care when lowering the shroud as the passenger airbag connector is mounted on this and improper handling of the connector or wires connected may have undesirable consequences.
02_IMG_20160411_141741093.jpg

Simply unscrewing the 2 screws on the filter enabled it to be taken out.

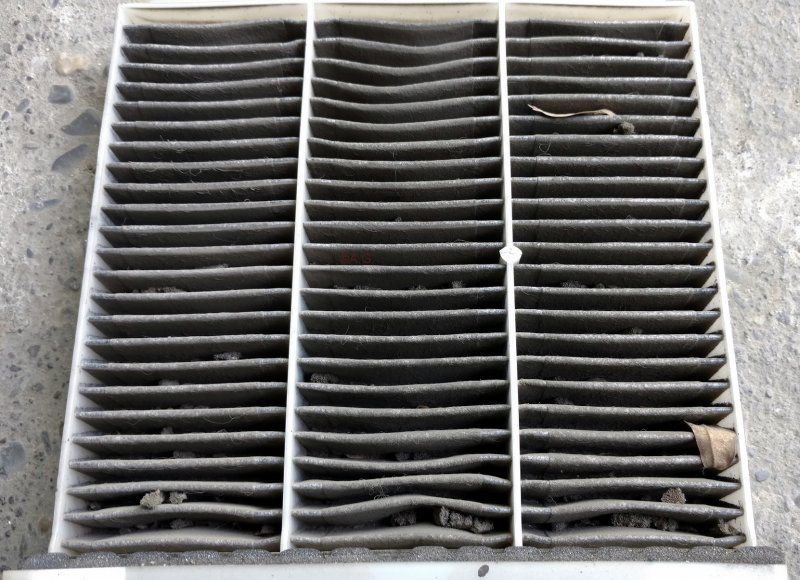
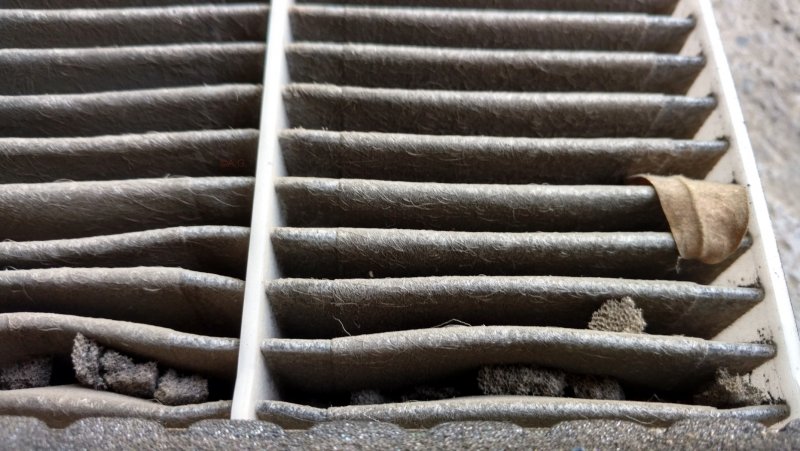
After getting the filter in hand, it became apparent that all the driving with fresh air mode had taken it’s toll on filter but it was equally overwhelming to see the damage which was avoided by the filter.

Dirt in the Filter
02_IMG_20160411_141934187.jpg

Close-up of Dirt and dry leaves caught in the filter
02_IMG_20160411_142003625_HDR.jpg

Cleaning was a simple affair by blowing air in the direction opposite to air flow form the filter.


K&N Air Filter cleaning:

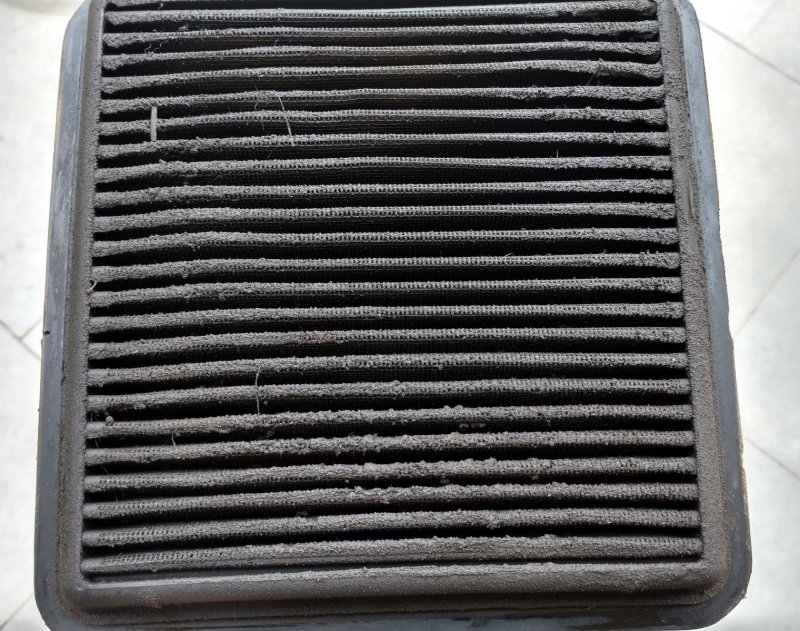
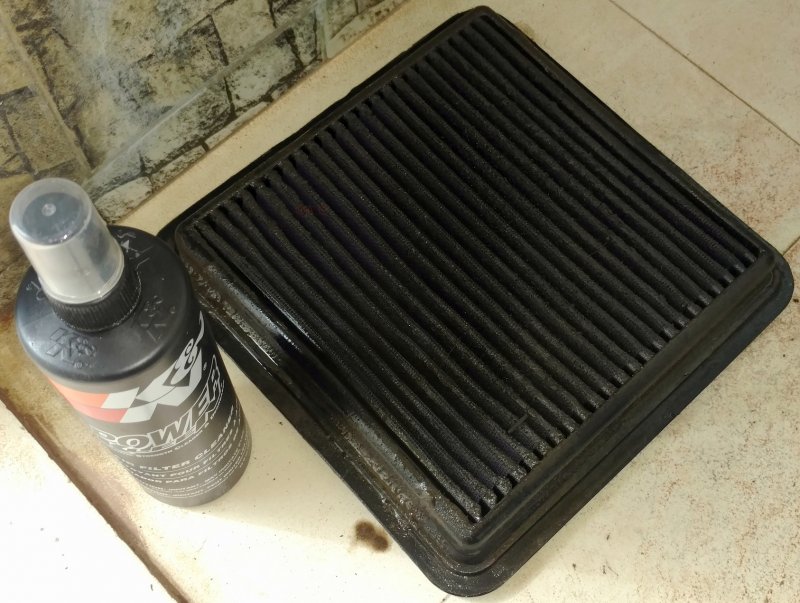
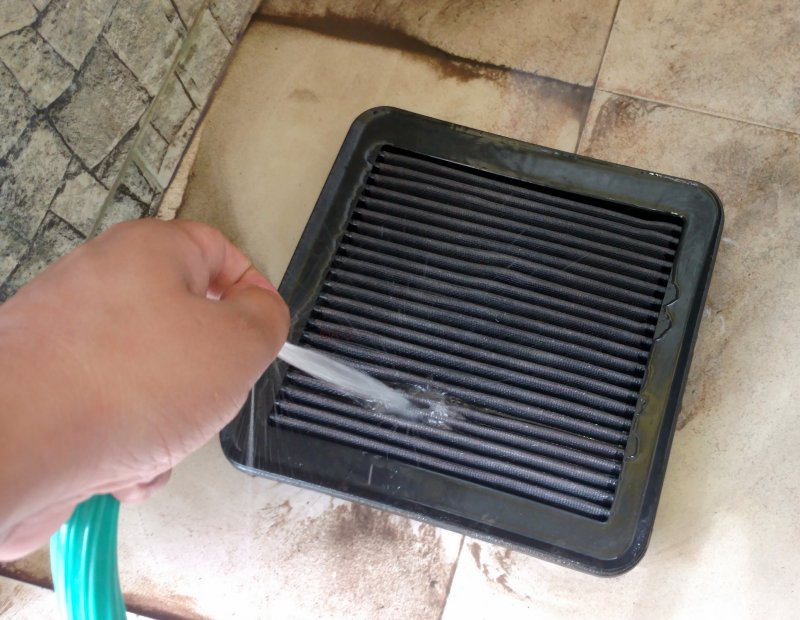
Before the service, the K&N Air Filter was cleaned and re-oiled. The cleaning process is fairly simple but is time consuming and took almost 2 hours.

The Dirty Filter
03_IMG_20160410_145050170_HDR.jpg

Filter soaked with K&N cleaning solution
03_IMG_20160410_145324306.jpg

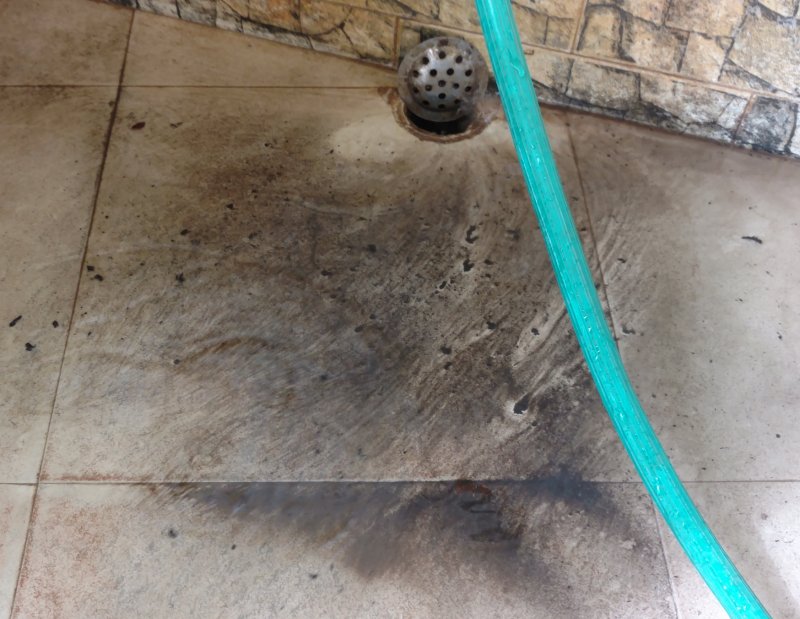
Washing in the direction opposite to air flow
03_IMG_20160410_150536266.jpg

The dirt after the first wash
04_IMG_20160410_150627153.jpg

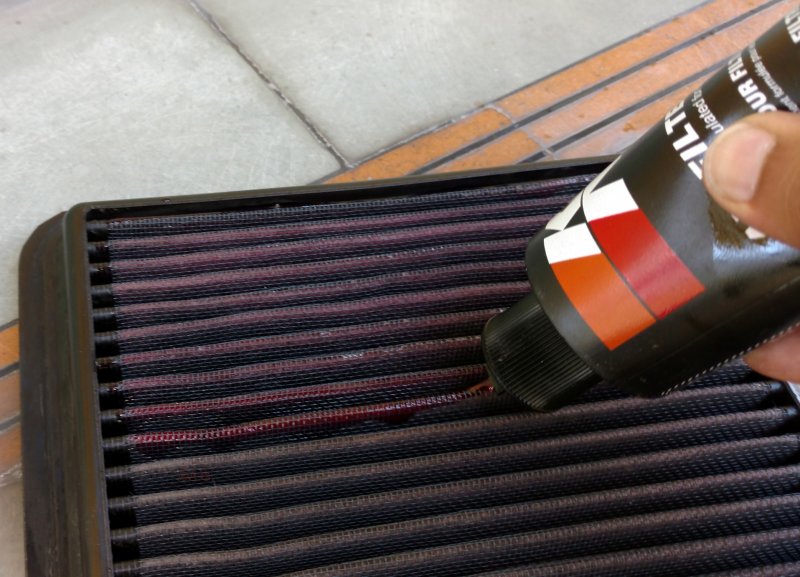
After 3 attempts, dried air filter being oiled from the bottom side
06_IMG_20160410_163407945.jpg

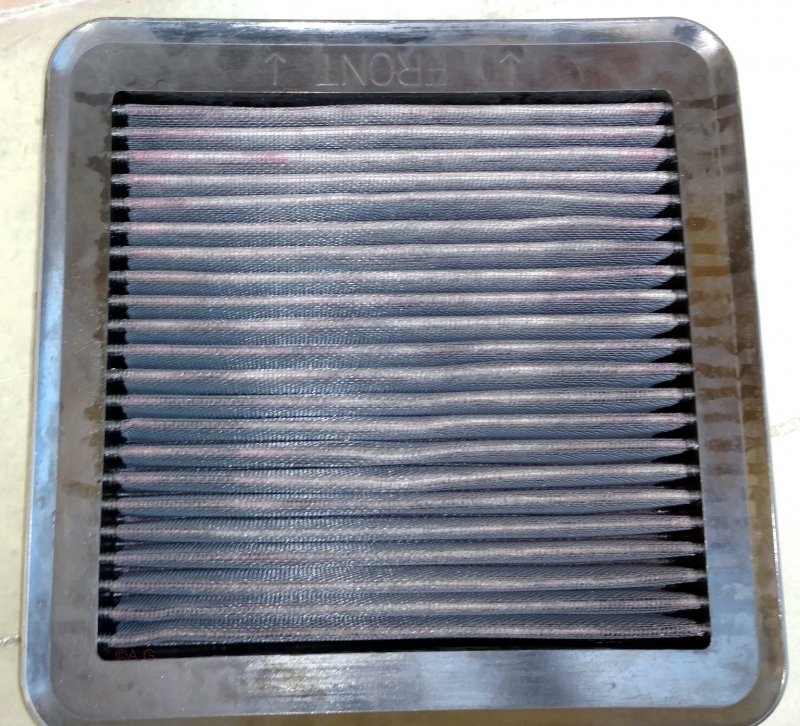
After 20 minutes, top side showing areas where touch-up of oil required
07_IMG_20160410_164856911.jpg

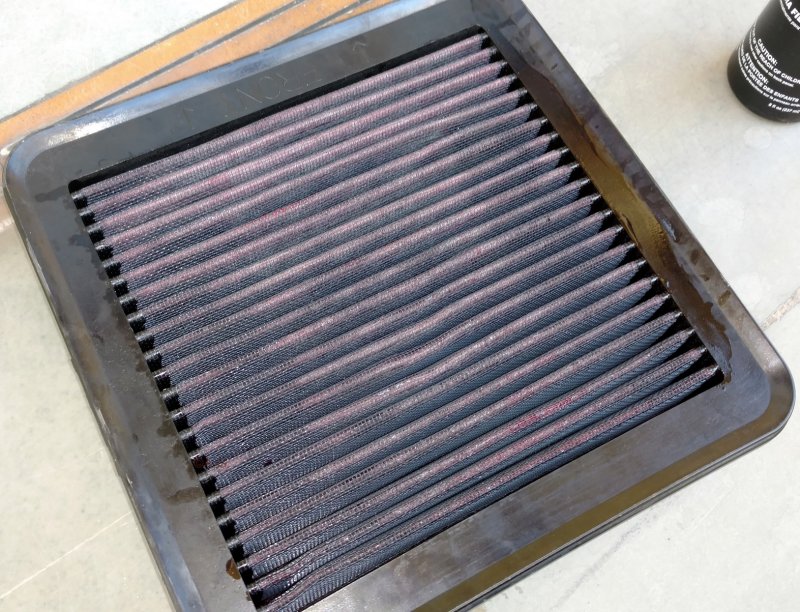
Ready to be installed cleaned & oiled filter
08_IMG_20160410_165143440.jpg

Overall, it was a day well spent.
 
Thread Starter #112
Joined
Nov 28, 2015
Messages
427
Likes
814
Location
Roorkee
Fifth Service experience:

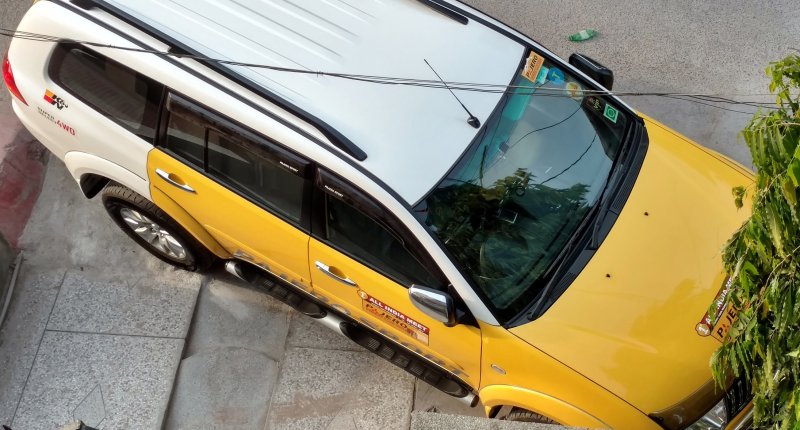
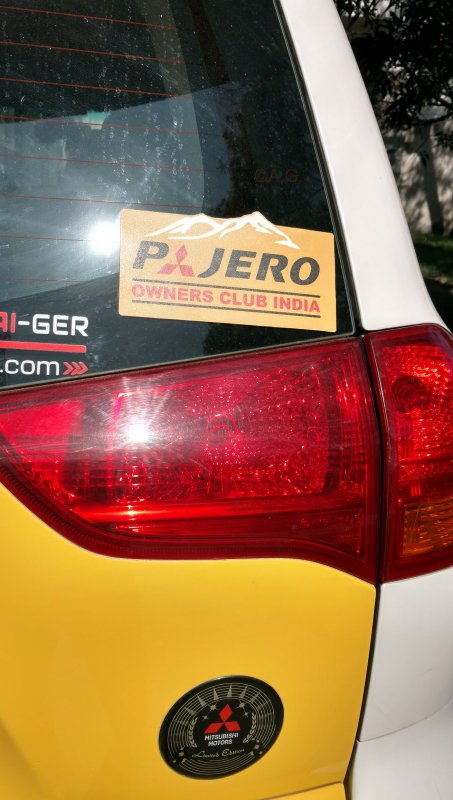
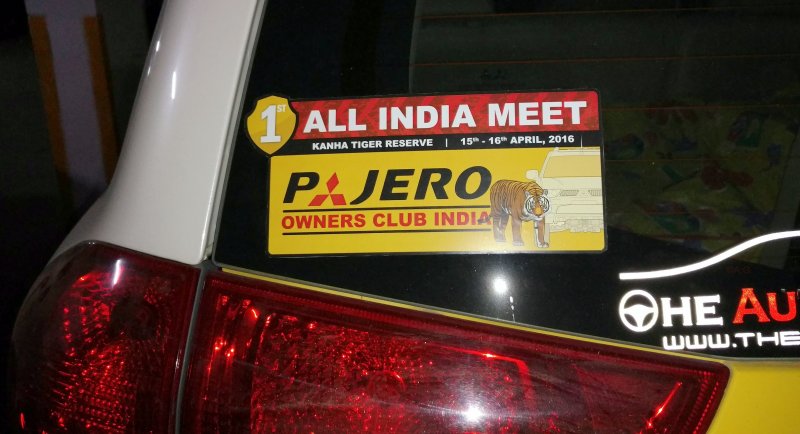
Got the Fifth Service done at 38,307 Kms in April 2016 a day before leaving for the All India Meet of Pajero Owners Club, India as this trip alongwith my schedule after returning would have resulted in moving the Odo to nearly 42K Kms before service resulting in exceeding the scheduled service by almost 2K Kms. The total bill came to Rs. 15,974/- which included the replacement of Coolant, Brake Fluid and Clutch Fluid apart from filters and Synthetic Engine Oil. Even with a long list of checks and jobs done, Vivek Autolinks again had a blazing turn around time of just 5 hours which included an hour almost dedicated to washing, cleaning and anti-rust treatment inspection. They also pasted the stickers for the meet.

Since the service, the clutch has become a tad softer and the effort required now is lesser. Maybe it can be attributed to the replacement of the Clutch Fluid and system bleeding.

An Ariel shot of the stickers
S5_01_IMG_20160414_173358535_HDR.jpg

Pajero Owners Club sticker on the rear glass
S5_01_IMG_20160413_094356653_HDR_Small.jpg

The Meet Sticker on the other side
S5_01_IMG_20160414_223435172.jpg
 
Thread Starter #113
Joined
Nov 28, 2015
Messages
427
Likes
814
Location
Roorkee
Driving experience to and from the Meet:

The 1st All India Pajero Owners Club India meet was scheduled from 15th to 17th April. A last moment change in my work schedule resulted in change of plan to attend the meet. My original plan to leave with the North convoy from Delhi on the morning of 14th April was dropped and the earliest I could leave was on 15th April sometime around when others would have already reached Kanha (M.P.). The eagerness to meet new friends got me charged-up and the thought of cancellation of the trip to the meet never came to mind.

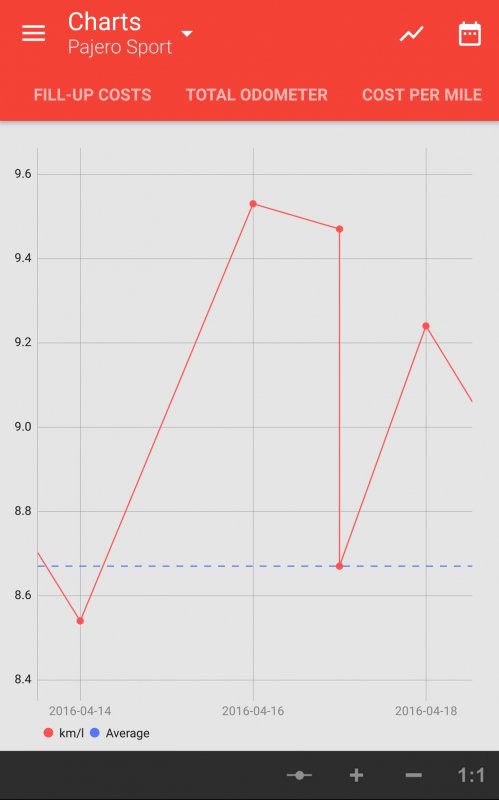
After finishing work on 15th, started around 3:30 P.M. from Maha Maya Flyover in Noida and reached Jhansi by Dinner around 10 P.M. stopping only for a tea break after a hectic drive through Agra. From there after having dinner, I became the passenger and after crossing the city we were on the North-South Corridor around 11 P.M. when we started munching up miles. The roads were good and traffic was pretty less resulting in good average speeds inspite of never crossing 120 Kmph. Fuelling was done at BPCL Lalitpur after covering 577 Kms with at an average of 9.53 Kmpl.

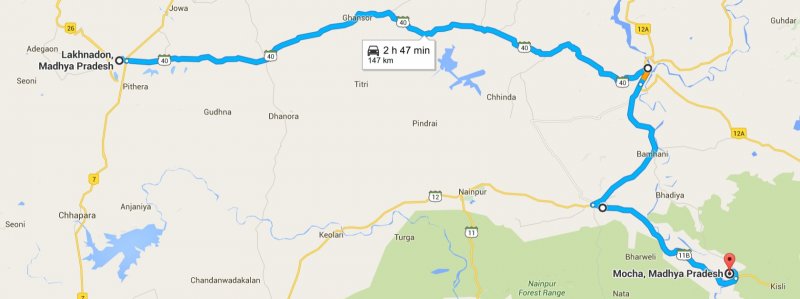
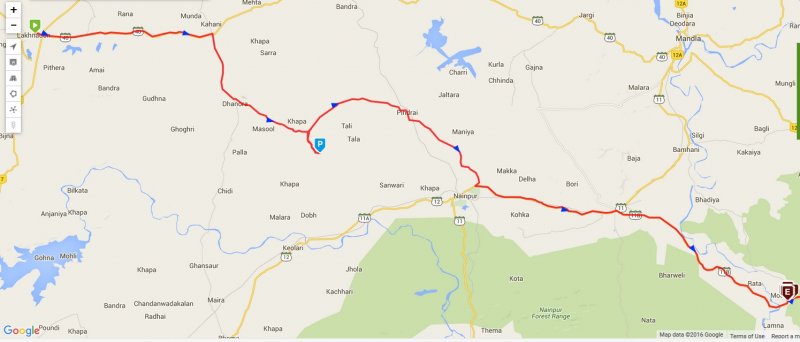
With immense help form the LED bar in the night, we decided against a pitstop and continued to Kanha. After getting off from the highway at Lakhnadon and proceeding some 20 Kms, Google Maps conflicted with the Mapmyindia navigation and trusting the former, we took the route it showed but the shortcut turned out to be an experience in itself. Slowly, the road started becoming narrower and finally we reached a point where there were no roads at all and again following Google Maps, we entered a village with new concrete road almost the width of the Pajero Sport with nearly 300mm vertical drops on both sides. It was around 4:30 A.M. when a good Samaritan guided us and we had to backtrace only 2-3 Kms to get back out of the village. Took the wheel, engaged 4H on the broken tarmac and we were literally rallying. The sight of blacktop almost 30 mins later near Nainpur can only be described as finding an oasis in a desert and from there after another 40 mins we were at our destination.

Google Map showing route to be followed
Map_Route_Actual.jpg

Google Map showing actual track followed as recorded by the GPS tracker
Map_Route.jpg

For the return journey, took a different route to meet my family and the fuelling done at the first opportunity after departure from Kanha resulted in FE of 9.47 Kmpl after having covered 559 Kms which included the off-roading to reach Kanha and then at Kanha during the trail drive. However, it dropped to 8.67 Kmpl for the next 465 Kms when the roads were majorly 2 laned ones.

Final fuelling for the trip done at Delhi showed the FE was 9.24 Kmpl over the last 597 Kms which had almost 200 Kms of 2 laned roads and crossing Agra in almost 1.5 hours.

Fuel log for trip
SS_FE.jpg

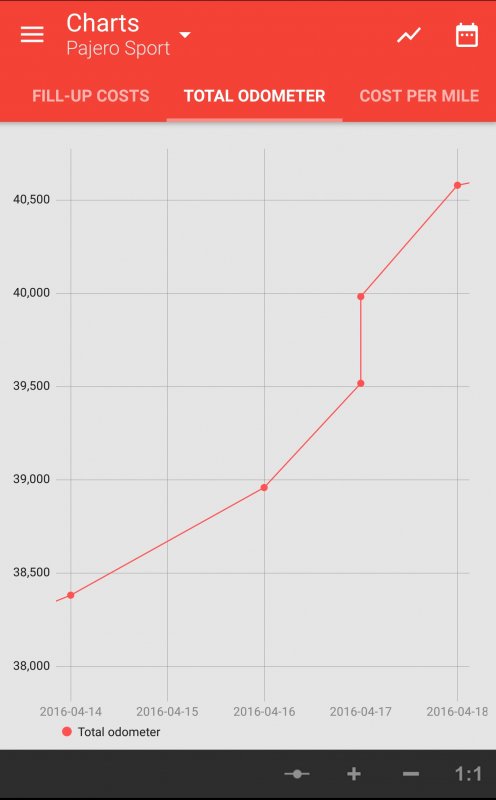
Odo log for trip
SS_ODO.jpg


The Meet experience:

Missed the introduction session and other events which happened on 15th. The next day when we reached Kanha around 5:40 A.M., some of the members were on their way to the morning safari while rest of us had slots for the evening safari. There were a lucky few who managed to see the Tiger. In between, there was a Pajero quiz session during lunch with many other activities / games during the day.

A trail drive was scheduled for 17th morning. The trail gave a dose of off-road driving and can be rated mild with occasional medium thrown-in for change of taste. There was a drive in the woods and then on the dry river. A convoy of various Pajeros was a sight to behold in the wild.

Overall it was a well organised first meet and hope we have many more to come. A couple of glimpses from the trail drive:

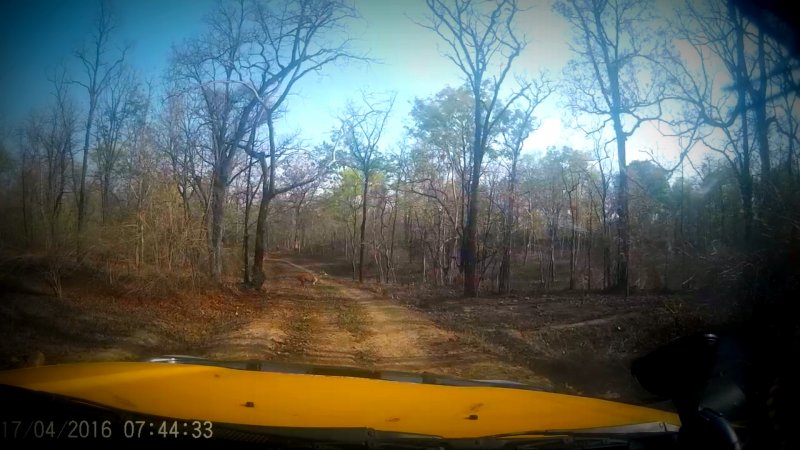
Dashcam captured the Deer crossing the path during trail drive
D2.jpg


Video compilation of Climb in the woods
https://www.youtube.com/watch?v=uPegoKmqb_M

Video compilation of Trail Drive
https://www.youtube.com/watch?v=bVLR_w90ggk

Video compilation of Descending into the River
https://www.youtube.com/watch?v=kgljg7m7XdM

Video compilation of Ascending from the River
https://www.youtube.com/watch?v=cCDqmzkkYQQ
 
Last edited by a moderator:
Thread Starter #114
Joined
Nov 28, 2015
Messages
427
Likes
814
Location
Roorkee
Additions Part 7 – Dieseltronic from Race Dynamics

One fine morning in April, a conversation and suggestion to a fellow Pajero Sport owner on the topic of getting more power was the inception of an idea surprisingly in my own head which grew bigger and bigger. Finally, researched more and got in touch with Team RD through their Facebook page.

Got a response on email and I sent them my queries some of which made me think would they even sell the box after looking at the questions as there was a pause of almost a day between response probably due to a confusion leading me to being referred to their Coimbatore and then Hyderabad dealer.

They answered my queries on phone directly after my location was clear to them. My main concerns were related to Power curves for the Pajero Sport, effects on the drivetrain, real-time switching of maps and warranty. Turns out that they didn’t have the dyno curves for the Pajero Sport and maps were switchable on-the-fly. As per them, the increase in air and fuelling is done with-in the operational envelope allowed by the ECU which should ensure safe operation. Further, the warranty of the unit is of 2 years and the best part which I came to know was the box can be transferred (at a nominal fee) from one vehicle to another incase I sell this vehicle. Also, the unit has Adaptive Self Learning technology which adapts to the driving style in approx. 150 Kms as informed to me.

Finally decided on getting the Dual Channel Dieseltronic unit which controls both fuel rail pressure and turbo boost as this claims to reduce turbo lag.

I requested Race Dynamics for a demo and they happily obliged by giving 7 days demo time from the date of install. Made the payment and the shipping was blazingly fast and got the unit in 2 days. Resisted the urge to install it in the night and slept with the thought that the next morning was going to be different.

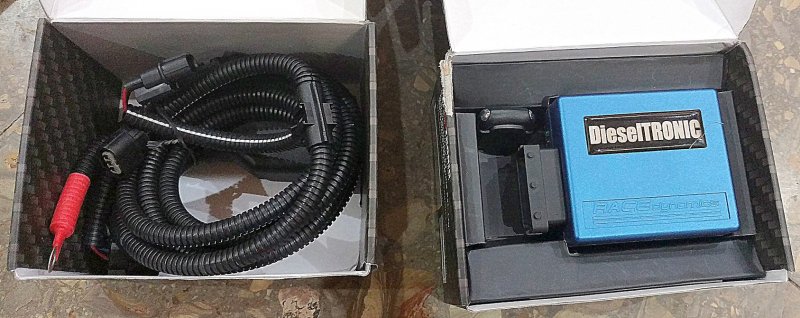
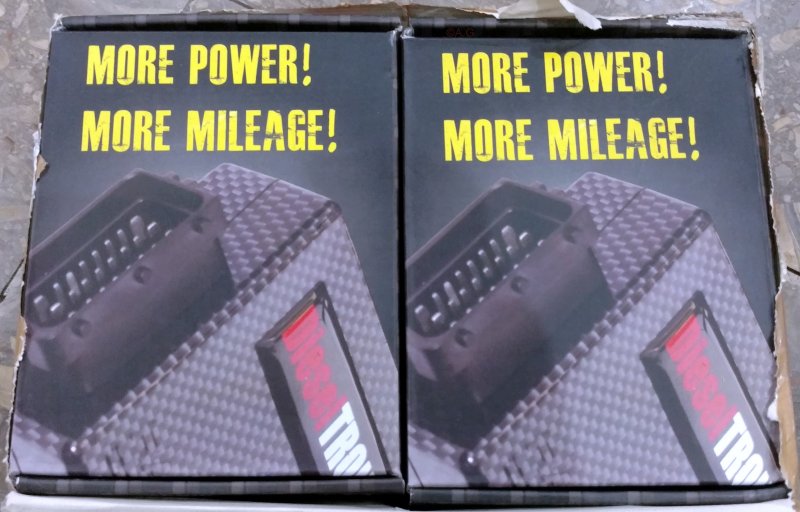
The packaging came in 2 boxes – one had the wiring harness specific to Pajero Sport and the other had rest of the stuff. All the items including the stickers reek quality.

Couple of pictures before install:
A3_IMG_20160518_133635684.jpg
The Boxes

A4_IMG_20160518_133730656.jpg
Contents of the Boxes

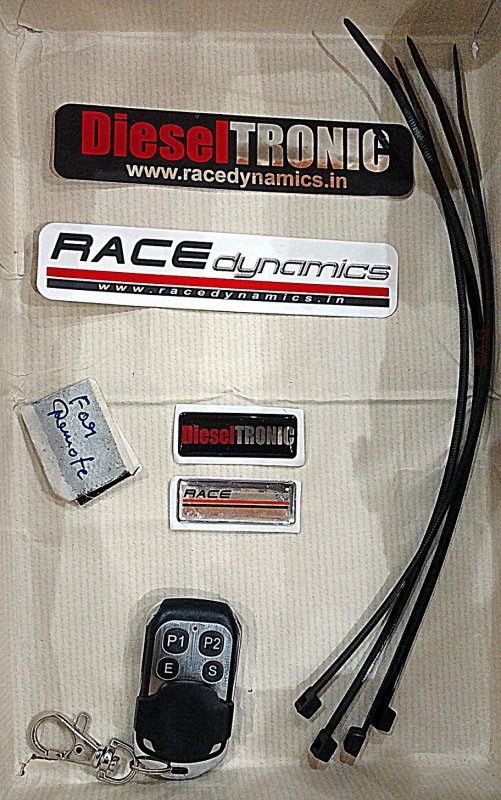
A5_IMG_20160518_133917046.jpg
More contents of the box

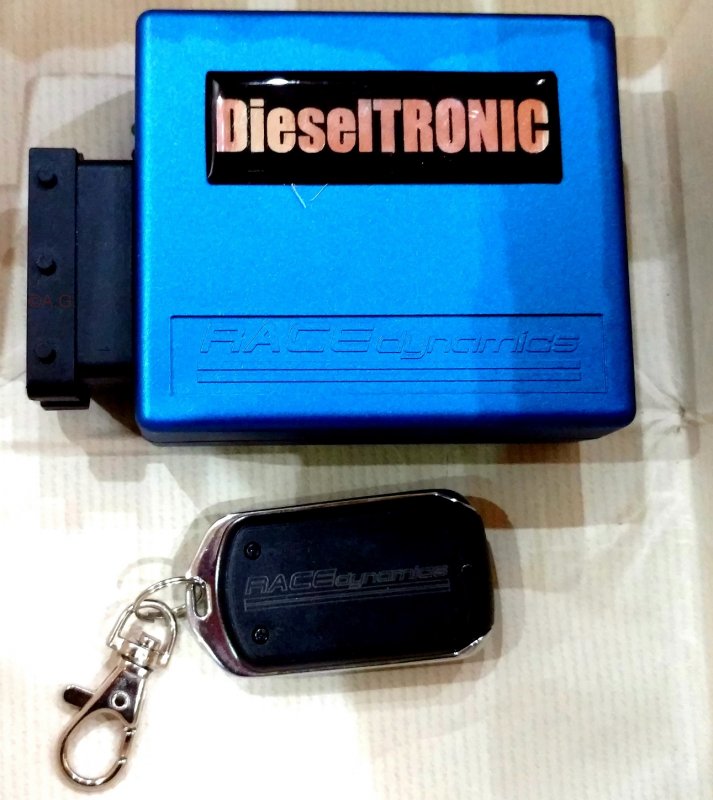
A6_IMG_20160518_133959131.jpg
Dieseltronic with remote having Race Dynamics logo
A7_IMG_20160518_134039735.jpg
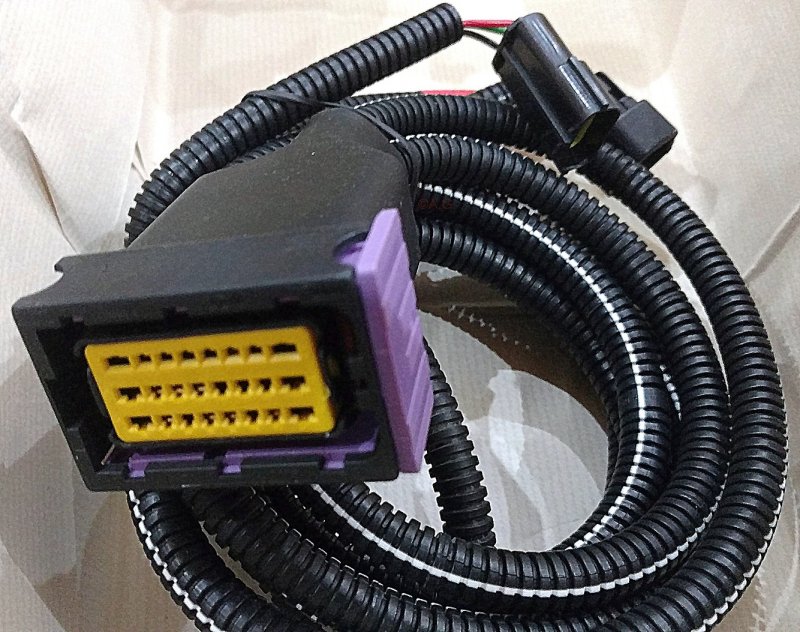
Wiring harness (Dieseltronic connector)
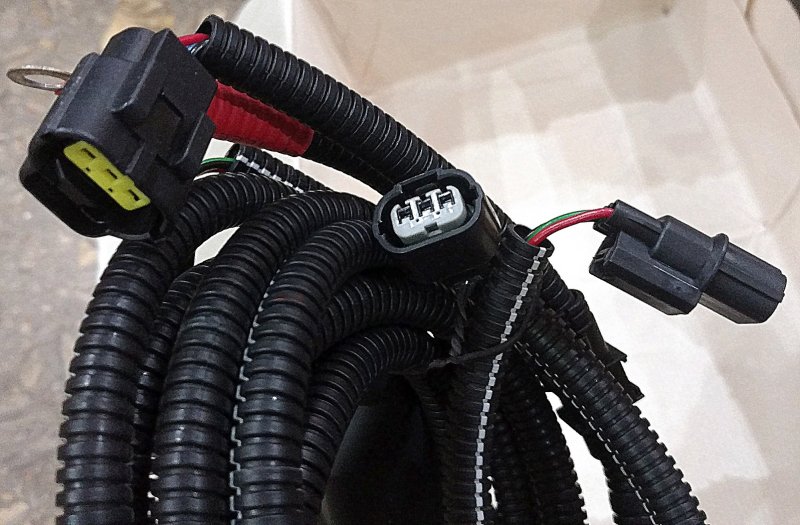
A8_IMG_20160518_134056894.jpg
Wiring Harness

The next morning, installed the box based on the documentation already provided by Team RD. Getting the documents beforehand helped as I knew the install would be difficult with hot engine once I had located the connectors. Before starting the installation, the battery negative wire was disconnected. The boost pressure sensor was easily routed through the box but accessing the rail pressure sensor connector was a task. Once the connector was removed from the sensor, it was a task getting the rail pressure sensor connector coupled to the Dieseltronic harness due to it’s limited length wire but finally succeeded after 5 minutes of tussle. In the end, the power wire of the Dieseltronic box was connected to the Battery positive terminal and then the negative terminal was reconnected. I have not yet found a suitable place to mount the unit and it has been tied-up on top of the fuse box where I feel it is most safe from battery fumes, heat & water splash. Started the engine and there was no engine light or any error code on OBD in any of the modes.

Confirmed Team RD about the receipt and successful installation of Dieseltronic and started my demo period.


Post Install Pics:
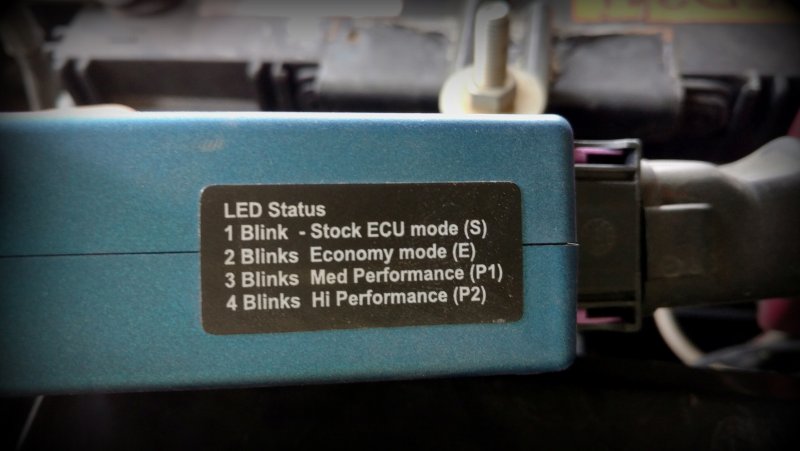
A9_IMG_20160608_103958769.jpg
Visual indications of different modes of the Dieseltronic
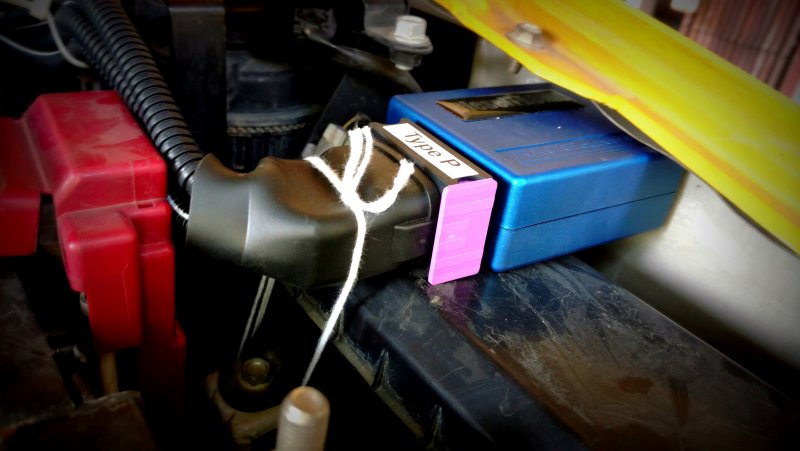
A10_IMG_20160519_085427400.jpg
Placement of Dieseltronic over the Fuse Box

Performance:
The box has 4 modes – E (Economy), S (Stock), P1 and highest is P2. The best part is that the modes are switchable on the fly. However I wouldn’t recommend doing the same as abrupt fuel changes result in jerky motion – best is to change the mode by getting engine to idle and then taking it back to power.

E mode: Has an economy map which is said to increase fuel economy by upto 35%. Personally I did not experience anything close to this in the city during my daily drive over 50 kms spanning over 2 days but yes there was an improvement and the gains could be more on the highway. I feel that this mode has near stock response till 2000 RPM after which it completely blunts the throttle. Anyways, this is not what I bought the box for and use it on highway when cruise is engaged.

S mode: Everything is back to stock and you are riding an extra burden of lightened wallet. I only use it when I am not driving.

P1 mode: This is the most balanced mode. It says that there is a 15% increase in power and torque. The driveability is improved below 2000 RPM and the engine pulls cleanly from low revs like 1100 RPM. Basically, the usability of the selected gear has increased by almost 300 to 400 RPM. On the highway where the engine earlier felt a bit hesitant in pulling from 60 Kmph in 5th gear, it now pulls from 50 Kmph in a manner it used to pull from 70 Kmph. This has drastically reduced gearshifts. Above 2000 RPM, it is a different animal all together leaping forward with the slightest input to the throttle. There is no spike or jerk in the power delivery and the rate of speed build-up gradually increases but the transition from below 2000 RPM to above that comes with a kick. This mode masks speed build-up so efficiently that initially for a couple of times I was thinking I might have reached 70 Kmph when the speedo was already crossing 90 Kmph. What’s best is that the fuel efficiency hasn’t taken a toll and gains of 2% or 3% can be termed negligible. The biggest weaklink in P1 mode is the stock Apollo tyres – even with slightest hint of dirt or water, the powered rear wheel breaks traction even in 2nd gear.

P2 mode: It is said that this mode increases power and torque by upto 40%. Below 2000 RPM, there is not much of a difference between this & P1 mode but above that, it’s a different story all together. With the right pedal to the metal above 2000 RPM, you get pinned back. The rate and ferociousness with which it charges forward is simply unbelievable. But considering the dynamics limitations of the Pajero Sport, I don’t use this mode and P1 mode is what I use.

Impressions of the Dieseltronic off the road:
The biggest perceivable difference off the road is the benefit of increased gear usability. It is much easier to maintain momentum in the higher gear while earlier to avoid any break in momentum, a lower gear was required keeping the revs high. Due to this, the incline which required 1st gear in Stock mode was done in 2nd gear in P1 mode – the revs dropped till 1200 RPM but the engine did not feel strained and the climb was done in a more controlled and calm fashion. In Stock mode, the revs kept falling below this mark and strained the engine. Here, I would like to mention that I am not an expert in off-roading as the climb is 2H stuff for the Pajero SFX but with the Pajero Sport, I usually end-up spinning the powered wheel in the absence of LSD.

The E mode is better suited for slush & mud as the blunted response and linear power delivery helps in avoiding any unwanted wheel spin. With the different modes, it’s like having your own terrain response system for the engine.


Final Comments:
I was concerned about it’s affect on the engine specially temperature and logged the data from OBD2 in P1 mode over almost 150 Kms Highway run during the demo period. True to what Race Dynamics says, it operates the engine in it’s safe working envelope and I didn’t find a single odd reading.

In long term, more power and torque from Dieseltronic might accelerate the rate of wear & tear. But as most of the damage to diesel engine happens at higher revs, the ace up it’s sleeve of better power delivery in the lower RPM band has reduced high RPM usage of the engine. This in-effect should keep the increased wear & tear to the minimum.

I have covered more than 4000 Kms in 2 months since the install with the box majorly in P1 mode and the only thing I can nitpick is that I would have preferred a bit more grunt between 1200 to 1600 RPM and less sharper kick at around 2000 RPM mark.

During this time, I did a short run with stock air filter and it highlighted the gains of K&N air filter are better suited with Dieseltronic which probably is utilizing the filter to it’s true potential. Looking forward to the 50K Kms Oil change.

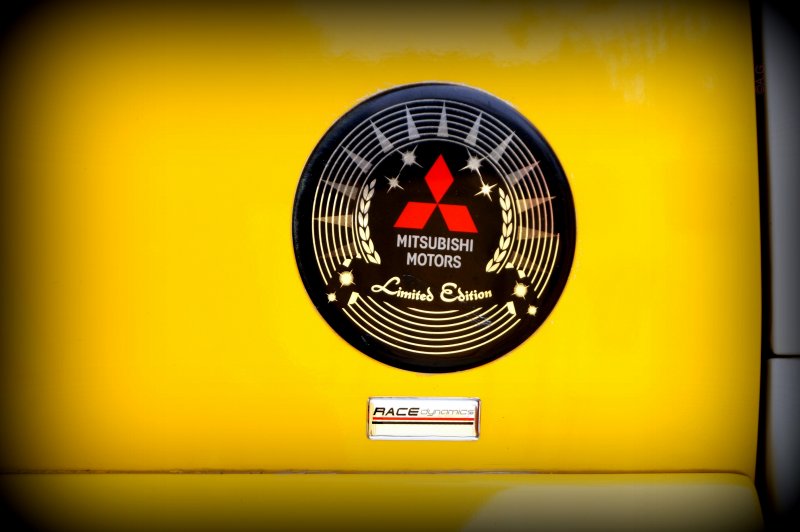
Finally pasted the stickers
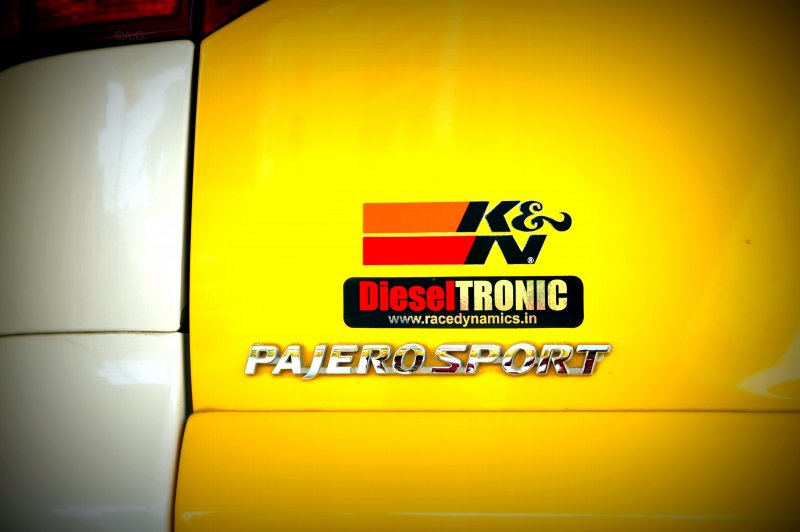
A1_DSC04425.jpg

A2_DSC04426.jpg
 
Thread Starter #115
Joined
Nov 28, 2015
Messages
427
Likes
814
Location
Roorkee
Getting the shine back

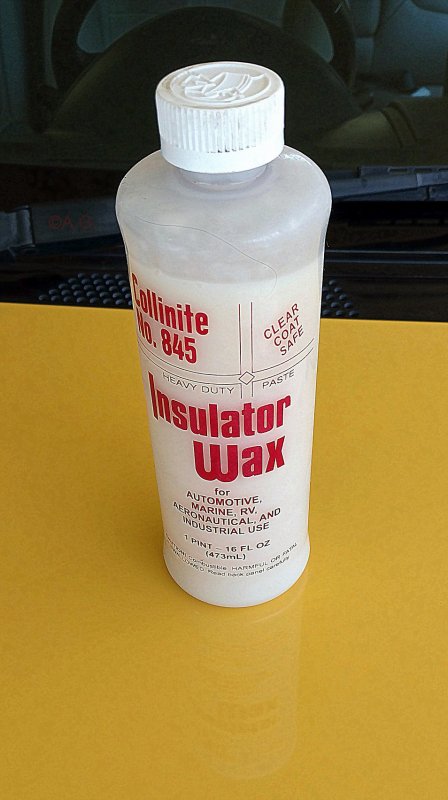
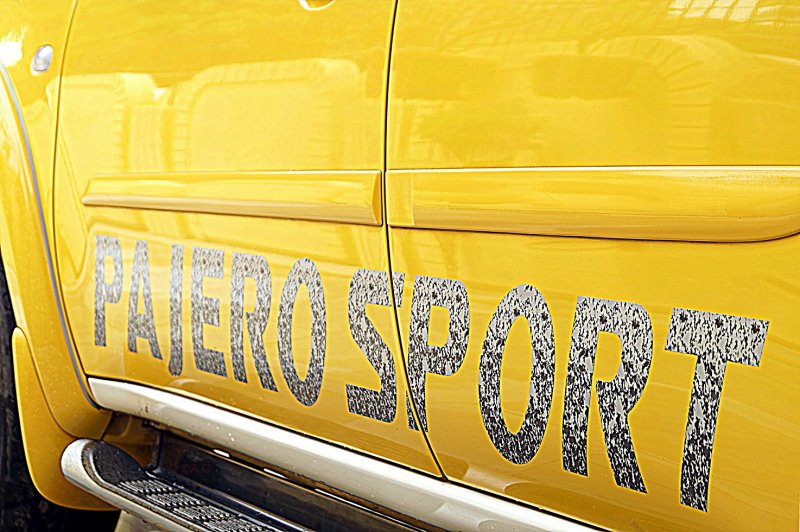
On the recommendation of Iron Rock and after seeing his truck, got the Collinite 845 liquid insulator wax. The application was done with a sponge and excess wax was wiped with the supplied microfiber cloth.

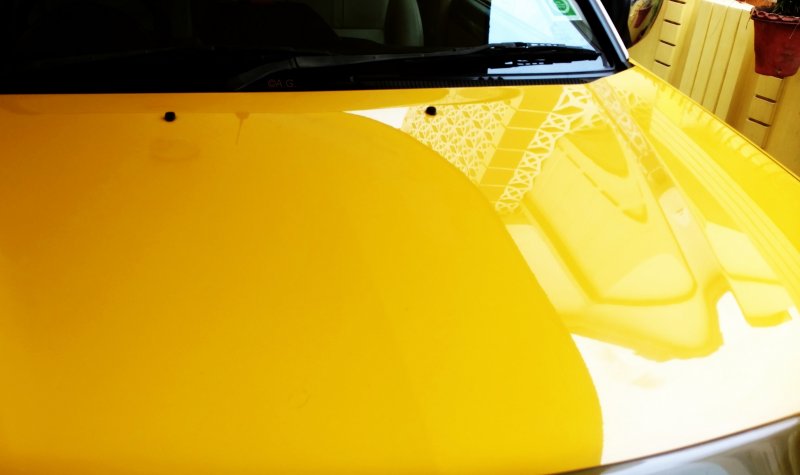
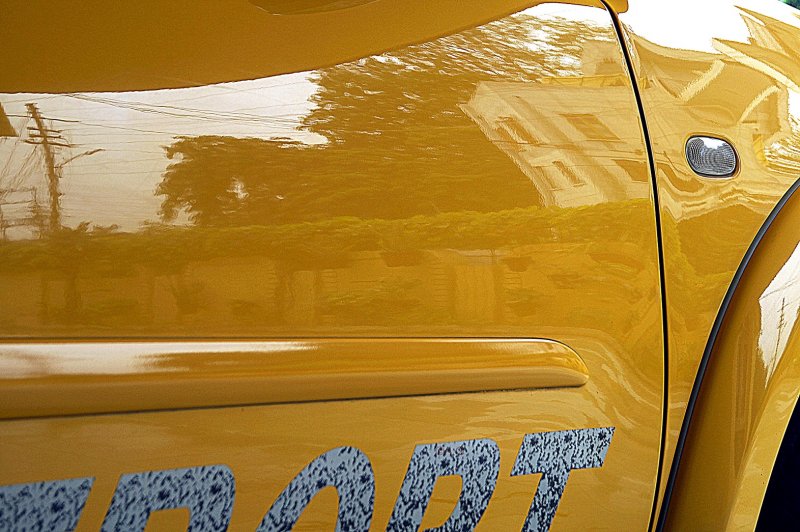
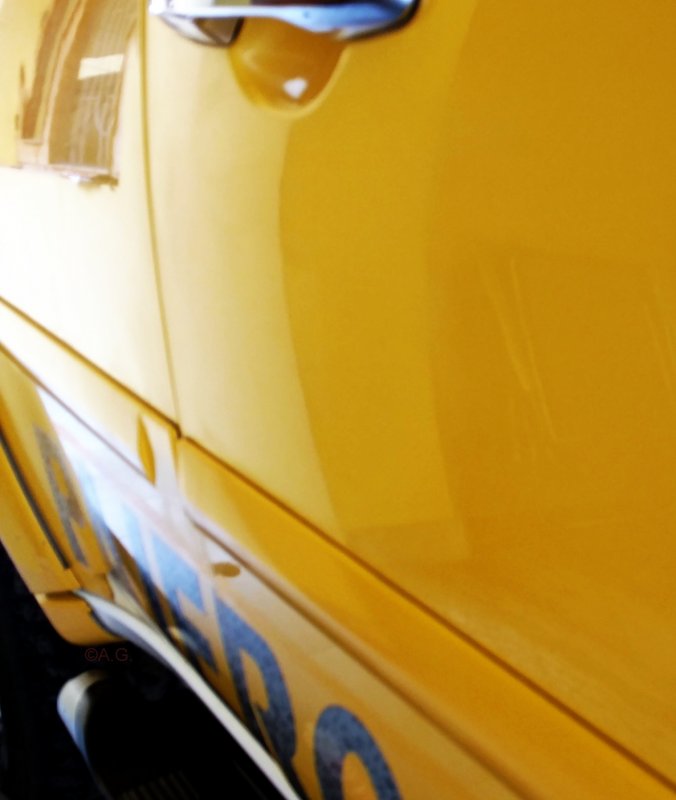
After completing the job which took close to 2 hours, the application looked like a walk in the park and it was the wiping the excess wax with the microfiber which was an energy draining process. For the first attempt, the end result was not that bad and regained the lost shine while additionally gaining mirror finish.

B1_IMG_20160710_090418417.jpg
Happy to see the reflection of the bottle itself

B2_IMG_20160710_083547025.jpg
Mirror effect on the bonnet

B3_DSC04436.jpg

B4_IMG_20160710_083554948.jpg

B5_DSC04438.jpg

B6_DSC04439.jpg
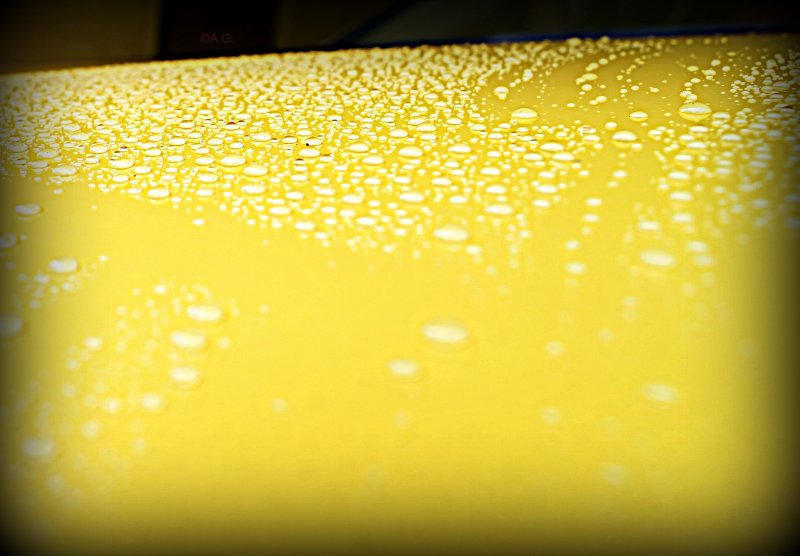
Catching a glimpse of the rain droplets on the waxed surface
 
Thread Starter #117
Joined
Nov 28, 2015
Messages
427
Likes
814
Location
Roorkee
^^ Got the combo of Collinite 845 with Microfiber cloth online from this link. The result is same even after taking a hammering from the rains over the past couple of weeks. Lets see how long it stays that way.
 
Thread Starter #118
Joined
Nov 28, 2015
Messages
427
Likes
814
Location
Roorkee
The confusing slip:

The start of July saw random slip where-in using 100% throttle from 2000 RPM in 2nd gear raised the engine RPM but not the speed in proportion. The issue did not come again leading to a conclusion that there might have been momentary tyre slip.

The next week, it became pretty clear that something was wrong when on paying close attention, it was found that the slip was in 3rd gear and sometimes in 4th gear too. There was no possibility of a momentary tyre slip at 80 Kmph which raised alarm bells. I feared the worst and started believing that the clutch is on it’s way out. The most obvious reason to me would have been the addition of Dieseltronic by virtue of which the additional torque was taking it’s toll on the clutch.

Chetak, with his exceptional logical reasoning approach, without actually seeing the vehicle pointed to 3 factors – clutch pedal adjustment, leak in intake system and slippage of belt. These 3 individually or their combination was causing shock load which was not being taken well by the clutch.

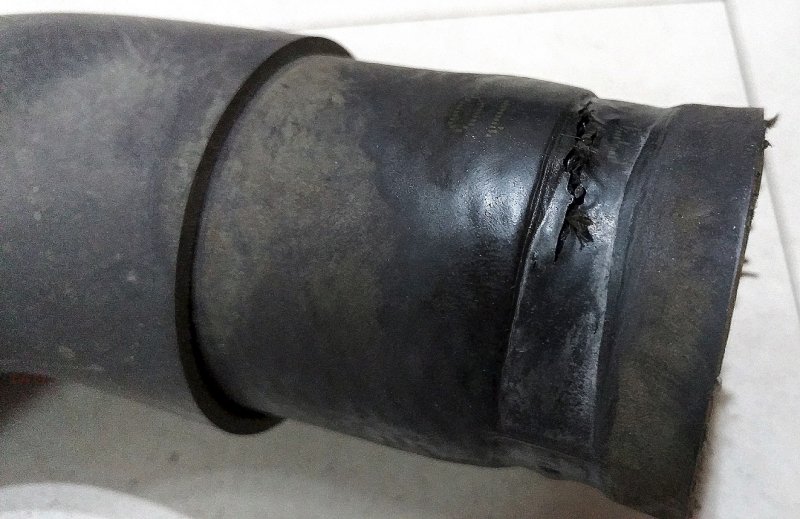
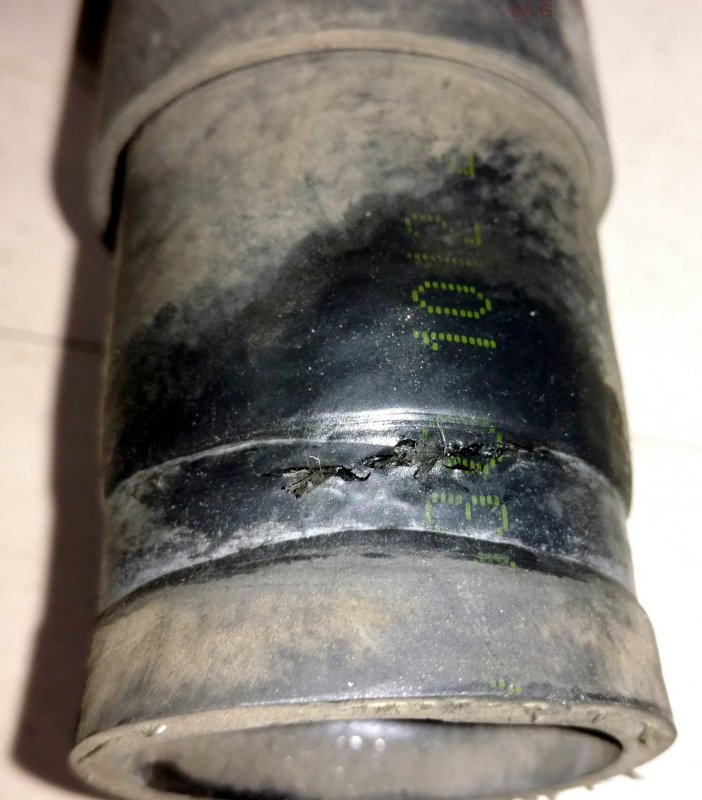
Got it checked the next day and in a true testimony to Chetak’s knowledge, all 3 issues were present. The Clutch bleeding was performed and for the first couple of times during the process, nothing came out but air. Then, the belts were found to be a bit loose and their tension was re-adjusted. The biggest shock came when the outlet hose from the turbocharger to the intercooler was also found to be damaged from near the turbocharger.

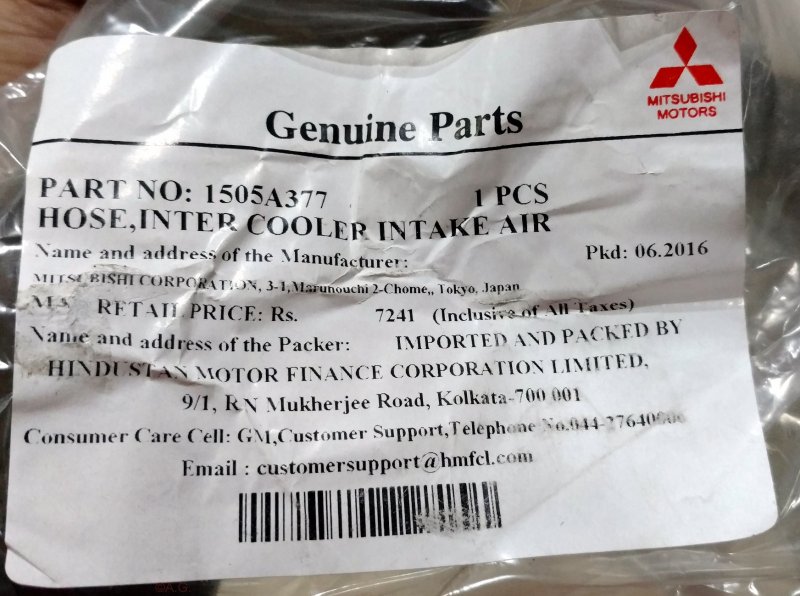
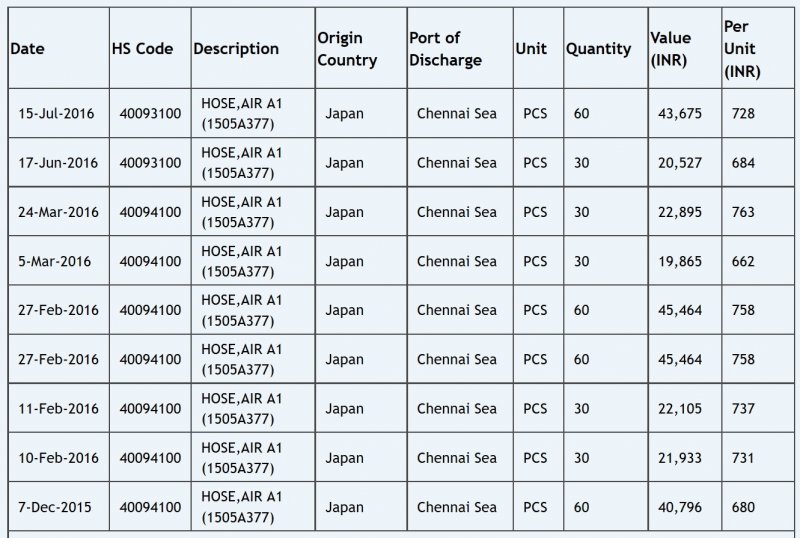
Thankfully, the part was in stock but the price for the original part is sky high. The shocking price and the profit margin charged on the same has made me realise that this hose is susceptible to damage during service as for the replacement of oil filter, both the inlet and outlet hose of the turbocharger are disconnected and incorrect fitment of the clip can damage this hose easily.

Damaged Hose
C1_IMG_20160715_150518826.jpg

C2_IMG_20160715_150526005.jpg

C3_IMG_20160715_150548923.jpg

MRP label of the hose
C4_IMG_20160715_150504681.jpg

Import data of the hose courtesy Zauba
C5_Hose_1505A377.jpg

The issue of slip has thankfully not resurfaced since then and I hope it does not come back to haunt me.
 
Joined
Jun 11, 2014
Messages
152
Likes
82
Location
Bangalore
Got it checked the next day and in a true testimony to Chetak’s knowledge, all 3 issues were present.
Thank you for your kind words A.G.
Glad to know that the issue has been resolved. Ideally, if the hose has been installed properly, it shouldnt resurface.
Very informative thread. Thanks to AG, Chetak and Iron Rock for making my decision easier to go for a Pajero Sport Manual.
You are welcome apsgaur. You can also connect with us on FB here.

https://www.facebook.com/groups/232335173473774/
 
Status
Not open for further replies.
Top Bottom