Mitsubishi Pajero Sport Limited Edition: Ownership Review


Status
Not open for further replies.
Thread Starter #46
Joined
Nov 28, 2015
Messages
427
Likes
814
Location
Roorkee
Additions Part 3 – K&N Air Filter: (June 2015)
The hint of turbo lag below 1800 RPM in comparison to Pajero SFX was a dampener especially on the mountain roads where it was prominently highlighted during the climbs. After finding the correct part number which is 33-2951, the heart said to go with it but the mind said against it as most of the studies online showed that the K&N air filter allowed for more dust to enter alongwith more air.

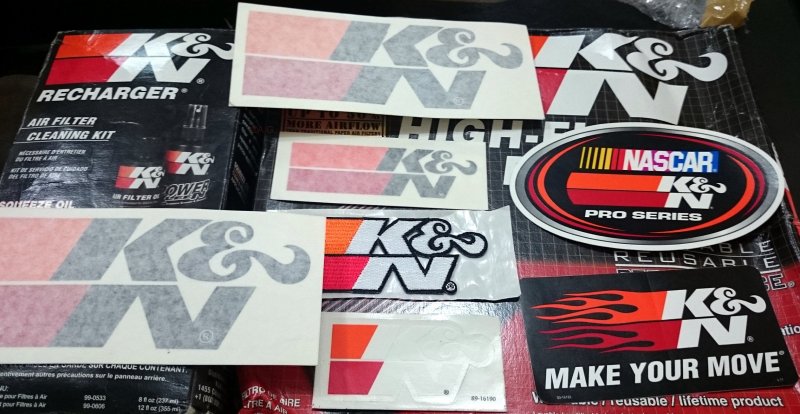
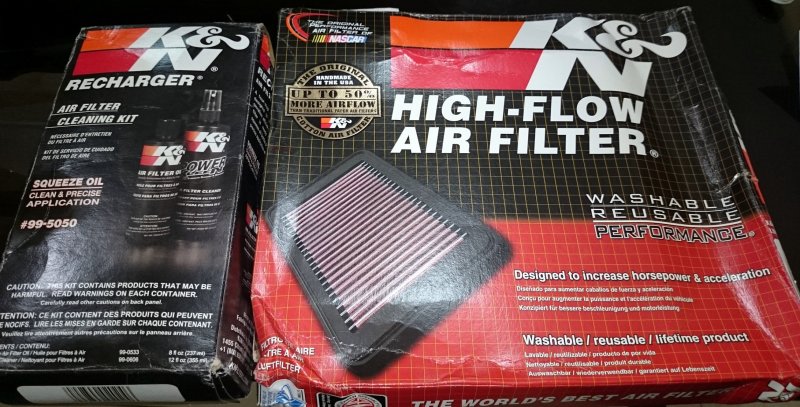
I went ahead and contacted K&N India who referred me to Moto Adda (now Rising Moto) for the filter. Got the filter and the cleaning kit at a discount and they even sent a sticker kit along with the order. Personally, after the install I could not find any traces of more dust during practical usage. The insides of top part of the airbox and the hose pipe are as clean as they were with the OE filter under similar usage after completing nearly half the usage with K&N air filter.

Since the install, gone is the hesitation and it pulls cleanly from even 30 Kmph in 3rd gear. The fuel efficiency has also got increased by 0.5 Kmpl (combined). Above 2000 RPM, the difference in character is more evident and now the engine climbs revs faster and feels overly enthusiastic to respond to the slightest of throttle inputs.

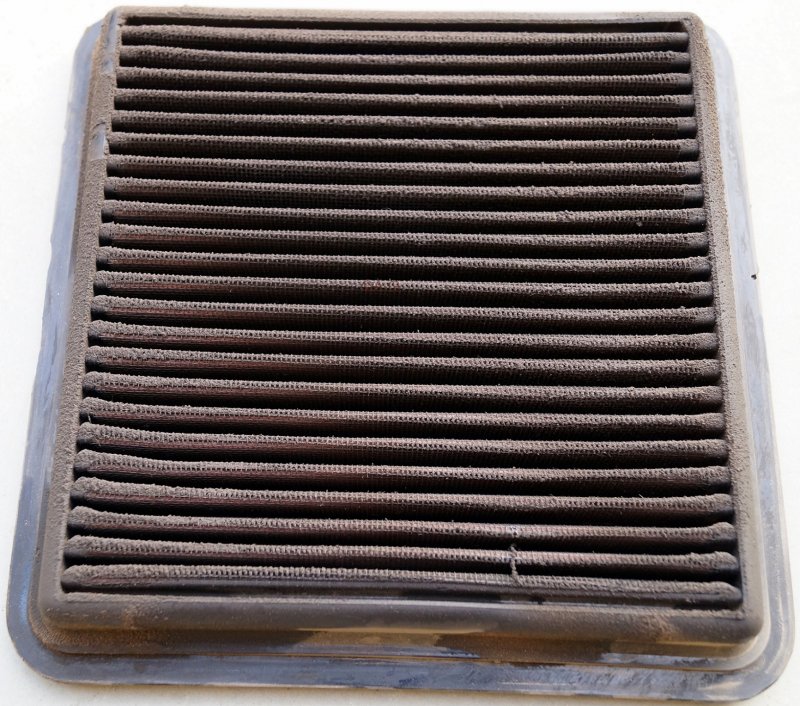
I have done nearly 15,000 Kms on K&N air filter and had cleaned it twice. As per the instructions available on the website of K&N (Link), the filter was not completely dirty but still I went ahead with the cleaning. The process is simple but tests patience. To get the dirt off, it took me 3 attempts both times with each attempt taking around 15-20 minutes. Then drying it and re-oiling and again waiting before touch-up was another 30 minutes affair. In all, it took around an hour and a half just to clean the filter but the rewards in-terms of restored performance are more than satisfying.

The Recharge Kit with Filter
DSC_2710_Small.jpg
Stickers sent along
DSC_2711_Small.jpg
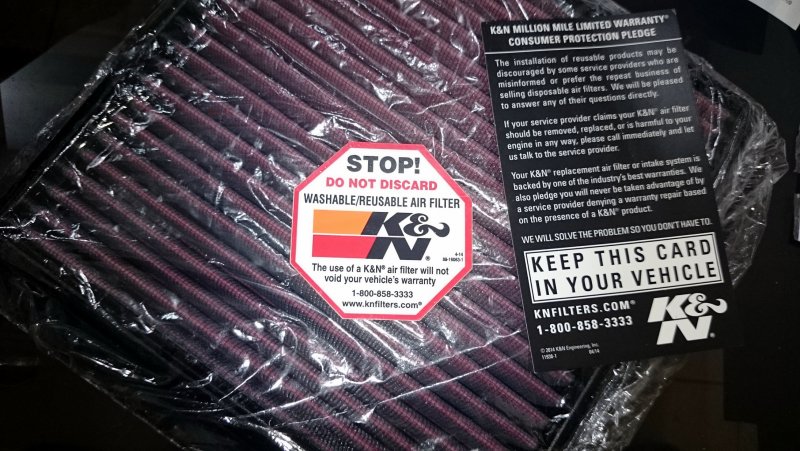
The K&N Air Filter with it's sticker for air filter box and warranty pledge
DSC_2712_Small.jpg
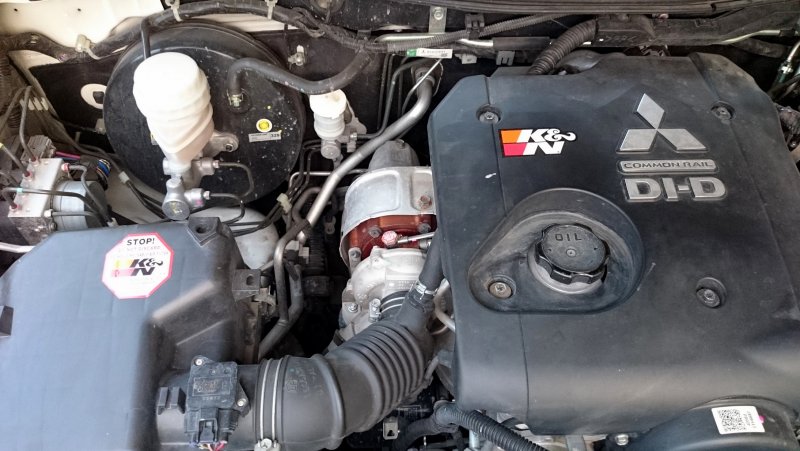
Stickers placement
DSC_2776_Small.jpg
DSC_2777_Small.jpg
DSC_2780_Small.jpg

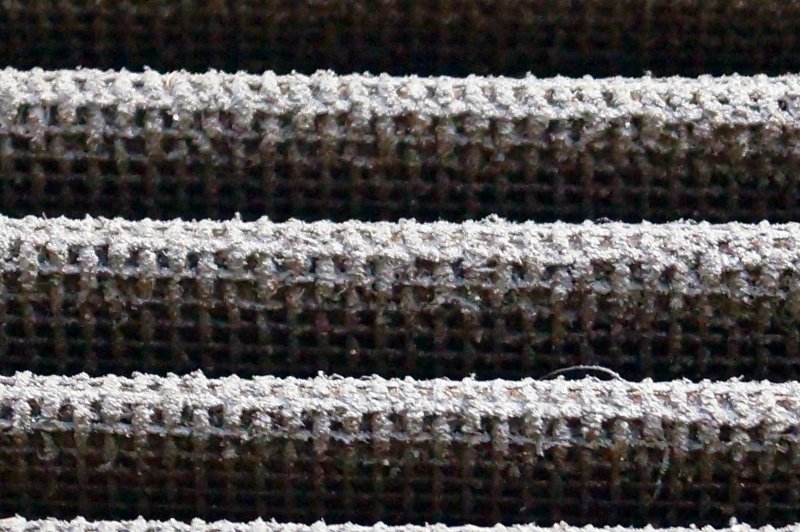
The Dirty Air filter after 7,500 Kms
DSC03582_Small.jpg
Close-up of dirty air filter
DSC03583_Small.jpg

Video showing cleaning process
https://www.youtube.com/watch?v=K5JtLLiBDbc
 
Joined
Nov 5, 2015
Messages
18
Likes
18
Location
Pune
Not only that, if you lower it too much you might have issues when lifting the vehicle on the 2-post lift at the service center as the lowered foot steps could require spacers to be placed on the lifting pads too.
A small plastic stool is the best option in my opinion
AG, Chetak: I think I will do the simplest solution which is what Chetak has also suggested, viz., buy a plastic stool. Sometimes the simplest solution is the best solution.

Additions Part 3 – K&N Air Filter: (June 2015)
Since the install, gone is the hesitation and it pulls cleanly from even 30 Kmph in 3rd gear.
I also recently installed the K&N but have yet to drive much with it on since I am travelling right now. But I have also experienced that I don't need to down-shift as much as I used to and I can swim around in 3 in city driving. Earlier I would have to downshift to 2 just so I am in the power band. Let me be clear, the additional kick provided by K & N is not like a turbo, more that you get a bit more responsiveness at lower revs and which is enough to reduce shifts.

Glad to hear from AG that the K&N allowing more dust bit is shown to not hold.
 
Joined
Jul 31, 2014
Messages
131
Likes
71
Location
Mumbai
Hi AG, thanks for the reply on the oil. He seems to be charging more then Rs5k extra, compared to your numbers. I also checked that the AC filter as per the service guy costs Rs3800, and now suspect that even this is inflated. Let me see.
 
Thread Starter #49
Joined
Nov 28, 2015
Messages
427
Likes
814
Location
Roorkee
Let me be clear, the additional kick provided by K & N is not like a turbo, more that you get a bit more responsiveness at lower revs and which is enough to reduce shifts.
You are right - even I feel it's more beneficial at low revs.
Hi AG, thanks for the reply on the oil. He seems to be charging more then Rs5k extra, compared to your numbers.
Apart from the price, I am more concerned about the quantity being 8 Liters as you mentioned instead of 6.4 Liters. Overfill by 1.6 Liters would be harmful for the engine.
I also checked that the AC filter as per the service guy costs Rs3800, and now suspect that even this is inflated.
The official price is absurdly high for the filter. Even the pre-hike price (Rs. 2200 which I paid) was higher as compared to price from other sources.
 
Joined
Aug 23, 2009
Messages
120
Likes
32
Location
Navi Mumbai
Apart from the price, I am more concerned about the quantity being 8 Liters as you mentioned instead of 6.4 Liters. Overfill by 1.6 Liters would be harmful for the engine.
No dealer will overfill the oil. They are just behind earning extra money by charging you for extra quantity. Happens many times.
 
Thread Starter #51
Joined
Nov 28, 2015
Messages
427
Likes
814
Location
Roorkee
Additions Part 4 – Cabin Air Filter + Lights: (June + July 2015)

Cabin Air Filter
While casually browsing the service manual one day, it appeared that there is a provision for a cabin air filter in the blower assembly. Checked with Vivek Autolinks and got to know that this is not a part of the standard fitment. The details of the part were also not available. A simple email to HMFCL for help with the part number and there-after in arranging the part even at the 11th hour was responded positively and the part was arranged from Asian Motors in less than 12 hours of sending the email. The fitment process was fairly simple which has already been highlighted by Iron Rock. The part number for the same is MZ341012EX which is common with Cedia.

Post install, the filter has ensured that I use the fresh air much of the time without worrying about the dust. Recently, HMFCL has issued a notice to the dealers to urge owners for proactive installation of the cabin air filter in the interests of longevity of the evaporator coil.

The only sour point is that the price of the cabin air filter through the official channel is considerably high. Atleast with the notice for proactive installation, a discount could have been offered.


Lights
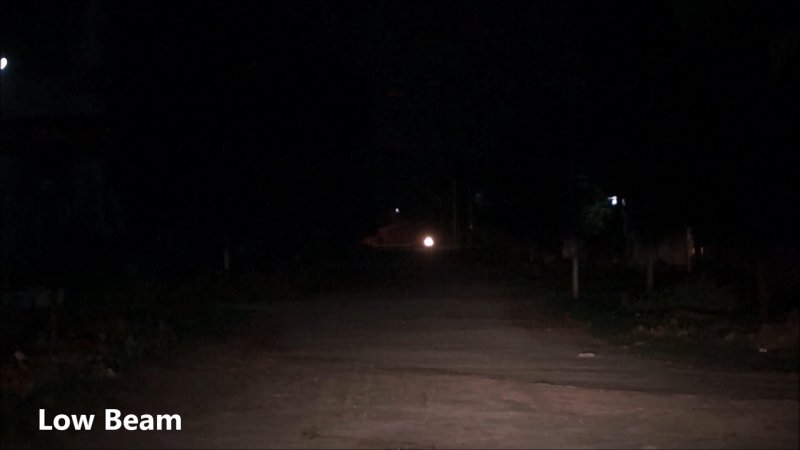
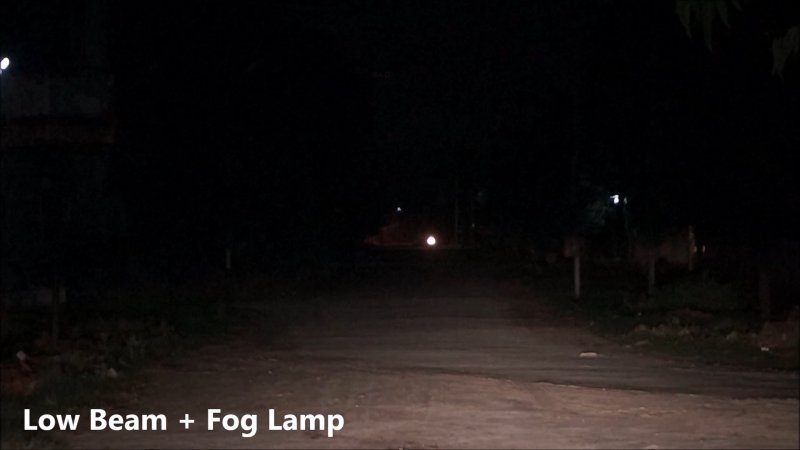
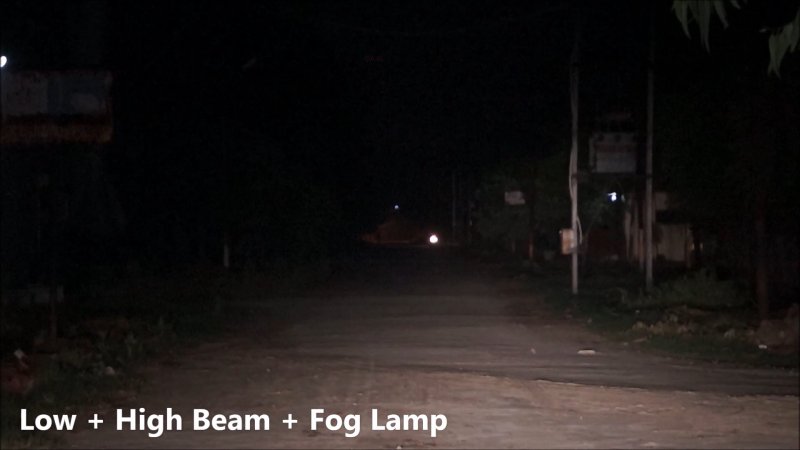
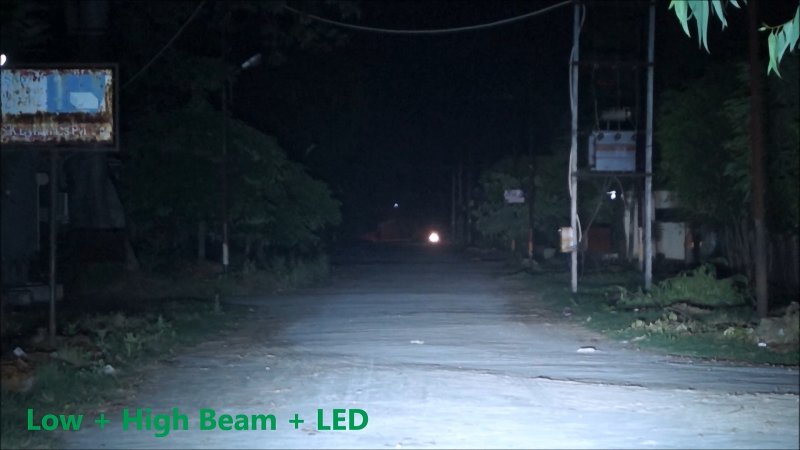
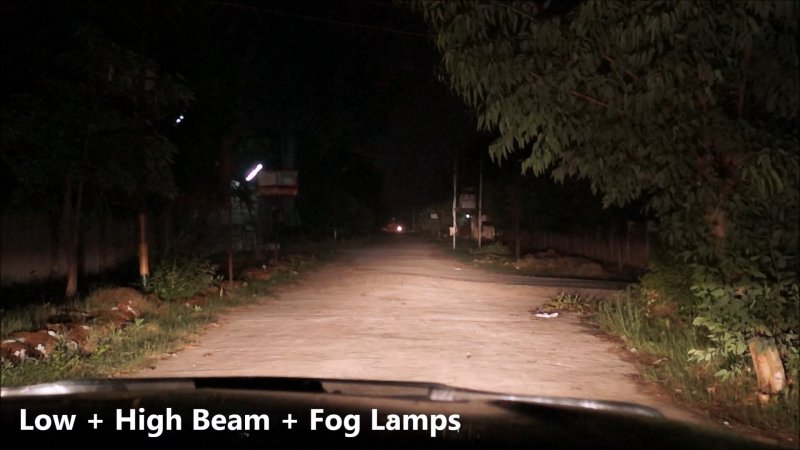
The head lights were the weakest link of my Pajero Sport as I found the low beam of the head light quite weak. A close call one night and it became clear that the lights needed immediate attention. Some fellow owners recommended LED Light Bar while others were in favour of bulbs upgrade. Got both.

Stock Bulbs upgrade
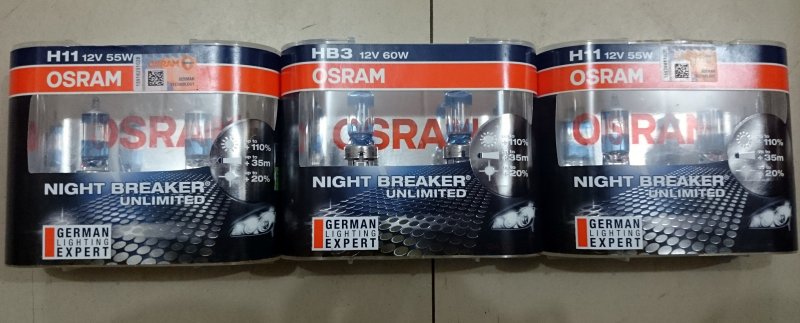
A couple of days into the dilemma, Chetak recommended that the best upgrade bulbs were Osram Night Breaker Unlimited (NBU) and the cheapest route to get the bulbs was aliexpress. Ordered the upgrade for High beam, Low beam as well as Fog lamps and got a deal on the pricing of all 3 pairs. Replaced the bulbs which arrived a month of ordering in end June. The bulbs were a direct replacement. The improvement vis-à-vis the original bulbs is considerable but not exceptional to me as I had already been spoilt by the LED bar which came earlier.

The Bulbs
DSC_2799_Small.jpg

LED Light Bar
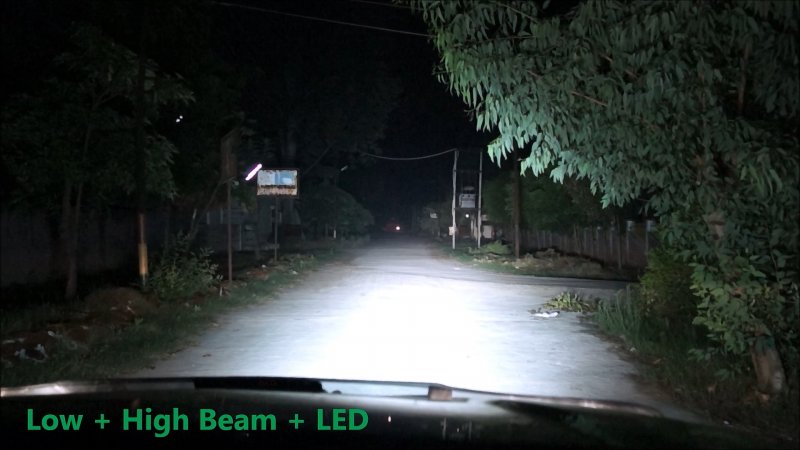
I had no idea of LED Bars being available as auxiliary lamp for cars. The recommendation from a fellow Pajero Sport owner was an eye opener and the results of the LED Bar which I saw in videos were impressive. Researched and 2 things were clear – LED had got to be from CREE and rating of each LED had to be 10W each. The latter would ensure lesser LEDs for a better light. Researched more and limited my search upto 120W LED Light Bars because of the electrical configuration I had in mind. Got interested in a couple of products on aliexpress and the final dilemma was a choice between 60W x 2 or a single 120W LED Bar. Chose the latter and the seller claimed that it is IP68 compliant and had 2 years warranty. Decided that 120W LED Bar with both wired & wireless wiring kit and front amber coloured covers should serve the purpose. The price for this entire kit, however, had held me back from ordering. Feeling that I might not get it in my target price, I ordered the Osram NBUs.

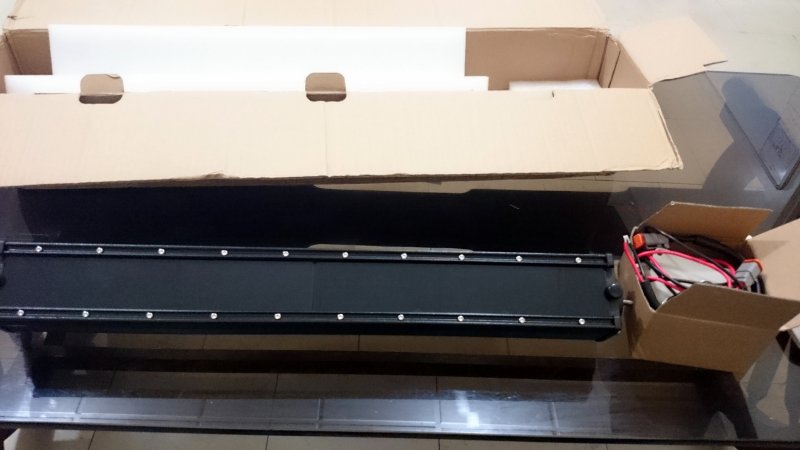
A couple of days later, the seller came back with a final price for the entire kit. For the price, the deal looked fine and I bought it with the final request for FedEx shipping instead of the EMS. The LED Bar has 12 CREE LEDs of 10W each in 3 Flood, 6 Spot and 3 Flood configuration with side markers in orange. Got it in 4 days of ordering due to FedEx Priority shipping. Tested it first on a separate battery for current consumption and it was consuming approx 118 watts. The light was simply superb even during the day.

LED Light Bar with Protective Black covers and Wireless wiring kit
DSC_2701_Small.jpg

Testing the LED Light Bar
DSC_2704_Small.jpg

Mounting the LED bar:
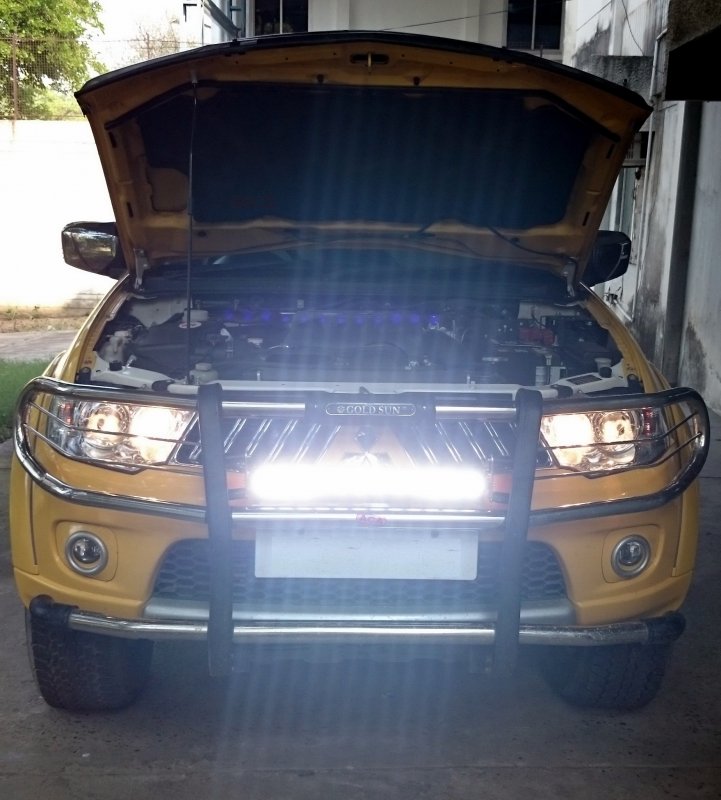
I was not willing to make alterations to the front grill or bumper simply because I should be able to remove the LED Bar without leaving any mark. I went ahead with the thought of the front guard for the sole purpose of mounting the LED Bar. The cons of the front guard overweight it’s pros (which are practically none) but I installed it for the interim time period before a final location for mounting the LED Bar could be decided. A week later, got the front guard which looks like an overkill but for the price, it offered great value compared to the over inflated prices front guards sold by HM dealers as well as some accessories dealers. Further, this was the only guard which had additional mounts from front number plate bracket which in case of a mishap could transfer enough force for SRS to function. After installation of the Front Guard, it took a couple of days to get the mounts for the LED Bar fabricated. The installation / removal of the LED bar requires special tools making it theft proof (atleast theoretically).

Final Picture after mounting
DSC_2783_Small.jpg

Electrical Wiring:
The reason I got the wireless wiring kit was to avoid damaging the firewall rubber gourmets and to save the hassle of resealing them properly. A simple circuit with the wireless controller was added near the battery. This circuit has fuses on both positive and negative wires taken from battery positive terminal and body respectively to ensure complete protection of the battery and other electricals incase there is any issue in the LED Bar. After the wireless controller, a relay is added as a final switch which is connected by tapping the High Beam and Fog Lamp output wires as these wires are already fused. This relay ensures that I never overburden the battery / alternator. Even if turned ON from the remote, the LED Bar can turn ON only if High beam is ON and Fog Lamp is OFF ensuring only 10 watts additional are drained (4 bulbs + LED bar) from the system capable of lighting all the 6 bulbs simultaneously. This also has an additional benefit of controlling the LED Bar from the control stalk which allows for it’s responsible usage by avoiding dazzle to the on-coming motorists. All the 3M scotch locks used for tapping wires have been water proofed by adding rubber over them.

Slide on Covers:
The Amber covers for changing the light colour slide-on in the designated slot easily. But due to my installation arrangement, it is possible only when the LED Bar is removed.

Result:
01_Low_Beam.jpg
02_Low+Fog.jpg
03_Low+High+Fog.jpg
04_Low+High+LED.jpg

Actual view from Driver's seat
05_Low+High+Fog_ZOOM_OUT.jpg
06_Low+High+LED_ZOOM_OUT.jpg
 
Thread Starter #52
Joined
Nov 28, 2015
Messages
427
Likes
814
Location
Roorkee
Third Service Experience and issues in between:

The Third Service was done at 19,606 Kms in July 2015. The visit was unplanned as out of the blue, the front right tyre started emitting some metal grinding noise. This happened after a detour was taken to avoid traffic jam which ensured the Pajero Sport got a mud bath. My first assumption was that a stone might have got stuck between the brake pad and the disc but it was not the case. Vivek Autolinks accommodated the request for service during the inspection for the issue.

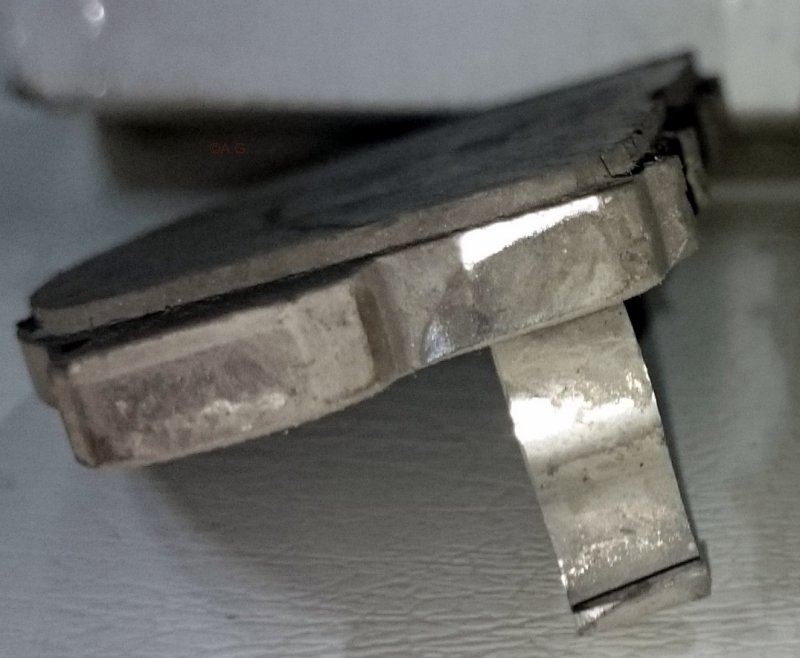
On inspection it was found that the metal clip responsible for indicating brake pad wear had broken and got stuck with-in the caliper. Fortunately, the disc was not damaged. The front brake pads could have survived another couple of thousand kms but had to be replaced had it not been for this damage. The rear ones could have run the same distance but got them replaced too.

Damaged Brake Pad
DSC_3507.JPG

The total bill came to Rs. 24,585/- out of which the brake pads replacement had half the share. Surprisingly, the Front and Rear brake pads are priced quite similarly considering the rear one is quite small in size. Might be because the Front pads are imported from Thailand and Rear ones are from Japan. The service excluded the Air filter replacement as K&N was already in place.

During the course of the service, a couple of customizations were also done.
1. Turn Signal lamp operation sound function – Changed to Operation (type A)
This has a different and less intrusive sound of the turn signal as compared to original setting.
2. Comfort Flasher – Changed to 400ms
This has enabled the lane change indicator which flashes the indicators 3 times in the direction the control stalk is tapped and returned to it’s position with-in 400ms.
3. Room lamp delay-off time – Changed to 60 sec
The interior lights remain ON for 60 sec after unlocking with remote.
4. Timer lock period adjustment – Changed to 60 sec
The vehicle now waits for 60 sec before relocking if no door is opened by then.
5. Rear Wiper intermittent duration – Changed to 16 sec/continuous
The intermittent delay between 2 swipes is changed to 16 sec with an option to keep the rear wiper swiping continuously if the rear wiper switch is operated twice in less than a second.

Vivek Autolinks had a blazing turn around time of just 2.5 hours for the entire service with brake pads replacement.

Stereo Reboot issue:
To power the rear entertainment system, instead of using the scotch lock to tap the required wires, the wires were simply spliced. Over the time, this caused the stereo to reboot due to loose connection. Nippon promptly replaced the power wiring of the stereo.

Whine from front of the vehicle:
There is a whine from the front of the vehicle in 2H mode. This happened under acceleration in a scenario when suppose in 2nd Gear from say 1000 RPM onwards acceleration is applied just after crossing a hump before the front and rear suspension could settle. The same is evident during long-wave-bounce on highway under acceleration. The only way to overcome is to let go of the throttle & apply power again.

The initial diagnosis was to check the EGR motor and valve for operation. Since the cleaning of the EGR motor, the sound surprisingly vanished.

The First scratch:
In a traffic jam, the driver in the front who missed the detour being pointed out by the traffic policeman decided to reverse without looking back. A muted bang followed the sound of shattering. On the spot, there were no visible marks on the Pajero Sport while Alto got it’s tail light shattered. Rather than being apologetic, the driver blamed it back that he did not reverse and it was the other way round. Luckily, the incident was caught on the Dashcam which was conveyed to the policeman. He relayed it to the other driver and escorted him to the side asking me to carry-on. A closer inspection later revealed that there was a minor hairline scratch on the front bumper on the silver part. Probably it flexed and returned back to shape to save further damage.

The First Puncture:
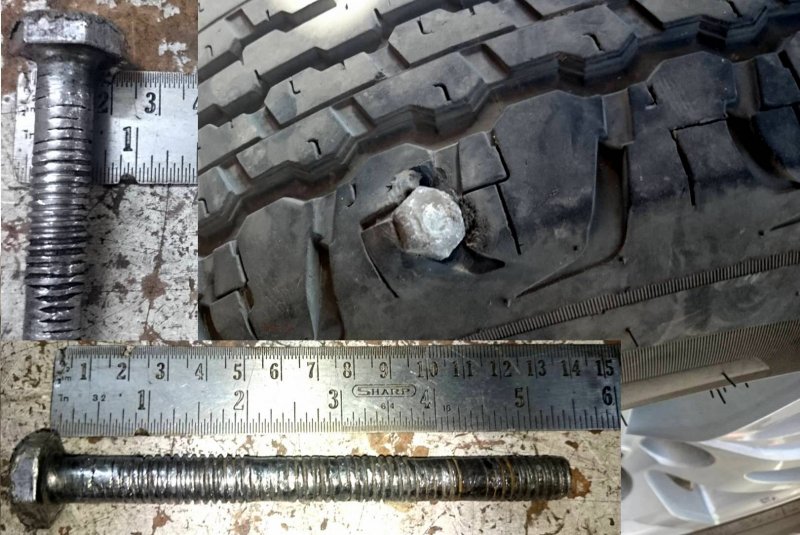
A fairly large bolt pierced the rear tyre from outside to inside and nearly to outside again. It is commendable that there was no blowout. The Pajero Sport handled the rapid pressure loss in a safe & composed manner and came to a controlled halt from 110 Kmph. Got a new respect for the OE Apollo Tyres. As the damage done was quite large for the puncture repair kit, got a tube in it after some rubber powder was put-in to close the hole and using is as a spare for emergency.

The picture of bolt embedded in the tyre
Pajero_Puncture.jpg

GPS Issue:
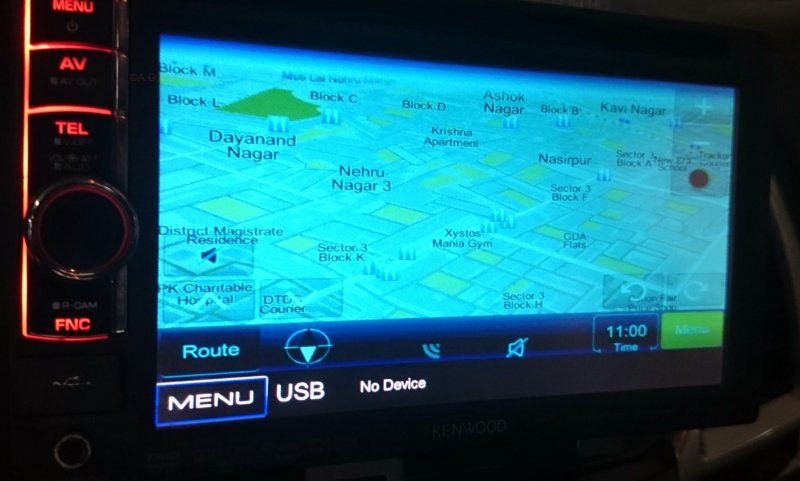
The GPS started throwing the blue screen error every now and then. The only way out was to do a complete reboot by switching off the key and restarting. A visit of service engineer from Nippon was arranged by Vivek Autolinks at their place. It was a known issue to Nippon and they straightaway went ahead with the replacement of the unit. Getting to the unit itself was an eyesore as the access was quite weird.

I requested the engineer to check the unit before refitting all the items back in their place as I doubted that they wouldn’t have done their homework. Though reluctant, he finally did it. Thankfully, it highlighted the issue that the replacement unit had a blue tint in the output. The Nippon engineer onsite and their head from the office tried hard to convince that it is a new feature and simply didn’t agree that the new unit was faulty. It was only after the team from Vivek Autolinks politely requested for another unit that the new unit was sent immediately and was replaced.

The worst part – Dashcam caught the sound of the service engineer of Nippon bad mouthing who repeatedly claimed the blue tint to be a new feature and that the customer is unnecessarily creating the issue.

Blue tint - new feature as per Nippon
DSC_2735_Small.jpg

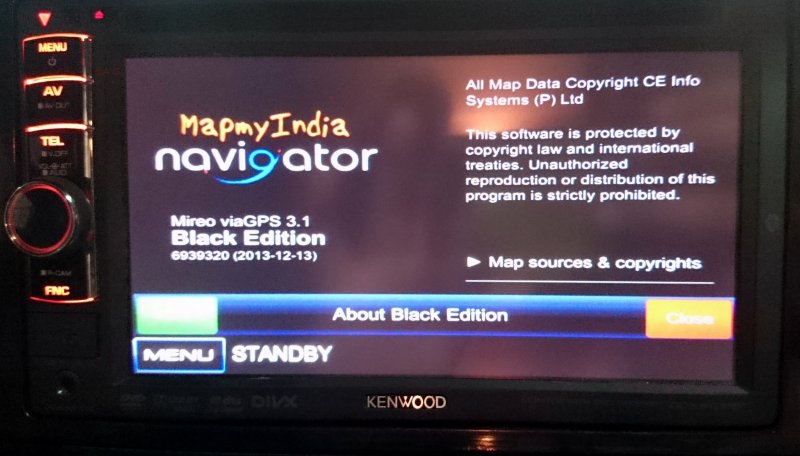
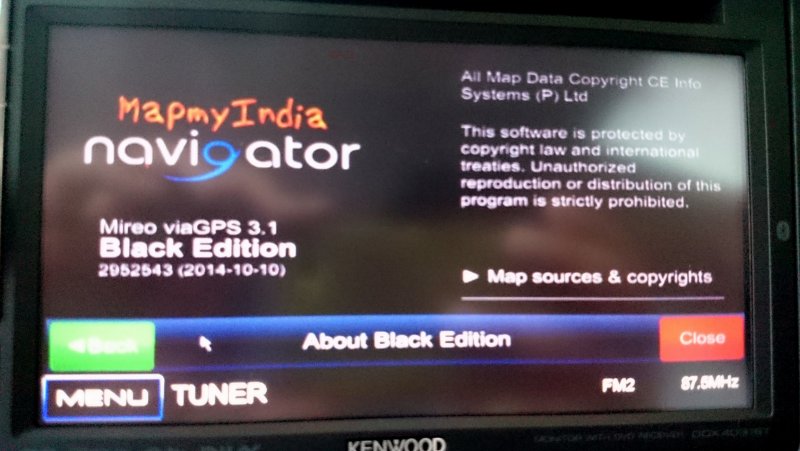
Even worse – Nippon had no clue that the software in the GPS box was updated from 693920 (2013-12-13) to 2952543 (2014-10-10). The latter has the visible difference in form of a mouse pointer which appears at the point of touch.

GPS unit in my Pajero Sport
DSC_3046_Small.jpg

GPS unit from a new Pajero Sport
DSC_3050_Small.jpg
The mouse pointer in the above picture near the Back button is the only visible change.
 
Joined
Sep 28, 2011
Messages
1,256
Likes
608
Location
India
HI,
Its really surprise to see the bolt size which made the tyre puncture. Normally Radials will not take puncture with this type of object which does not have a sharp edge. Whether the front of Pajero is too heavy or the position of this bolt was like that when tyre ran in?
 
Joined
Jun 11, 2014
Messages
152
Likes
82
Location
Bangalore
The total bill came to Rs. 24,585/- out of which the brake pads replacement had half the share.
That sounds expensive.

Even if the brake pads costed 12k INR, 12K INR for a service without an air filter replacement sounds significant.
Do you have a break up?

That said, here is a small update from my side too.

Chetak and I completed a 4000km road trip to meet a few friends across the route given below.

Chetak (Pajero Sport MT) behaved well and had him serviced at Imran's dealership (S&R Cars) at Bhopal.
Overall observations:
1. Fuel efficiency: 10.2kmpl.
2. Speeds maintained: 120 kmph on 4 laners. Touched insanity for a short duration on the Hyderabad ORR to free his lungs.
3. Issues Faced: The rattle from the centre console continues to be an irritant. It was checked and fixed at Bhopal but came back by the time we reached Betul. The K&N filter seems to be taking a toll on the fuel efficiency by 0.5kmpl.
4. The tailpipe end clamp had somehow wound itself in a weird manner because of which the tailpipe touched the rear bumper and melted a part of it. Was fixed quickly at Jagdalpur at the Tata Motors service centre. Nitrogen was also topped up at Jagdalpur.

5. S&R Cars, Bhopal is a very well maintained dealership in terms of cleanliness, courtesy and professionalism and outlet maintenance.

Service bill:
I had taken an oil filter with me to S&R cars and my total service bill for the 30K km service was as under:

1. Fuel Filter - 1777.79.
2. Engine Oil - 1393.22
3. Labour Charges - 1062.5
4. Taxes - 600.00

Total - 4826.00 INR.

I find the fuel filter pretty expensive and will henceforth order it from outside. The engine oil used was "mamooli" mineral oil 10W-30 by Motul.

https://www.google.co.in/maps/dir/Bangalore,+Karnataka/Hyderabad,+Telangana/Warangal,+Telangana/Sukma,+Chhattisgarh/Jagdalpur,+Chhattisgarh/Chitrakoot+Falls,+Tiratha,+Chhattisgarh/Rajnandgaon,+Chhattisgarh/Nagpur,+Maharashtra/Bhopal,+Madhya+Pradesh/Bangalore,+Karnataka/@18.0635788,75.2704239,6z/data=!3m1!4b1!4m62!4m61!1m5!1m1!1s0x3bae1670c9b44e6d:0xf8dfc3e8517e4fe0!2m2!1d77.5945627!2d12.9715987!1m5!1m1!1s0x3bcb99daeaebd2c7:0xae93b78392bafbc2!2m2!1d78.486671!2d17.385044!1m5!1m1!1s0x3a33450bd75e4be7:0x9306909c277bc137!2m2!1d79.5940544!2d17.9689008!1m5!1m1!1s0x3a30e5091322aed5:0xe000f9e557183269!2m2!1d81.659273!2d18.3911344!1m5!1m1!1s0x3a30126bc5ae6beb:0xcae4d4ac10952ba7!2m2!1d82.008014!2d19.0740973!1m5!1m1!1s0x3a30255b1365a9b5:0x793b25c14a696017!2m2!1d81.7000521!2d19.2072248!1m5!1m1!1s0x3a294452f4f47145:0xe6b0ebabb2989a0b!2m2!1d81.0302222!2d21.0971034!1m5!1m1!1s0x3bd4c0a5a31faf13:0x19b37d06d0bb3e2b!2m2!1d79.0881546!2d21.1458004!1m5!1m1!1s0x397c428f8fd68fbd:0x2155716d572d4f8!2m2!1d77.412615!2d23.2599333!1m5!1m1!1s0x3bae1670c9b44e6d:0xf8dfc3e8517e4fe0!2m2!1d77.5945627!2d12.9715987!3e0
 
Last edited:
Thread Starter #57
Joined
Nov 28, 2015
Messages
427
Likes
814
Location
Roorkee
Its really surprise to see the bolt size which made the tyre puncture. Normally Radials will not take puncture with this type of object which does not have a sharp edge. Whether the front of Pajero is too heavy or the position of this bolt was like that when tyre ran in?
The front would have been heavier as there were only 2 people inside at the time of puncture. My guess is that the front tyre went smoothly over the bolt but altered it's position resulting in piercing of the rear tyre.
That sounds expensive.
The break-up is as follows (Amount + Taxes):
1. Oil Filter - Rs. 983.33+137.67
2. Fuel Filter - Rs. 1,762.28+246.72
3. Pad Set RR Brake - Rs. 4,500.88+630.12
4. Pad Set FR Brake - Rs. 5,007.02+700.98
5 to 8. Balancing weights - Rs. 224.60+31.45
9. Synthetic Oil Motul 5W40 (6.4 Lt) - Rs. 6,484.54+1361.75
10. Wheel Alignment - Rs. 450.00+63.00
11. Disc Pad Assembly replacement - Rs. 900.00+126.00
12. Car Lubricant - Rs. 495.00+69.30
13. Wheel Balancing - Rs. 360.00+Rs. 50.40
Total - Rs. 24,585/-

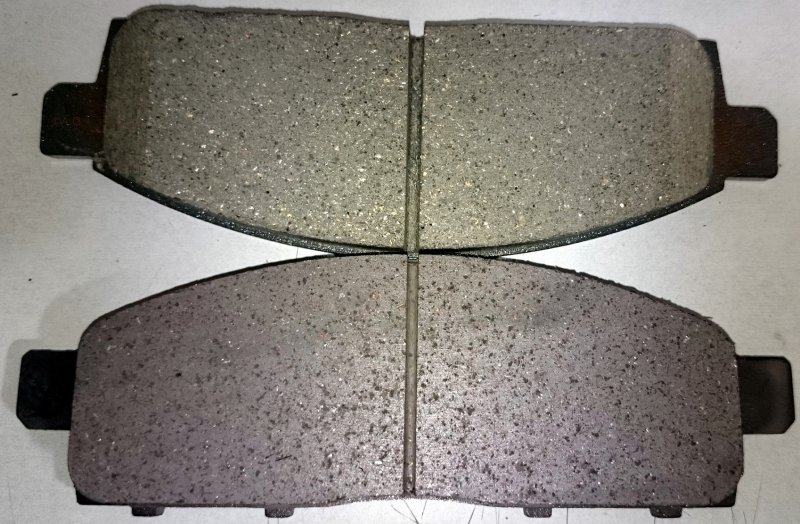
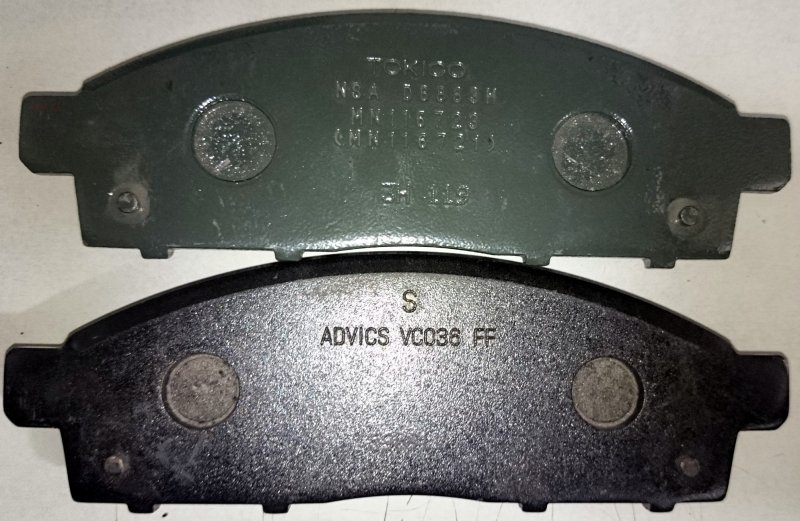
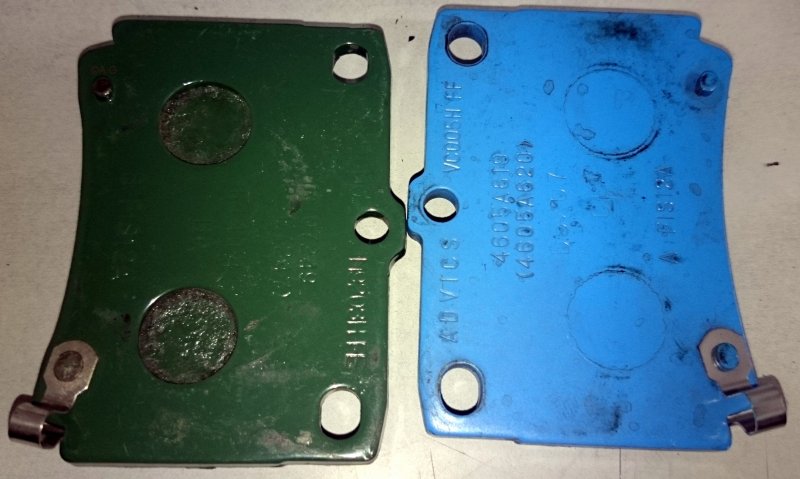
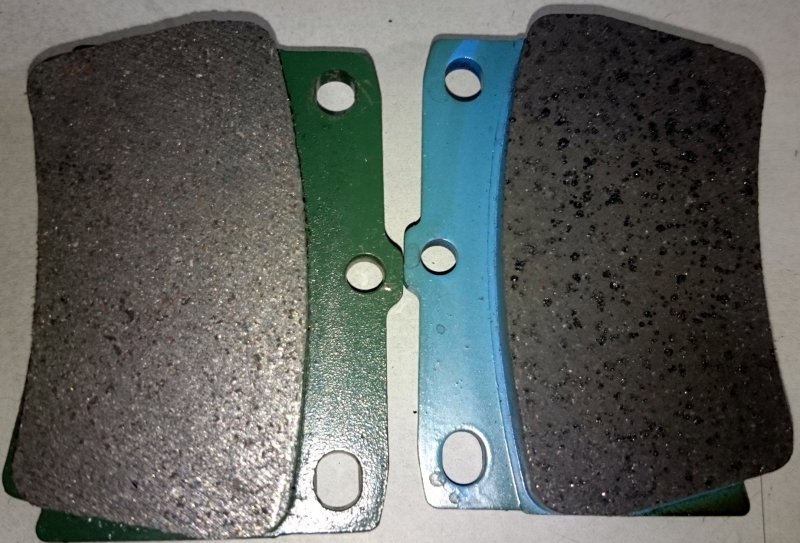
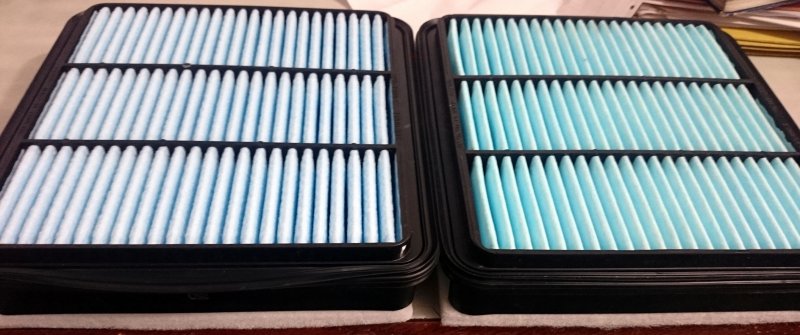
The most expensive item is the Synthetic Oil. I could have saved a lot on the brake pads from the outside but when I checked them against the company parts, the differences in quality were quite visible. Sharing a couple of pictures for some of the parts compared.

Front Brake Pads - Bottom is from HM. Notice the chamfer around the left and right edge in the brake lining of the market ones on top
DSC_3540_Small.jpg

Another view of Front Brake Pads - Bottom is from HM
DSC_3541_Small.jpg

Rear Brake Pads - Right one is from HM. Notice that the back is flush and there are no holes for piston.
DSC_3543_Small.jpg

Another view of Rear Brake Pads - Right one is from HM
DSC_3544_Small.jpg

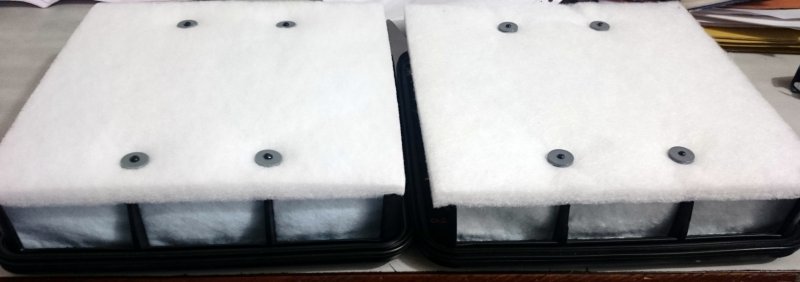
Air Filter - Left one is from HM. Notice the density of filter material.
DSC_3553_Small.jpg

Another view of Air Filter.
DSC_3554_Small.jpg

Chetak and I completed a 4000km road trip to meet a few friends across the route given below.
Great to see Chetak back in action after a long time.
2. Speeds maintained: 120 kmph on 4 laners. Touched insanity for a short duration on the Hyderabad ORR to free his lungs.
Any noticeable difference after the Italian Tune-up?
3. Issues Faced: The rattle from the centre console continues to be an irritant. It was checked and fixed at Bhopal but came back by the time we reached Betul.
This seems to be a common problem in the old models when the Stereo was not company installed.
4. The tailpipe end clamp had somehow wound itself in a weird manner because of which the tailpipe touched the rear bumper and melted a part of it.
Any pictures of exactly what happened with the tailpipe clamp and the extent of damage?
Total - 4826.00 INR.
Your service bill literally brought tears to my eyes as even with 'mamooli' oil, the best quote up north for the service is around Rs. 7,000/- without the fuel filter.
 
Joined
Jun 11, 2014
Messages
152
Likes
82
Location
Bangalore
I could have saved a lot on the brake pads from the outside but when I checked them against the company parts, the differences in quality were quite visible.
I have ordered brake pads (aftermarket) and will compare them with your pictures. Also, as long as they are genuine Tokico, I am happy. Else, I will replace them with Brembo discs and pads. I cannot tolerate brake pads wearing out in less than 20k km which is what happens with most Pajero Sports. Also, the chamfer in brake pads reduces brake squeal and hence is good to have.
Any noticeable difference after the Italian Tune-up?
Yes. 120kmph now seems like a breeze. Top speed is back to 200kph on the dial from the previous 180.
This seems to be a common problem in the old models when the Stereo was not company installed.
Yeah, have seen it in quite a few vehicles. I know what will fix it and I will get around to doing it sometime next week.
Any pictures of exactly what happened with the tailpipe clamp and the extent of damage?
I will take and post pictures tomorrow.
Your service bill literally brought tears to my eyes as even with 'mamooli' oil, the best quote up north for the service is around Rs. 7,000/- without the fuel filter.
Why do you prefer synthetic oil? I do not see any perceptible difference between both for my kind of usage and requirements. Hariya (My Scorpio CRDe) lasted healthily for 2.70 lac km using Mahindra Maximile (mamooli oil) without any impact on engine performance or mileage.

BTW, what is Car Lubricant?
 
Last edited:
Thread Starter #59
Joined
Nov 28, 2015
Messages
427
Likes
814
Location
Roorkee
I have ordered brake pads (aftermarket) and will compare them with your pictures. Also, as long as they are genuine Tokico, I am happy.
I think now HM in India has moved to Advics for both front & rear. The performance is same while wear seems to be lower as the pads were in great shape during the last cleaning done after 10,000 Kms of install.
Else, I will replace them with Brembo discs and pads.
Is it available officially in India or direct import is required?
Also, the chamfer in brake pads reduces brake squeal and hence is good to have.
Learned a new thing - thanks. As a layman I thought that the change in friction area due to the chamfer would affect braking performance which would increase with the pad wear.
Yeah, have seen it in quite a few vehicles. I know what will fix it and I will get around to doing it sometime next week.
Please do share the fix.
Why do you prefer synthetic oil?
For the temperature swings encountered, I was of the opinion that synthetic would be a better choice. Also, as mentioned earlier, the oil pressure light used to flash once after a cold start with mineral oil but no such thing since the switch to synthetic oil. Apart from this, the biggest mental barrier I have is I don't prefer the oils from the 200L drum which is the case with the mineral oil at the workshop.
Hariya (My Scorpio CRDe) lasted healthily for 2.70 lac km using Mahindra Maximile (mamooli oil) without any impact on engine performance or mileage.
Great to know that you too graduated from Scorpio. Infact, in the Scorpio I too never used synthetic oil as they had special packing for the Scorpio.
BTW, what is Car Lubricant?
It was some additional Wurth spray for the door hinges, their beading and some blueish coat on the battery terminals among other things.
 
Status
Not open for further replies.
Top Bottom