This still doesn't answer my question ! My question is " can the 12 V socket be used for cigarette lighters too ?"
Maruti Suzuki Baleno Hatchback: Accessories & Modifications
- Thread Starter RDx.
- Start date
Update for Baleno ZETA owners :
DIY REAR VIEW CAMERA INSTALLATION
Disclaimer : NO IMAPACT ON WARRANTY if exact Tapping Connections are used.
This DIY is only for ZETA owners. Apologies for poor quality of pictures and less number of picture for STEP 4. Full credits to TAI.
THE DIY IS FULLY REVERSIBLE if the BLACK CAP in rear chrome strip is replaced by New one. Part No. 39977M68P00
As this DIY was done before 45 days, NO ISSUES OR RATTLES ARE FOUND.
Tools :
a. Drilling Machine
b. Star Screw Driver
c. Tool post or Bit Spanner Size : 10
d. Cutting Players
Components :
a. Xenos(or any branded) 16.5mm Flush type camera. CAUTION CAUTION : 16.5mm diameter only. COST : Rs1200
b. Suitable display(Mirror or Dashboard mount-I Have Used MGA) COST : Depends on Type of display
c. Tapping connectors. COST : Rs 5 each
d. Wires. COST : Rs 15 per meter
Step 1 : Remove the rear hatch and use the Grove circled in the picture for removing the Trim panel.
There are 12 clips to be removed. Remove them in Anticlockwise direction.
Step 2 : There are Two 10 sized nuts beneath the crome strip at circled places. Remove them gently.
Step 3 : Remove two Star screws circled in the picture which holds the black cap to the crome strip.
Step 4 : Mark diagonal cross lines on the face of black cap to obtain its centre.
Hold the cap firmly using Players and drill the hole using Drill bit provided with the camera.
Insert the camera gently. CAUTION : Dont firmly install camera till Step-8 is completed.
Step 5-1,2,3 : Route the wires as shown in the Picture
Step 6 : Remove two 10 Sized bolts holding the Left side tail Light and gently pull the Assembly outwards.
Use Tapping connectors to provide power for Camera From Reversing Light.
TIP(iff necessary, not preferred) : If you are finding short of connectors, just TAP +ve terminal and connect -ve terminal of camera to a Bolt connected to car Body.
Step 7 : Connect a suitable monitor at a required place in Dashboard or mirror. Connect Camera to Display.
Get power for Display at the same place in Step - 6 as it doesnot require tapping again.
Step 8 : Start the vehicle and engage Reverse Gear. Rotate camera till you get the exact view from camera.
Now push the camera and fix it firmly. Take help of a friend to align camera.
Step 9 :
a. Fix the Black cap to chrome strip.
b. Fix the Chrome strip to Rear hatch. CAUTION CAUTION : These 10 Sized nuts should be tightened gently!! Never Overtighten it!!
c. Fix the rear tail light assembly.
d. Fix the Black Trim Panel in Clockwise direction.
ALL SUGGESTIONS ARE WELCOME.
I would be glad to help if you need any other pictures or procedure.
CHEERS !!
Hello everyone
I am looking for upgrading my music system can anyone guide me with it
I have with me a jbl gt5-s12 subwoofer in a tube do I need to get it replaced in a box or tube is good? Also I would require advice on blaupunkt 470 dsp 4 channel amplifier
And also suggest me a good components in 6-7k range
Thanxx
Hi...I booked Baleno Alpha petrol from Hisar Nexa on 16 Apr and yesterday I got a call that my car has come. Planning to take delivery in Wednesday or Thursday..Kindly help me what all to take from nexa and what to avoid. So far I had only given 11K as booking amount. And purchase is from CSD so no money directly being handed over to dealer.
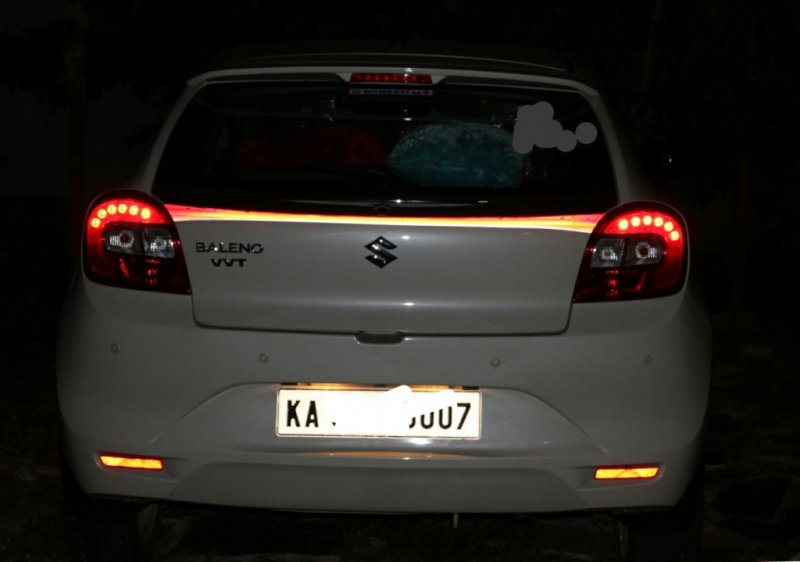
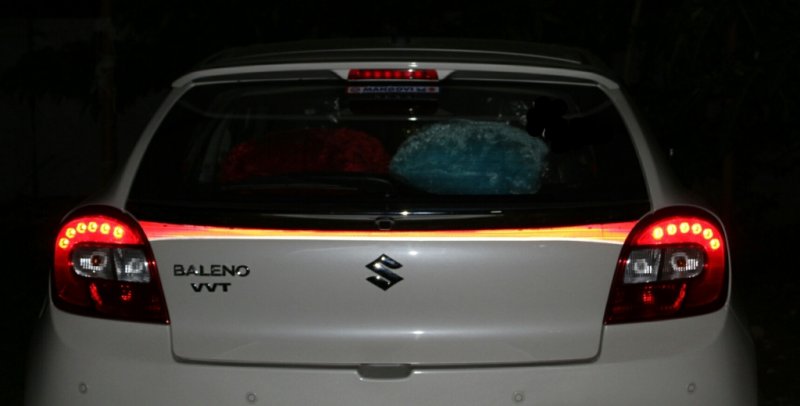
3M reflector, an experiment on my ZETA.
Attachments
-
 362.7 KB Views: 1,883
 -
 287.2 KB Views: 1,597
hi guyz,
expecting my baleno delivered by 10 june , so these days i'm bussy in making a list of accessories i like to install in my baleno. As i have booked zeta variant , so my top priority would be the reverse parking camera and i'm confused weather should i go for mga or from outside, as i have read in few posts that mga reverse camera quality is not good and my main concern is that they install the camera after drilling at he back but i need to install it in the back chrome strip as in the alpha variant. been through kashyap post and i like the way he explained how to install, but i'm afraid i wont be able to do that also i looked online for xenos 16.5mm flush camera but i haven't found one as displayed in the pic.
so i'm confused what to do , please guyz if any one had installed the camera and screen from nexa let me know how is the quality of the screen and are they installing on chrome strip or otherway.
also i booked my baleno from karol bagh delhi if any one else i there let me know . and also like to know best place to install reverse parking camera outside nexa .
Update for Baleno ZETA owners :
DIY REAR VIEW CAMERA INSTALLATION
Disclaimer : NO IMAPACT ON WARRANTY if exact Tapping Connections are used.
This DIY is only for ZETA owners. Apologies for poor quality of pictures and less number of picture for STEP 4. Full credits to TAI.
THE DIY IS FULLY REVERSIBLE if the BLACK CAP in rear chrome strip is replaced by New one. Part No. 39977M68P00
As this DIY was done before 45 days, NO ISSUES OR RATTLES ARE FOUND.
Tools :
a. Drilling Machine
b. Star Screw Driver
c. Tool post or Bit Spanner Size : 10
d. Cutting Players
Components :
a. Xenos(or any branded) 16.5mm Flush type camera. CAUTION CAUTION : 16.5mm diameter only. COST : Rs1200
b. Suitable display(Mirror or Dashboard mount-I Have Used MGA) COST : Depends on Type of display
c. Tapping connectors. COST : Rs 5 each
d. Wires. COST : Rs 15 per meter
Step 1 : Remove the rear hatch and use the Grove circled in the picture for removing the Trim panel.
There are 12 clips to be removed. Remove them in Anticlockwise direction.
Step 2 : There are Two 10 sized nuts beneath the crome strip at circled places. Remove them gently.
Step 3 : Remove two Star screws circled in the picture which holds the black cap to the crome strip.
Step 4 : Mark diagonal cross lines on the face of black cap to obtain its centre.
Hold the cap firmly using Players and drill the hole using Drill bit provided with the camera.
Insert the camera gently. CAUTION : Dont firmly install camera till Step-8 is completed.
Step 5-1,2,3 : Route the wires as shown in the Picture
Step 6 : Remove two 10 Sized bolts holding the Left side tail Light and gently pull the Assembly outwards.
Use Tapping connectors to provide power for Camera From Reversing Light.
TIP(iff necessary, not preferred) : If you are finding short of connectors, just TAP +ve terminal and connect -ve terminal of camera to a Bolt connected to car Body.
Step 7 : Connect a suitable monitor at a required place in Dashboard or mirror. Connect Camera to Display.
Get power for Display at the same place in Step - 6 as it doesnot require tapping again.
Step 8 : Start the vehicle and engage Reverse Gear. Rotate camera till you get the exact view from camera.
Now push the camera and fix it firmly. Take help of a friend to align camera.
Step 9 :
a. Fix the Black cap to chrome strip.
b. Fix the Chrome strip to Rear hatch. CAUTION CAUTION : These 10 Sized nuts should be tightened gently!! Never Overtighten it!!
c. Fix the rear tail light assembly.
d. Fix the Black Trim Panel in Clockwise direction.
ALL SUGGESTIONS ARE WELCOME.
I would be glad to help if you need any other pictures or procedure.
CHEERS !!
DIY REAR VIEW CAMERA INSTALLATION
Disclaimer : NO IMAPACT ON WARRANTY if exact Tapping Connections are used.
This DIY is only for ZETA owners. Apologies for poor quality of pictures and less number of picture for STEP 4. Full credits to TAI.
THE DIY IS FULLY REVERSIBLE if the BLACK CAP in rear chrome strip is replaced by New one. Part No. 39977M68P00
As this DIY was done before 45 days, NO ISSUES OR RATTLES ARE FOUND.
Tools :
a. Drilling Machine
b. Star Screw Driver
c. Tool post or Bit Spanner Size : 10
d. Cutting Players
Components :
a. Xenos(or any branded) 16.5mm Flush type camera. CAUTION CAUTION : 16.5mm diameter only. COST : Rs1200
b. Suitable display(Mirror or Dashboard mount-I Have Used MGA) COST : Depends on Type of display
c. Tapping connectors. COST : Rs 5 each
d. Wires. COST : Rs 15 per meter
Step 1 : Remove the rear hatch and use the Grove circled in the picture for removing the Trim panel.
There are 12 clips to be removed. Remove them in Anticlockwise direction.
Step 2 : There are Two 10 sized nuts beneath the crome strip at circled places. Remove them gently.
Step 3 : Remove two Star screws circled in the picture which holds the black cap to the crome strip.
Step 4 : Mark diagonal cross lines on the face of black cap to obtain its centre.
Hold the cap firmly using Players and drill the hole using Drill bit provided with the camera.
Insert the camera gently. CAUTION : Dont firmly install camera till Step-8 is completed.
Step 5-1,2,3 : Route the wires as shown in the Picture
Step 6 : Remove two 10 Sized bolts holding the Left side tail Light and gently pull the Assembly outwards.
Use Tapping connectors to provide power for Camera From Reversing Light.
TIP(iff necessary, not preferred) : If you are finding short of connectors, just TAP +ve terminal and connect -ve terminal of camera to a Bolt connected to car Body.
Step 7 : Connect a suitable monitor at a required place in Dashboard or mirror. Connect Camera to Display.
Get power for Display at the same place in Step - 6 as it doesnot require tapping again.
Step 8 : Start the vehicle and engage Reverse Gear. Rotate camera till you get the exact view from camera.
Now push the camera and fix it firmly. Take help of a friend to align camera.
Step 9 :
a. Fix the Black cap to chrome strip.
b. Fix the Chrome strip to Rear hatch. CAUTION CAUTION : These 10 Sized nuts should be tightened gently!! Never Overtighten it!!
c. Fix the rear tail light assembly.
d. Fix the Black Trim Panel in Clockwise direction.
ALL SUGGESTIONS ARE WELCOME.
I would be glad to help if you need any other pictures or procedure.
CHEERS !!
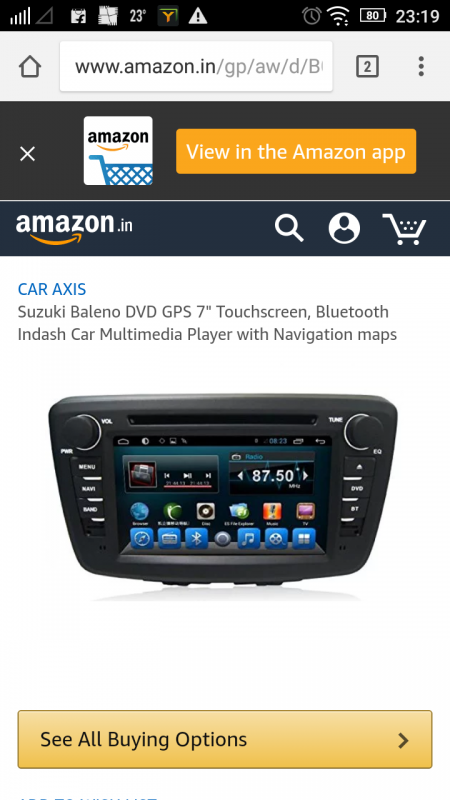
I am planning to install a touch screen audio setup with bluetooth and navigation for my baleno delta. Need advice on various options.
1. Can I install the alpha touch screen setup. How much it gonna cost?
2. If any aftermarket solution available? Will i be able to retain the link with steering mounted audio controls. If any one has any link where I can purchase that would be great.
3. I found one in amazon as you see in the image. But not sure how this unbranded one will suit baleno. I liked it most and badly looking for something like this either from a reputed online seller or good accessory shop either in Hyderabad or Bangalore
Attachments
-
 258.5 KB Views: 421
I am planning to install a touch screen audio setup with bluetooth and navigation for my baleno delta. Need advice on various options.
1. Can I install the alpha touch screen setup. How much it gonna cost?
2. If any aftermarket solution available? Will i be able to retain the link with steering mounted audio controls. If any one has any link where I can purchase that would be great.
3. I found one in amazon as you see in the image. But not sure how this unbranded one will suit baleno. I liked it most and badly looking for something like this either from a reputed online seller or good accessory shop either in Hyderabad or Bangalore
1. Can I install the alpha touch screen setup. How much it gonna cost?
2. If any aftermarket solution available? Will i be able to retain the link with steering mounted audio controls. If any one has any link where I can purchase that would be great.
3. I found one in amazon as you see in the image. But not sure how this unbranded one will suit baleno. I liked it most and badly looking for something like this either from a reputed online seller or good accessory shop either in Hyderabad or Bangalore
Please refer to the last page of this thread at below link.
http://www.theautomotiveindia.com/f...no-2015-zeta-petrol-ownership-review-102.html
I too am a baleno owner with zeta model. I had the same questions as you.
You can see what i opted to go for and why. Let me know if you need anything more.
I have also attached the cost and photos of the reverse cam setup of mine.
Edit: Mine does not have navigation.
Last edited:
There are a lot of shortcomings with the pioneer units
1. They are resistive touch screens, not capacitive. Meaning they are less sensitive
2. They are based off Win CE. So they dont have android auto
That being said, Pioneer units have the best sound quality.
Alternative to this is Sony XAV 100. It also has similar issues and price.
There are other things you need to be concerned about. Firstly, these accessoriesdont really add to the car's value. You wont recover their cost especially if you have the versions with HU. Secondly there is always the chance you will lose the original fit and finish either through something breaking or through large gaps in the dash during installation. The inly way to keep the original look is to order through aliexpress and that chinese stuff isint necessarily reliable
plus, in most casex, we need better sound quality because touch screens are more of a gimmick in cars and most navigation can be done off the phones
Ameyam
There are a lot of shortcomings with the pioneer units
1. They are resistive touch screens, not capacitive. Meaning they are less sensitive
2. They are based off Win CE. So they dont have android auto
Ameyam
1. They are resistive touch screens, not capacitive. Meaning they are less sensitive
2. They are based off Win CE. So they dont have android auto
Ameyam
How about installing the alpha audio setup in delta. Is it possible?
Frankly, even i want to change my HU. Like many others, i want better sound quality and android auto, not necessarily navigation. But i am cash strapped. Will do some searching and inform
Ameyam
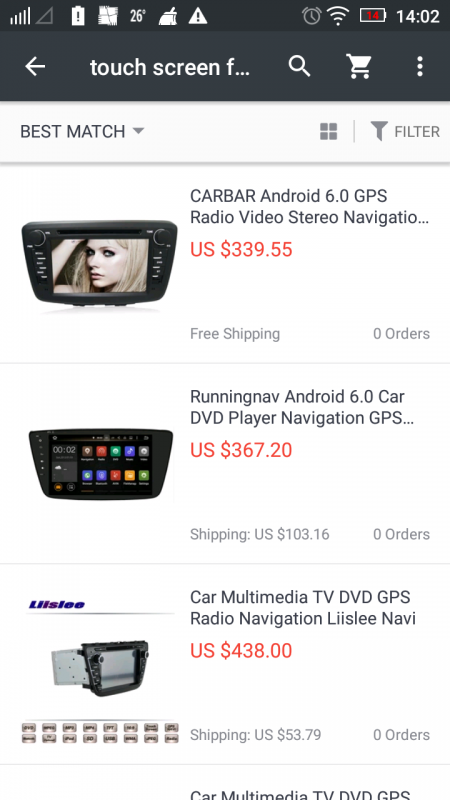
I found the below two is the best looking.. Even i do not like the alpha setup. It looks like a tablet was put there and looks more of a after market setup. Though I am getting good setup in ali express but not sure how reliable it will be .
Attachments
-
 217 KB Views: 174
"Step 4 : Mark diagonal cross lines on the face of black cap to obtain its centre.
Hold the cap firmly using Players and drill the hole using Drill bit provided with the camera.
Insert the camera gently."
Hold the cap firmly using Players and drill the hole using Drill bit provided with the camera.
Insert the camera gently."
Last edited by a moderator: