Oh finally there is a update ! The dash looks better now. Which color have you painted for the air vents,instrumental cluster ?
Bought My First Car - Maruti 800 AC
- Thread Starter ss80
- Start date
- Status
- Not open for further replies.
While seeing your dash I remember chocolates !!
Thread Starter
#215
Thanks guys, I know its a crazy colour combination for the dash ![Wink [;)] [;)]](https://www.theautomotiveindia.com/forums/images/smilies/Wink.gif)
I am yet to fix the dashboard in the car, because I am still thinking about the colour I have chosen for the top portion. I can remove it easily using thinner even now, Once I appy the clear coat, I can go ahead with fixing the Dashboard.
I purchased 100/90 wiring kit for my car (Bosch Brand) along with Bosch relay. Costed Rs.690/- Here are the pictures.
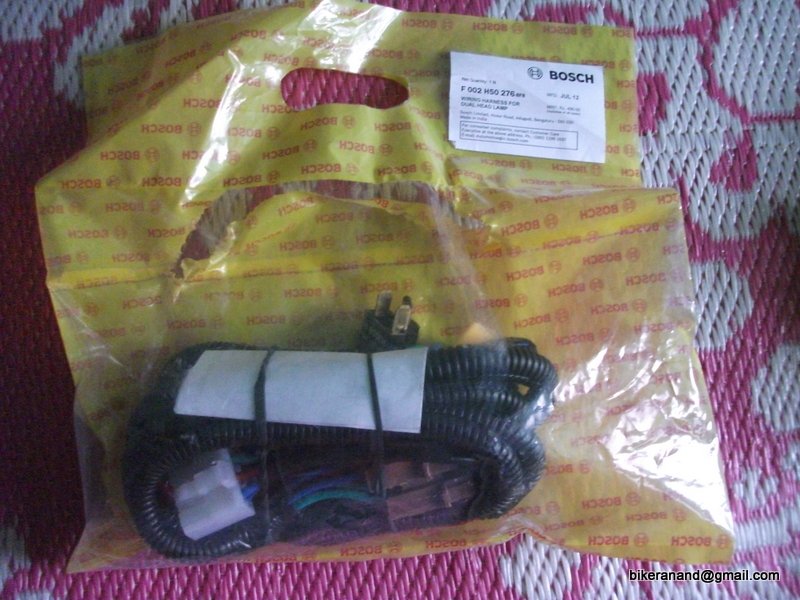
The wiring kit
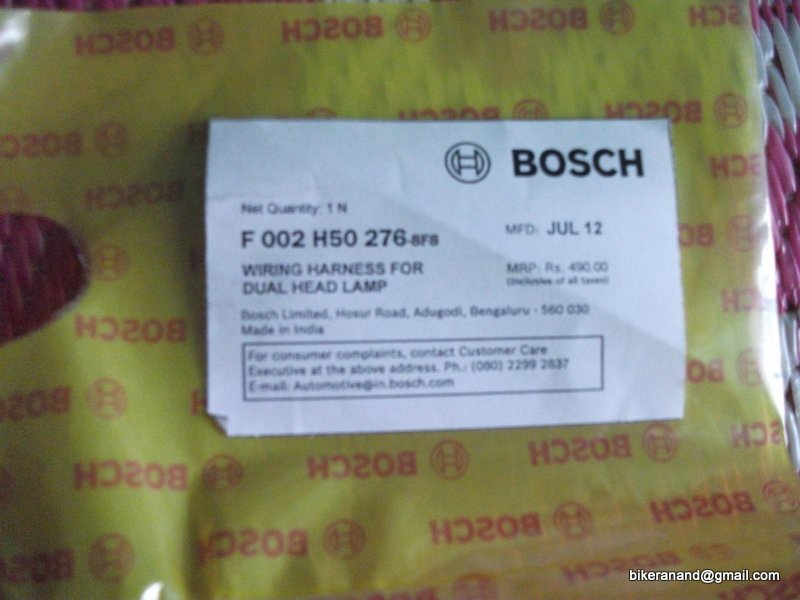
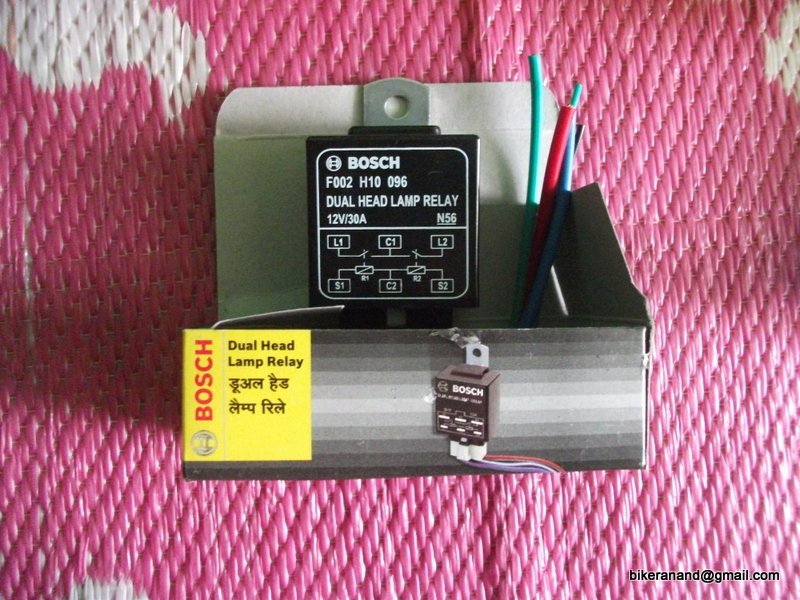
The relay
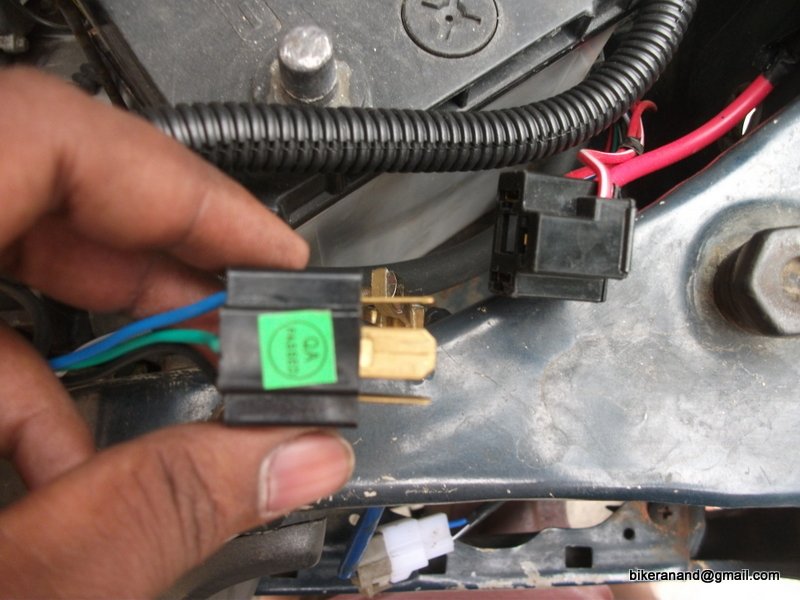
Just open the wiring & you will find 2 ends (yellow bulb holders), one plug in the middle to fit the relay, one connector pin, one positive cable(connects to the battery +ve point) + earthing points (next to each bulb holder)
In the above picture, you can see the connector pin is inserted into our bulb holder (closer to battery).
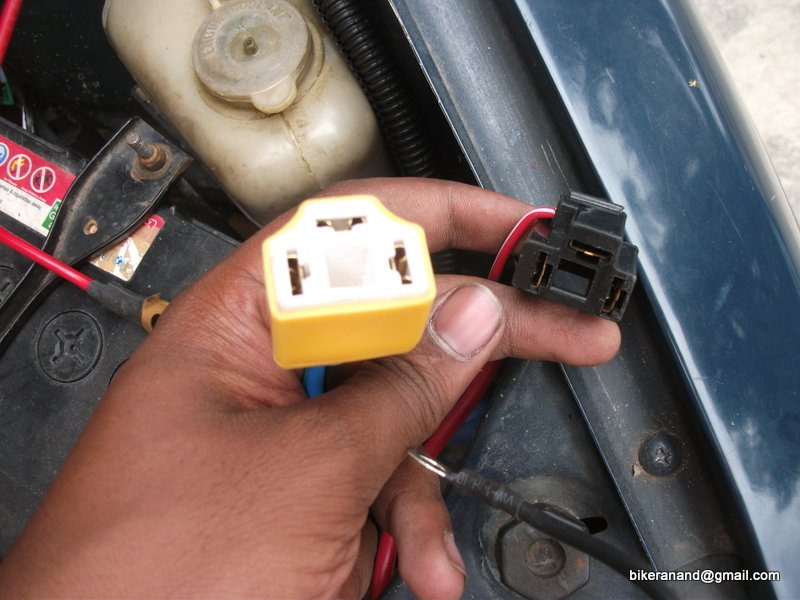
Here the yellow is the Bosch holder, other one is the stock Minda holder.
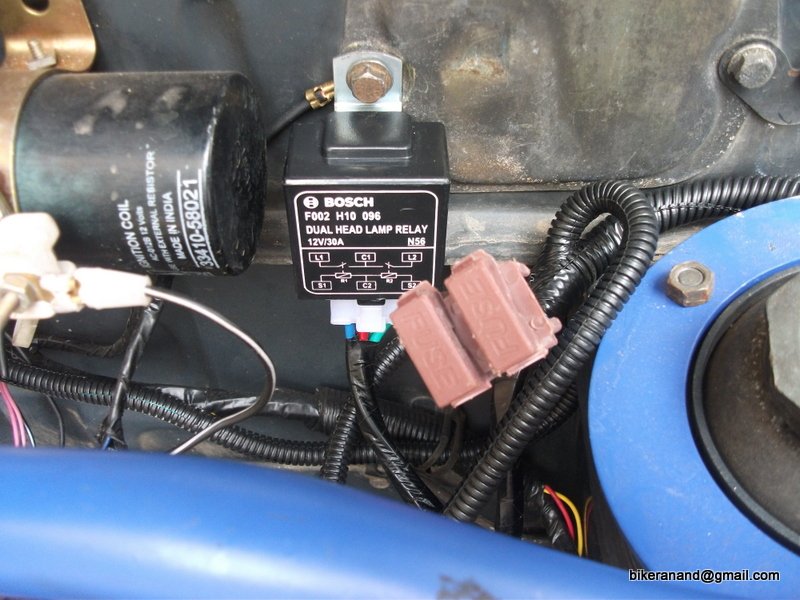
Just bolt the Relay where ever possible & connect it to the socket in the wiring harness

Forgot to mention above, The wiring kit comes with fuse holders & 30Amps Fuses (2Nos)
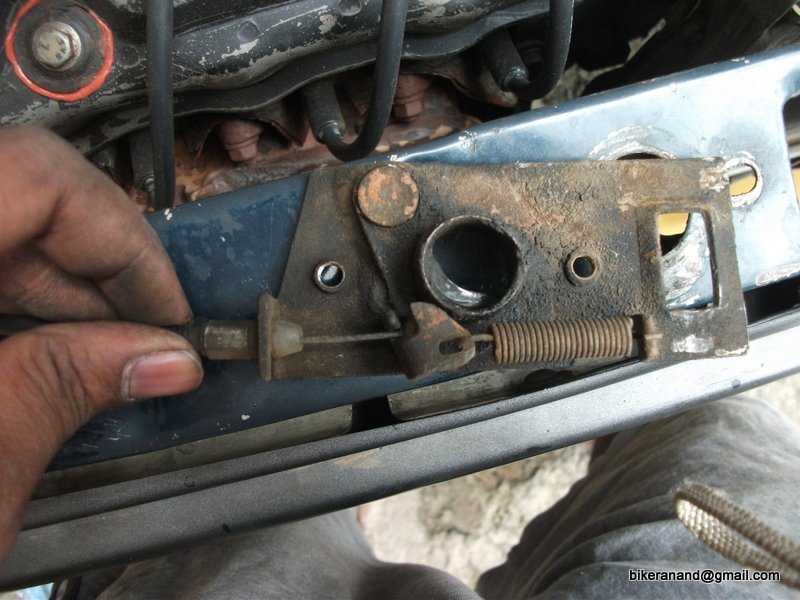
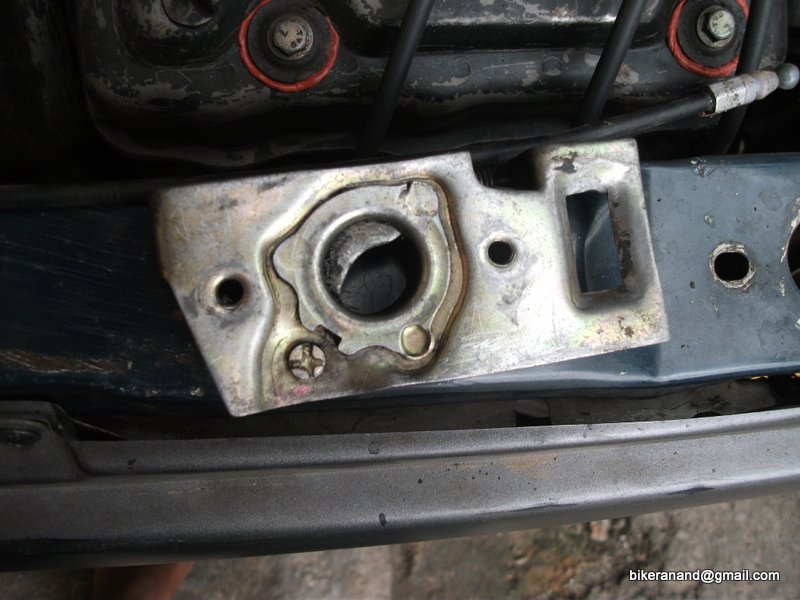
Cleaned the Bonnet release Mechanism
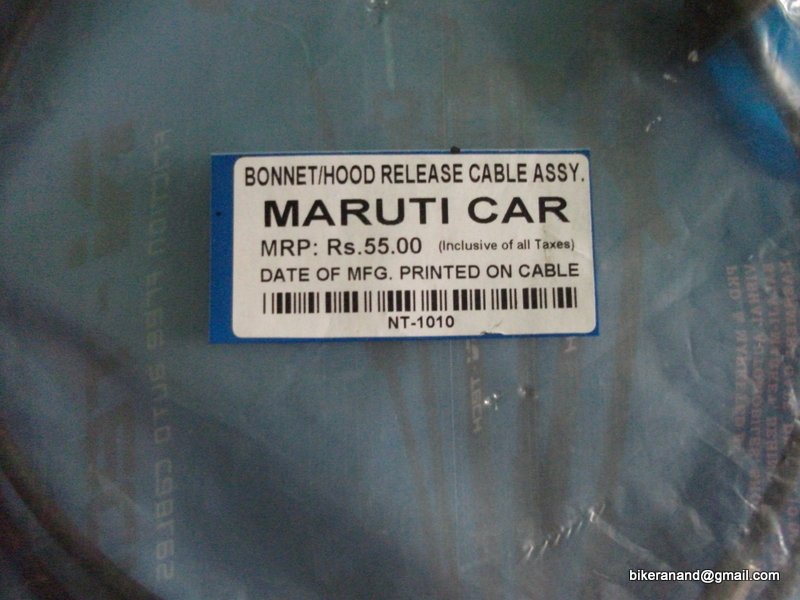
Replaced the bonnet cable too.
Currently working on the Varun DIY - Remote Boot opener, will update ASAP
![Wink [;)] [;)]](https://www.theautomotiveindia.com/forums/images/smilies/Wink.gif)
I am yet to fix the dashboard in the car, because I am still thinking about the colour I have chosen for the top portion. I can remove it easily using thinner even now, Once I appy the clear coat, I can go ahead with fixing the Dashboard.
I purchased 100/90 wiring kit for my car (Bosch Brand) along with Bosch relay. Costed Rs.690/- Here are the pictures.

The wiring kit


The relay

Just open the wiring & you will find 2 ends (yellow bulb holders), one plug in the middle to fit the relay, one connector pin, one positive cable(connects to the battery +ve point) + earthing points (next to each bulb holder)
In the above picture, you can see the connector pin is inserted into our bulb holder (closer to battery).

Here the yellow is the Bosch holder, other one is the stock Minda holder.

Just bolt the Relay where ever possible & connect it to the socket in the wiring harness

Forgot to mention above, The wiring kit comes with fuse holders & 30Amps Fuses (2Nos)


Cleaned the Bonnet release Mechanism
Replaced the bonnet cable too.
Currently working on the Varun DIY - Remote Boot opener, will update ASAP
Attachments
-
337.5 KB Views: 3,078
Any updates, eagerly waiting for the pic's.
Thread Starter
#217
Whenever I update late, I have many reasons for that. This time, both good & sad news is here.
Good news is: Bought new
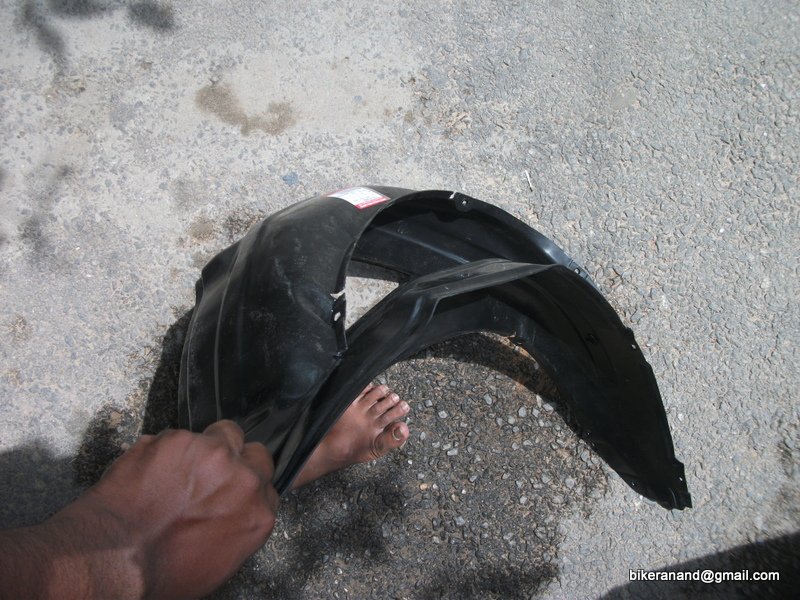
- Fender Liner (plastic cladding inside front wheel wells)
- Front & Rear Bumpers
- Bolts & nuts & brackets (only for rear) to hold them in place
- Fender indicator
- Gearbox Breather pipe cap
- Tail lamp bulb holders
Here are a few pics of the same.
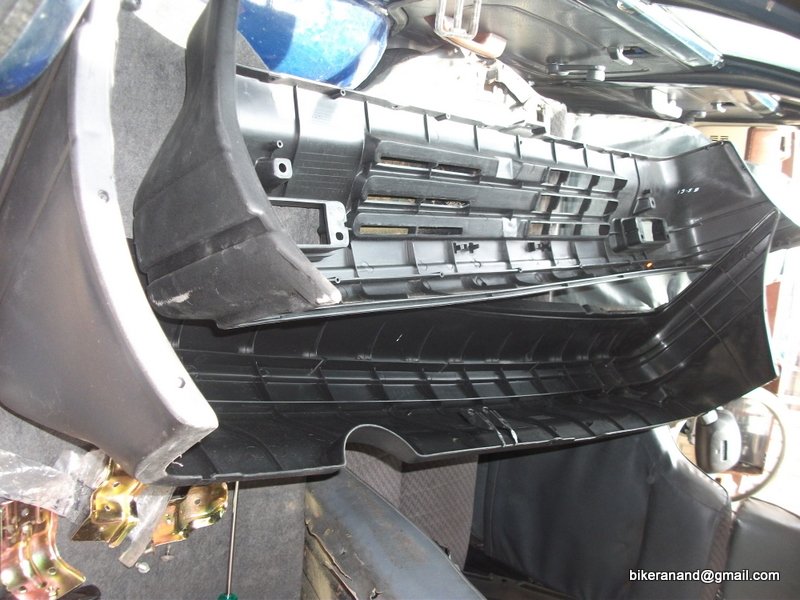
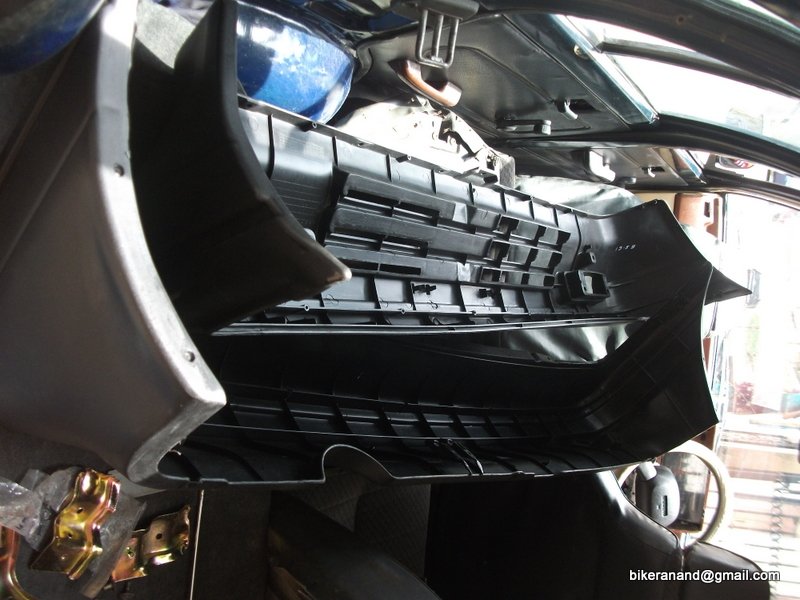
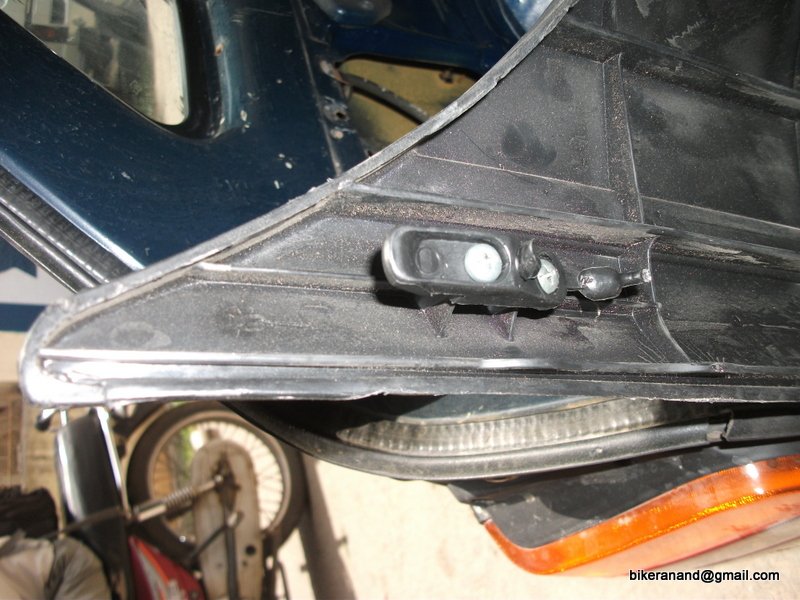
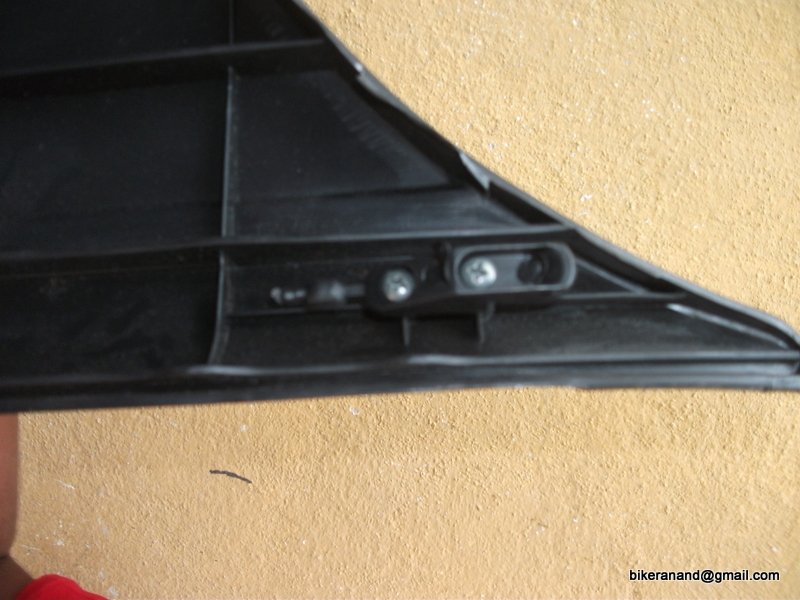
Brought the new bumpers (Split seat at back is very useful)
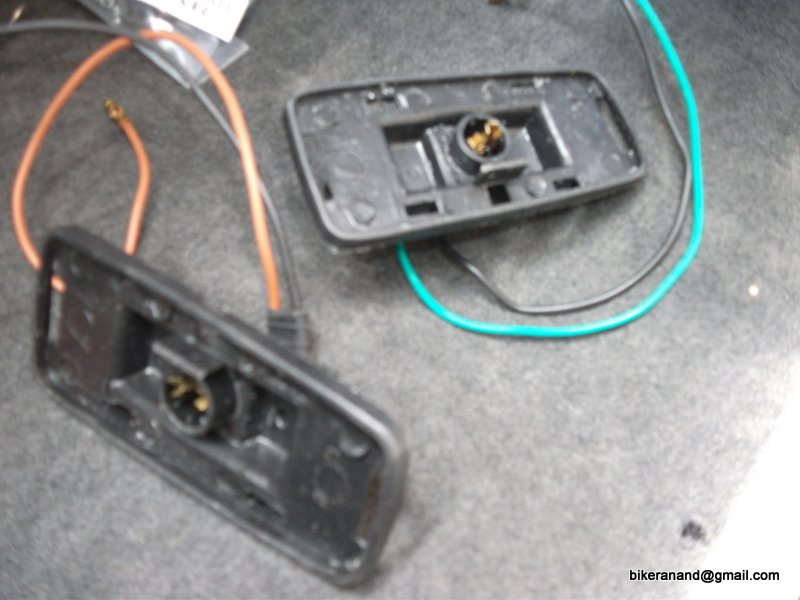
Fender indicators
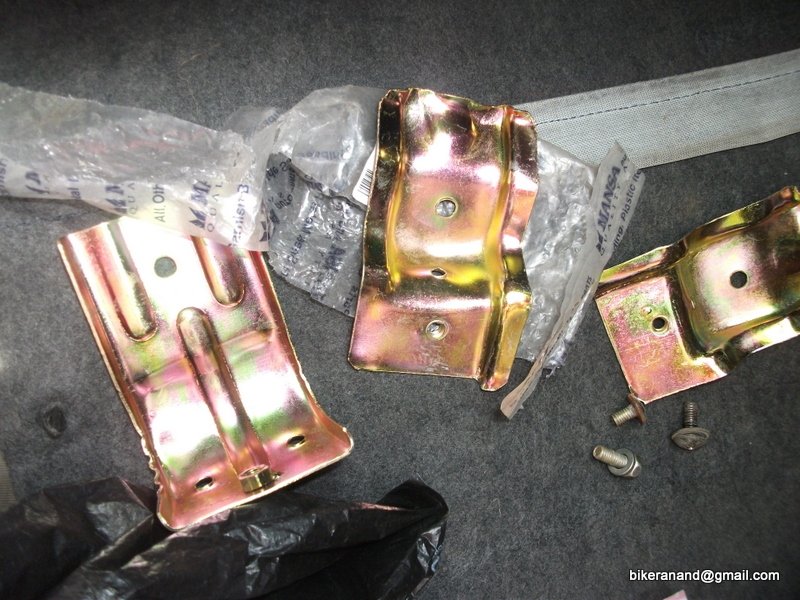
Rear Bumper brackets
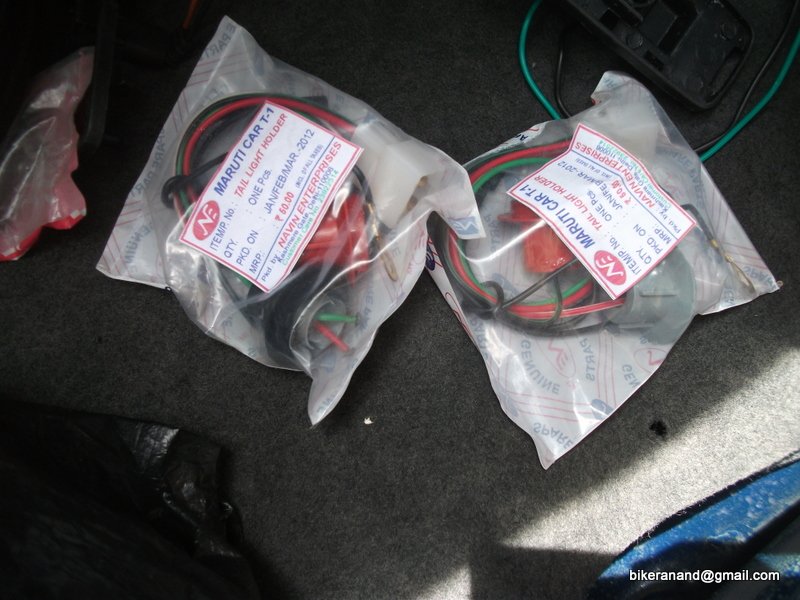
Tail lamp bulb holders (2 nos)
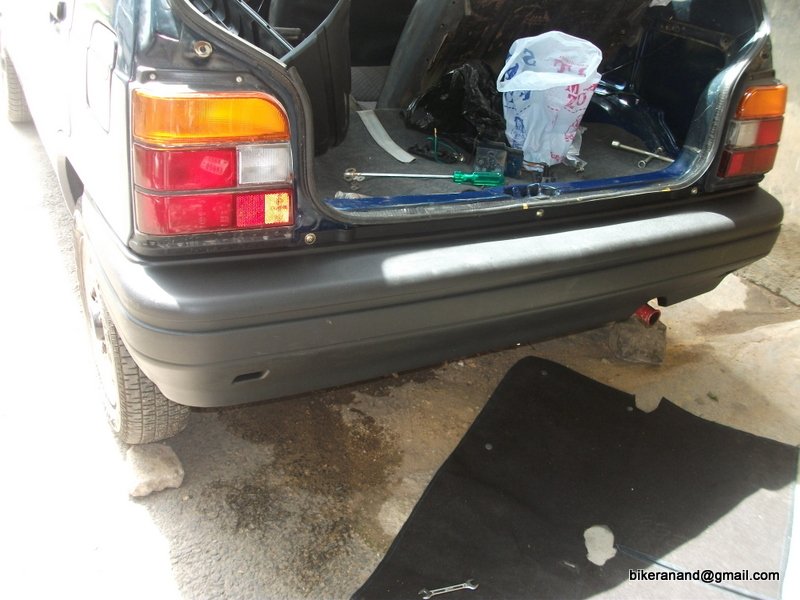
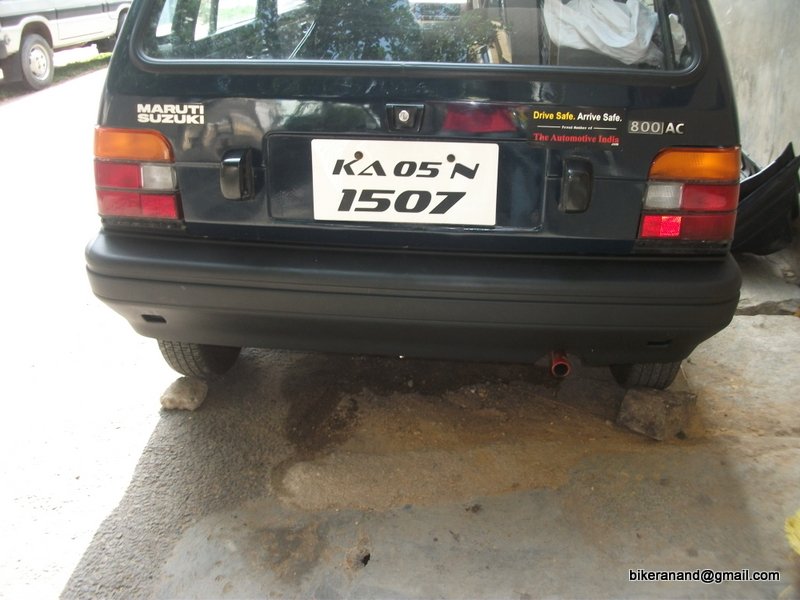
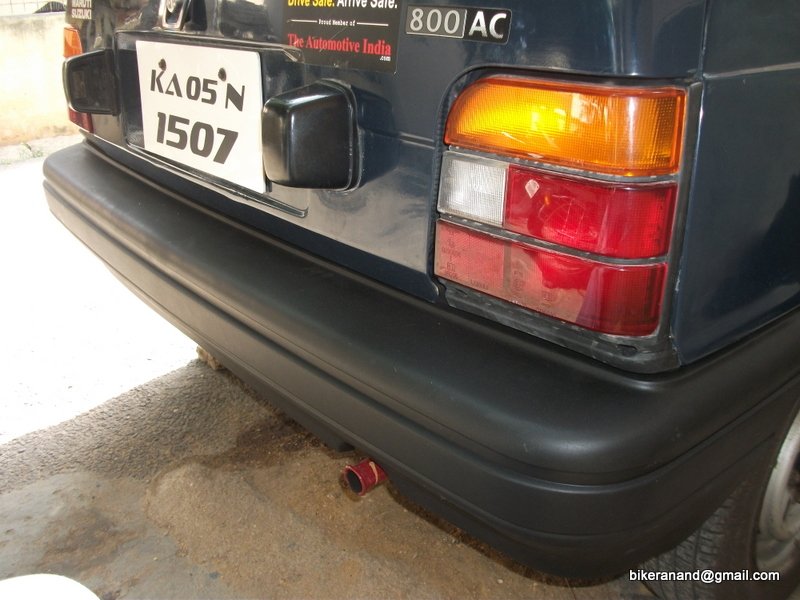
Today managed to install the rear bumpers partially (2bolts remaining) + Fender liners (both properly) + Front bumper partially (4bolts pending)
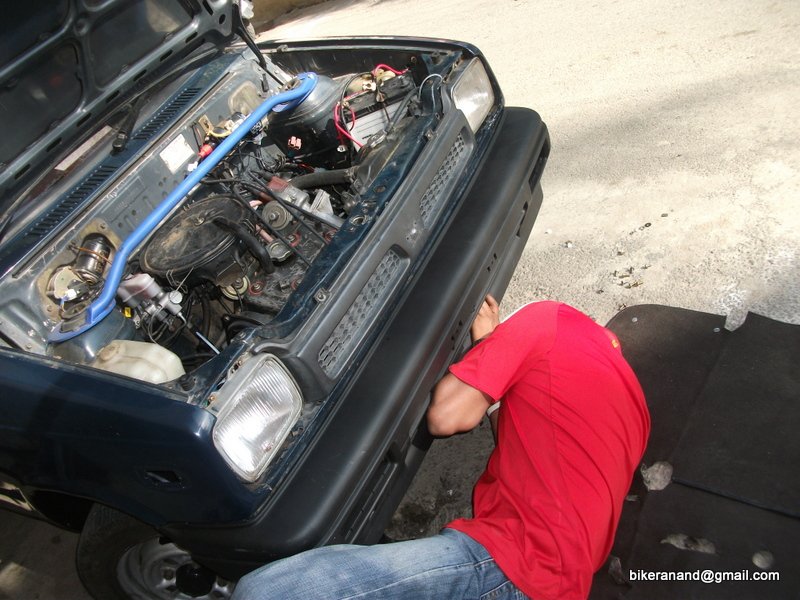
Here are some more pictures of the installation. One of my close friend Volunteered to fix the front bumpers seeing my sad state of mind.
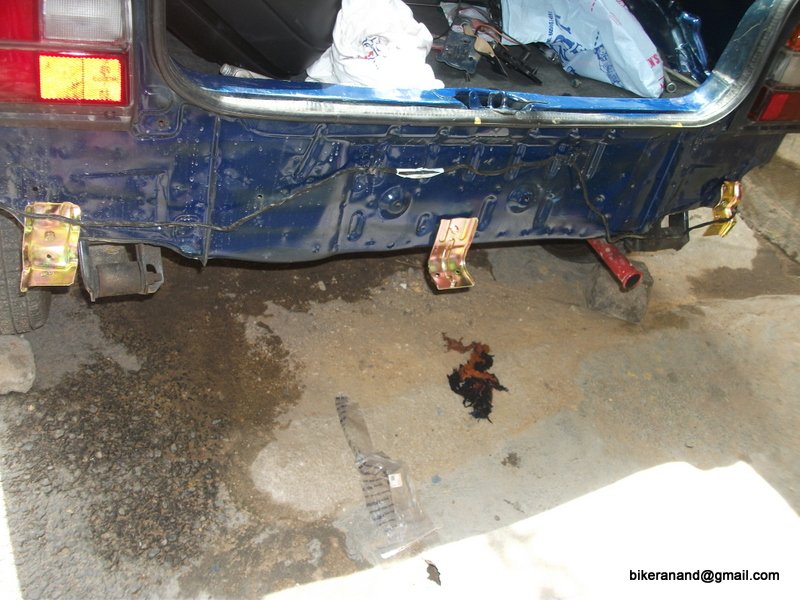
Rear Bumper clamps in place
Plz Note: New clamps needs to bent outwards otherwise they just tend to bend the new bumper.
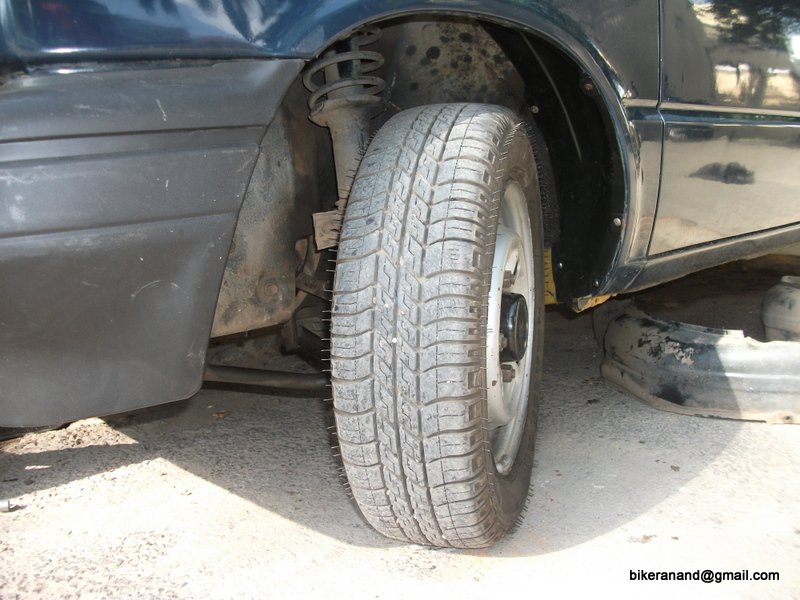
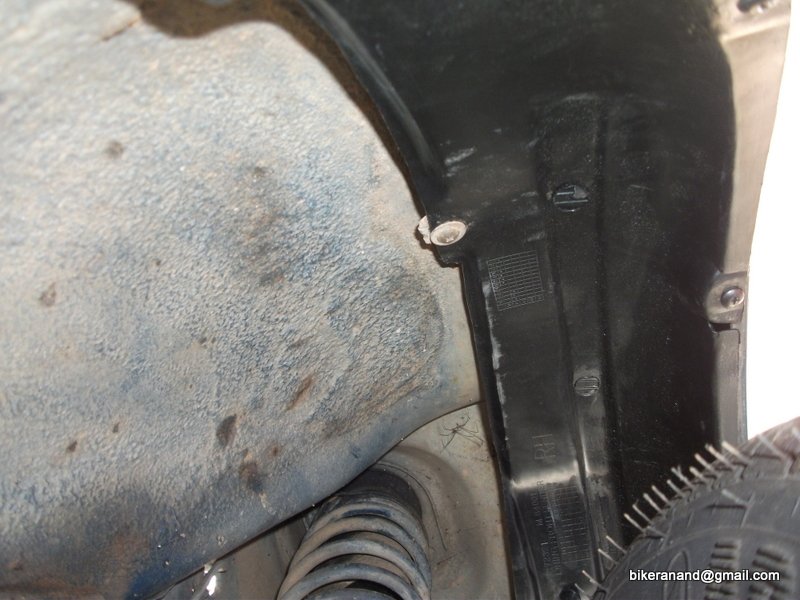
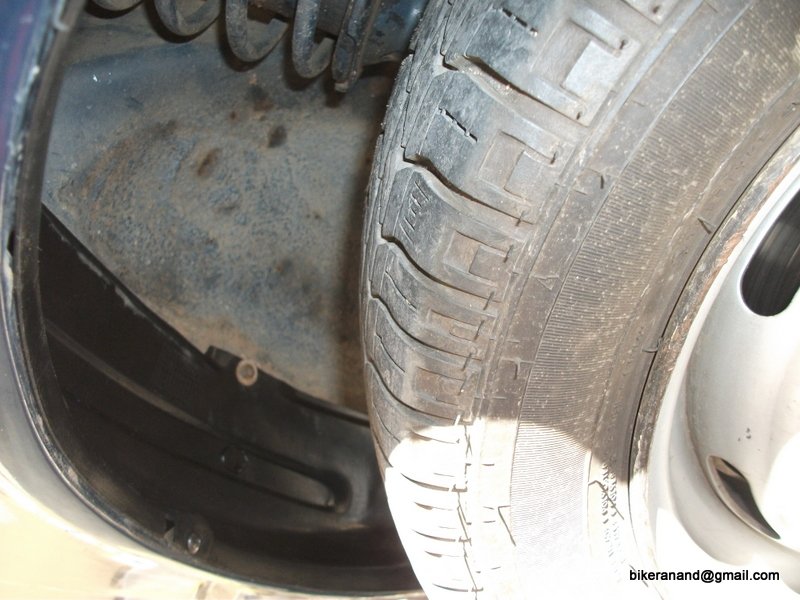
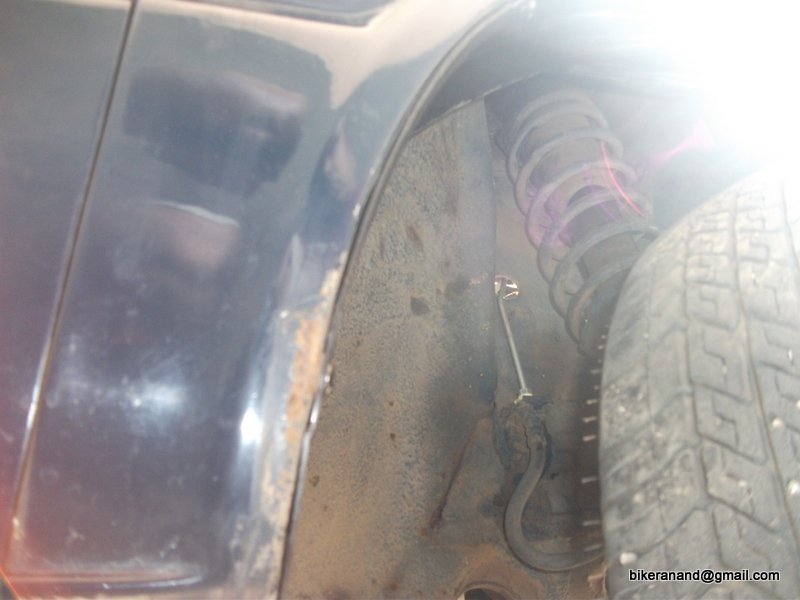
Front Fender Liners Fit
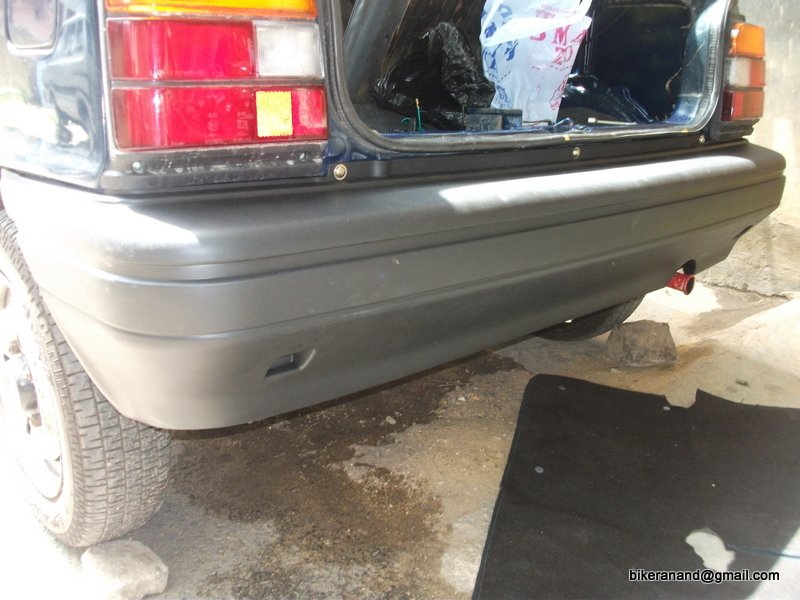
Rear Bumper fixed
Good news is: Bought new
- Fender Liner (plastic cladding inside front wheel wells)
- Front & Rear Bumpers
- Bolts & nuts & brackets (only for rear) to hold them in place
- Fender indicator
- Gearbox Breather pipe cap
- Tail lamp bulb holders
Here are a few pics of the same.


Brought the new bumpers (Split seat at back is very useful)


Fender indicators

Rear Bumper brackets

Tail lamp bulb holders (2 nos)
Today managed to install the rear bumpers partially (2bolts remaining) + Fender liners (both properly) + Front bumper partially (4bolts pending)
Here are some more pictures of the installation. One of my close friend Volunteered to fix the front bumpers seeing my sad state of mind.

Rear Bumper clamps in place
Plz Note: New clamps needs to bent outwards otherwise they just tend to bend the new bumper.


Front Fender Liners Fit

Rear Bumper fixed


Good to see an update. New bumpers look good. Need a final look.
I can see all the mud flaps missing, please put them back. It looks very odd without that.
I can see all the mud flaps missing, please put them back. It looks very odd without that.
Thread Starter
#219
Yesterday I had been to Kolar. Before I started off I just fixed the dashboard patially (with a few screws & the speedometer console, seats & bumpers etc. There is a sort of heavy jerking in the low speeds (as if carb is choked, yes i did check the choke cable) but once I am above 80kmph pick up is smooth, I clocked 120Kmph max (dead roads, not a crow in sight! I could not believe). Booster did save my life a couple of times yesterday as I had met monkeys & street dogs on the highway (big surprise).
I am really happy that my DIY wiring isnt an issue, my car travels faster than before without any electrical issues![Smile [:)] [:)]](https://www.theautomotiveindia.com/forums/images/smilies/Smile.gif) .
.
Couple of issues that I noticed yesterday were
- Kind of bouncy ride quality on NH highway without potholes (may be rear dampers needs to changed)
- Rear Headrest is a must, will do it soon (Varun plz help me out here, I think the Alto Vxi model rear seat has everything we want)
- Leakage of gear oil is more now (compared to last week)
- Front wheel needs balancing or new rims (alignment done recently)
Couple of things I noticed today that really put me off are here
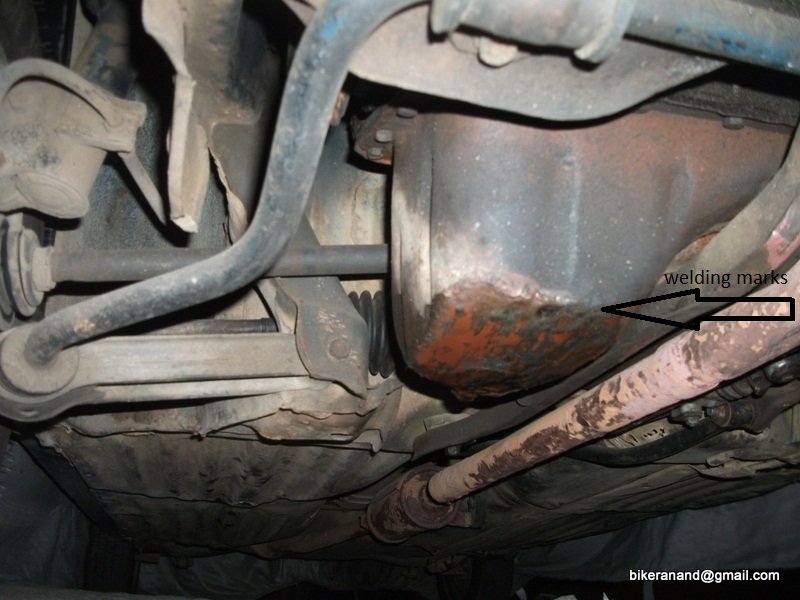
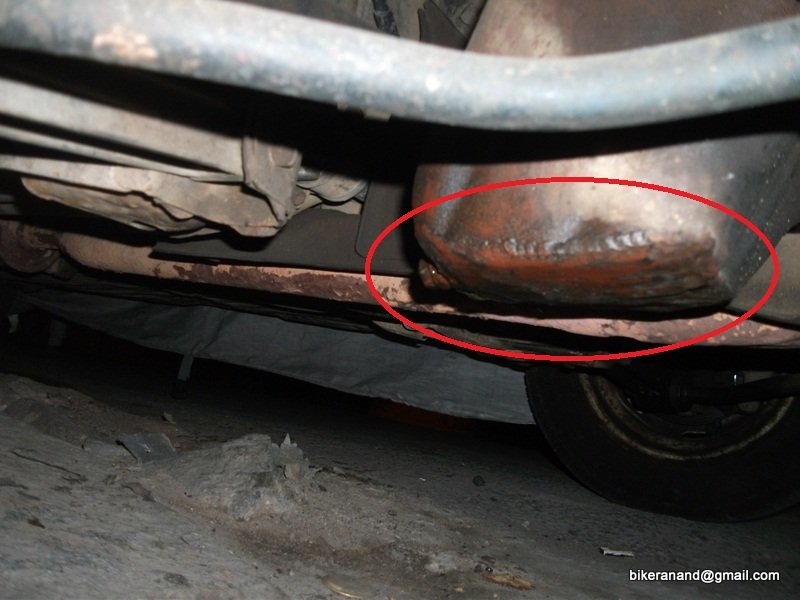
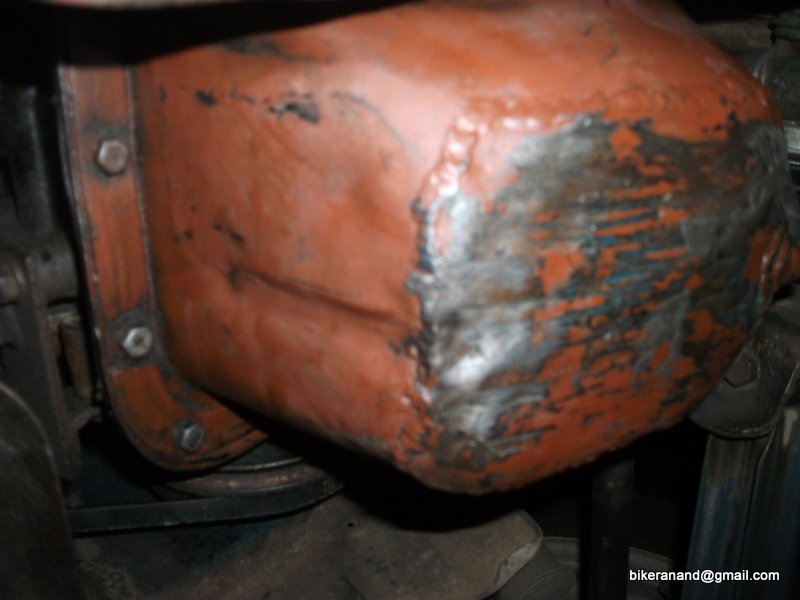
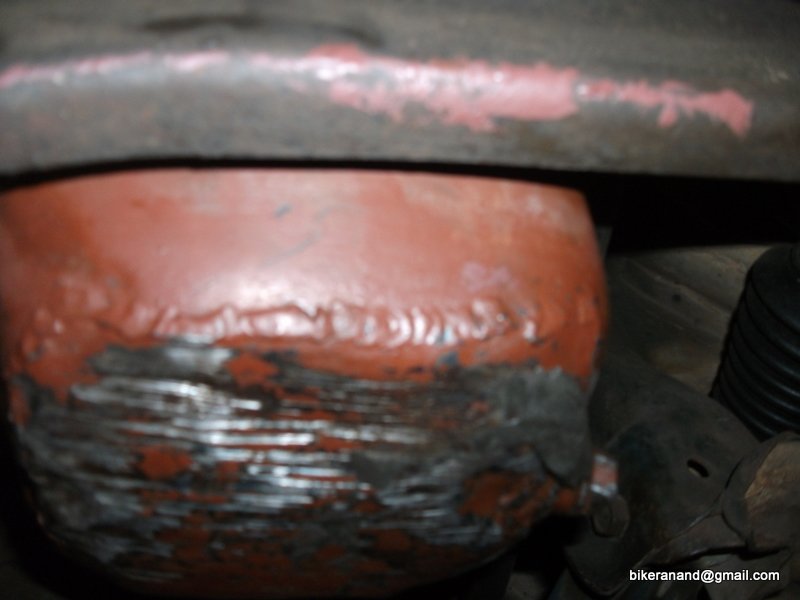
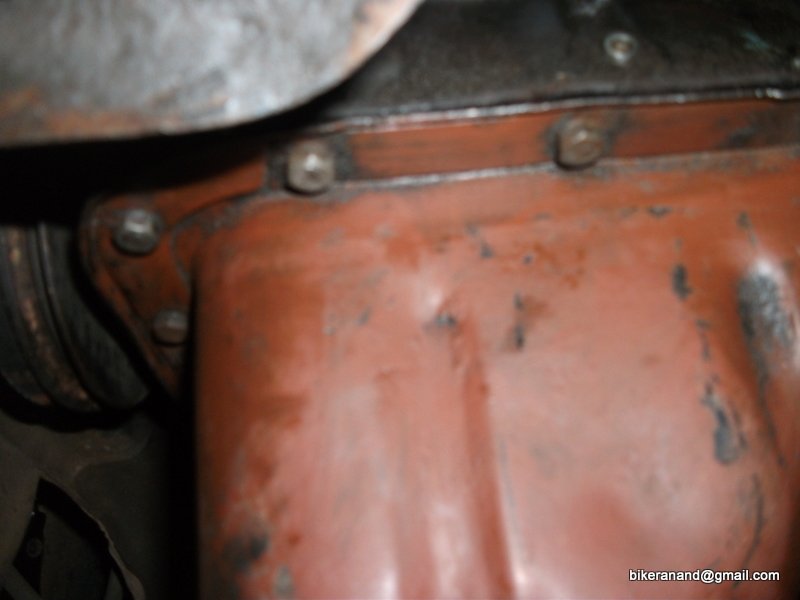
1. My car has started to leak gear oil since a week, after yesterday's drive it seems to be more. The chamber/tank that has this gear oil is welded (signs of previous damage) & there was Mseal around it, I scratched the Mseal out of curiosity & here is the surprise![Frustration [frustration] [frustration]](https://www.theautomotiveindia.com/forums/images/smilies/Frustration.gif)
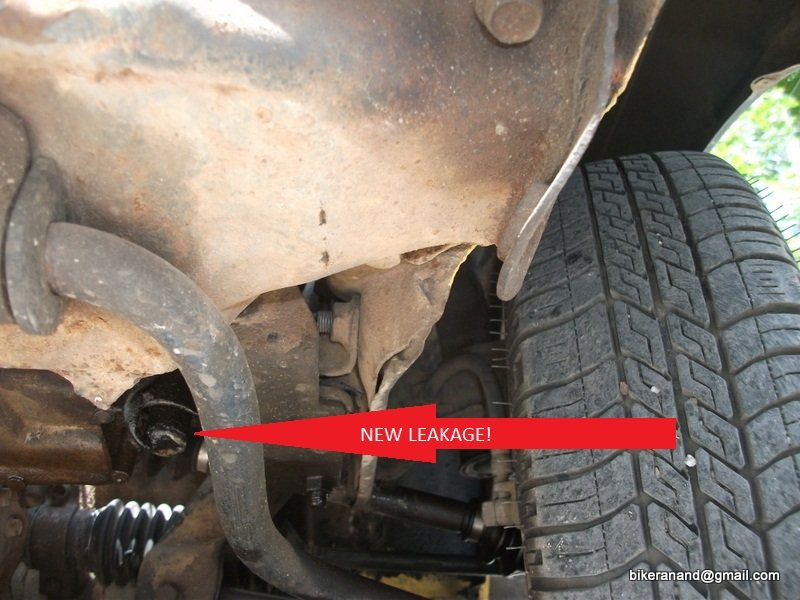
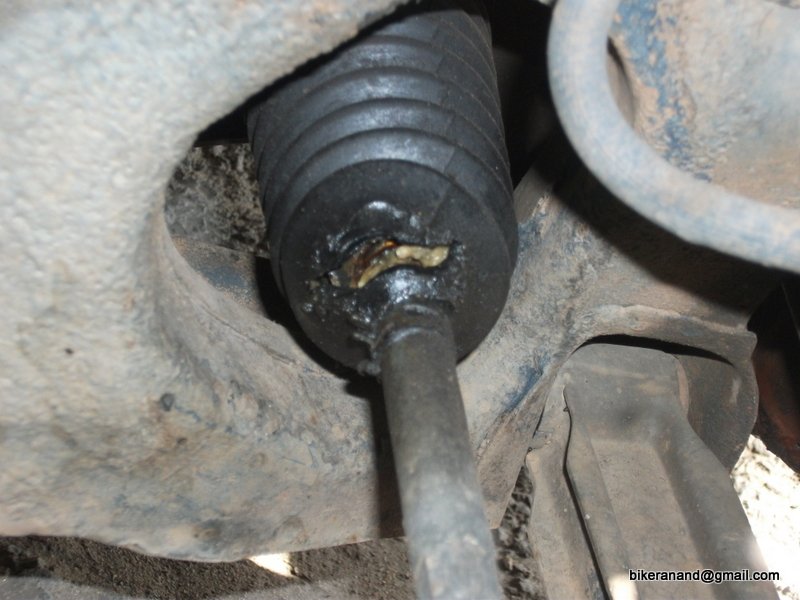
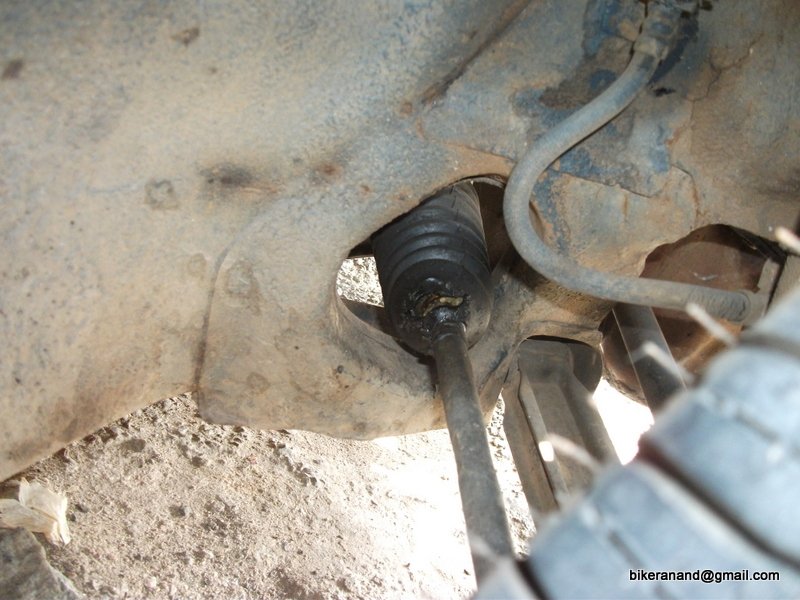
2. Axle boot is cut & I think I am losing the grease inside that rubber thing, may be a major DIY work is on the edge now
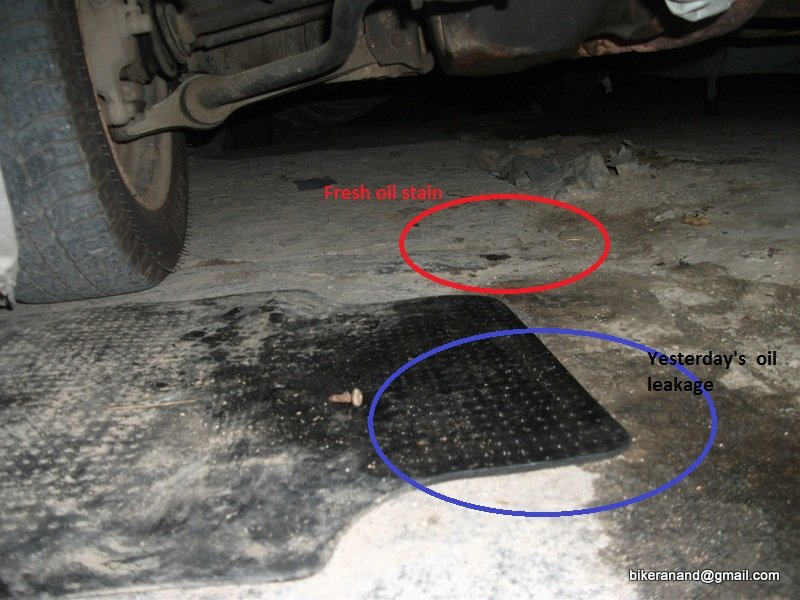
Leakage Issue proof on ground
Zoomed & a little far away picture for clarity
As if this was not enough, I got the saddest news of the day, My car doesnot have ORIGINAL PAINT ON IT. One of my close friend, who also owns a shop on J.C.Road saw my car for the first time & he could make out all the repainted areas & also showed me some uneven surfaces. The rear door had met with accident long back & hence the repaint I guess. Except roof, everywhere else Lacquer coat is missing.
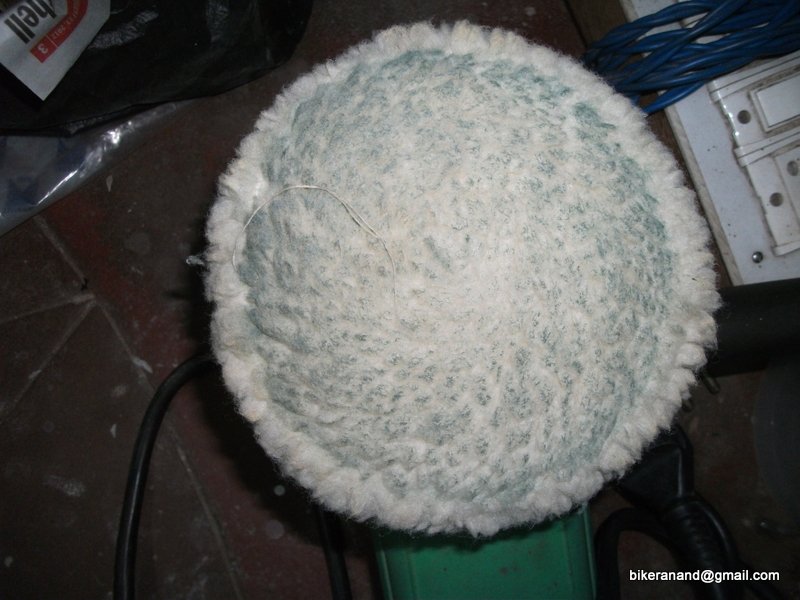
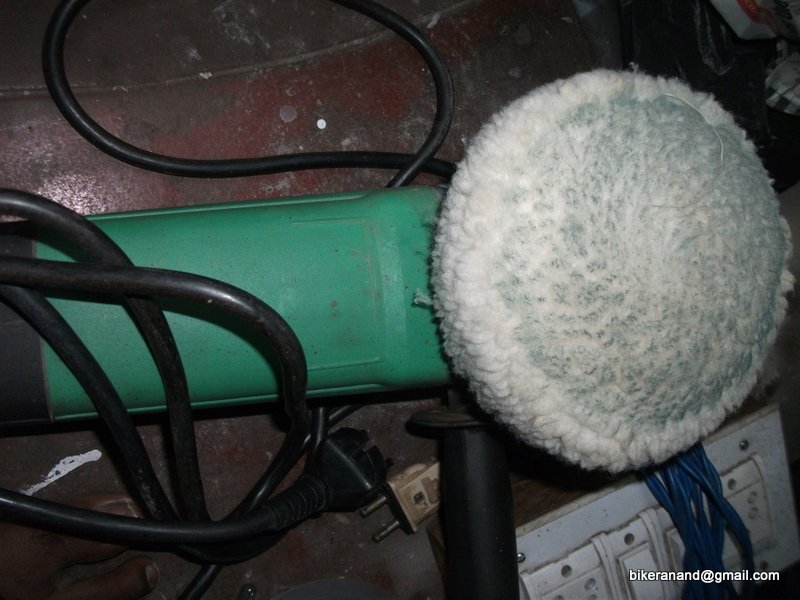
I came to know this news only in the afternoon, this morning I washed my car & tried to wax polish using my new tool. Here is what I got, paint coming off the bonnet!
I am so depressed for today, I d\could not complete my work on bumpers & postpone it to tomorrow. I dont mind spending on the car, I love it & it rewards me well (like yesterday on the highway, doing good triple digit speeds on a 17yr old car!), no breakdowns etc. But it is the hidden surprises that bother me sometime.
I am really happy that my DIY wiring isnt an issue, my car travels faster than before without any electrical issues
![Smile [:)] [:)]](https://www.theautomotiveindia.com/forums/images/smilies/Smile.gif) .
.Couple of issues that I noticed yesterday were
- Kind of bouncy ride quality on NH highway without potholes (may be rear dampers needs to changed)
- Rear Headrest is a must, will do it soon (Varun plz help me out here, I think the Alto Vxi model rear seat has everything we want)
- Leakage of gear oil is more now (compared to last week)
- Front wheel needs balancing or new rims (alignment done recently)
Couple of things I noticed today that really put me off are here
1. My car has started to leak gear oil since a week, after yesterday's drive it seems to be more. The chamber/tank that has this gear oil is welded (signs of previous damage) & there was Mseal around it, I scratched the Mseal out of curiosity & here is the surprise
![Frustration [frustration] [frustration]](https://www.theautomotiveindia.com/forums/images/smilies/Frustration.gif)
2. Axle boot is cut & I think I am losing the grease inside that rubber thing, may be a major DIY work is on the edge now

Leakage Issue proof on ground


Zoomed & a little far away picture for clarity
As if this was not enough, I got the saddest news of the day, My car doesnot have ORIGINAL PAINT ON IT. One of my close friend, who also owns a shop on J.C.Road saw my car for the first time & he could make out all the repainted areas & also showed me some uneven surfaces. The rear door had met with accident long back & hence the repaint I guess. Except roof, everywhere else Lacquer coat is missing.
I came to know this news only in the afternoon, this morning I washed my car & tried to wax polish using my new tool. Here is what I got, paint coming off the bonnet!


I am so depressed for today, I d\could not complete my work on bumpers & postpone it to tomorrow. I dont mind spending on the car, I love it & it rewards me well (like yesterday on the highway, doing good triple digit speeds on a 17yr old car!), no breakdowns etc. But it is the hidden surprises that bother me sometime.
Sorry to see this.. Its not the gear box its the engine oil sump !! The boot is from steering I guess.
I will confirm it after seeing my car. For the color peeling out, may be clear coat has not been done.
I will confirm it after seeing my car. For the color peeling out, may be clear coat has not been done.
Re: Small Video Review of my car
@SS
What an effort to bring in a such a beautiful car from the initial one![Clap [clap] [clap]](https://www.theautomotiveindia.com/forums/images/smilies/Clap.gif)
Excellent and detailed job !!
The video, oh !! what to say about it, it is just like a new launch story on any of the popular Auto show. Keep it up man !!
I am really glad to be in such a forum where there are people like you around which gives a lot of learning !!
@SS
What an effort to bring in a such a beautiful car from the initial one
![Clap [clap] [clap]](https://www.theautomotiveindia.com/forums/images/smilies/Clap.gif)
Excellent and detailed job !!
The video, oh !! what to say about it, it is just like a new launch story on any of the popular Auto show. Keep it up man !!
I am really glad to be in such a forum where there are people like you around which gives a lot of learning !!
Last edited:
First of all congrats on acquiring the new parts, the new set of bumpers have transformed the look of the car.
Regarding the leakage, as Varun previously mentioned, its the engine oil sump which is leaking. From the pics it seems to have suffered extensive damage at one point of time, the welded patch indicates that. It will be better to get the oil sump replaced with a new or even a used one.
Your other unexpected surprise, the axle cv boot, seems past its life, please get it changed on both sides ASAP to prevent a huge repair bill. It costs around Rs 60 a pc. Majority of times a worn out CV boot (rubber) is the culprit of kat kat noise while turning wheels.
As you might be aware of, these rubber boots act as a dust cover to the grease applied on CV joints & when these boots wear out dust gets into the joints resulting in loss of lubrication.
Also repainted body panels always come as a surprise, am experiencing this in my 800 too. The paint residue you see on the orbital buffer pad is most probably the dead/ oxidised layer of paint, so don't worry much about that. BTW what polish did you use on the car's body.
Anyways i hope you are able to complete the installation without much worries & am eager to see the updated pics of your beloved 800, do share the exterior pics especially the panels you recently polished.
Last edited:
Your car looks as new as showroom condition and very good DIY Anand a.k.a SS80.
Thread Starter
#224
Cleaning under the Engine, just to be sure about the source of the leak.
Thanks a lot Gurrala74, This place is fantastic, the support we get here from like minded people is amazing. Had I not been a part of TAI, may be I would have sold my car by now for sure. Because the guidance, feedback, doubts etc that Senior members & new guys like me share here is an absolute must to carry out anything in my car.
Thanks a lot Samsag, I am sorry the rubber part that got cut is in the STeering rod thing & not the Drive Shaft rubber. You can definately understand how big a disappointment it is to find repainted body panels, but there is nothing that I can do about it now.
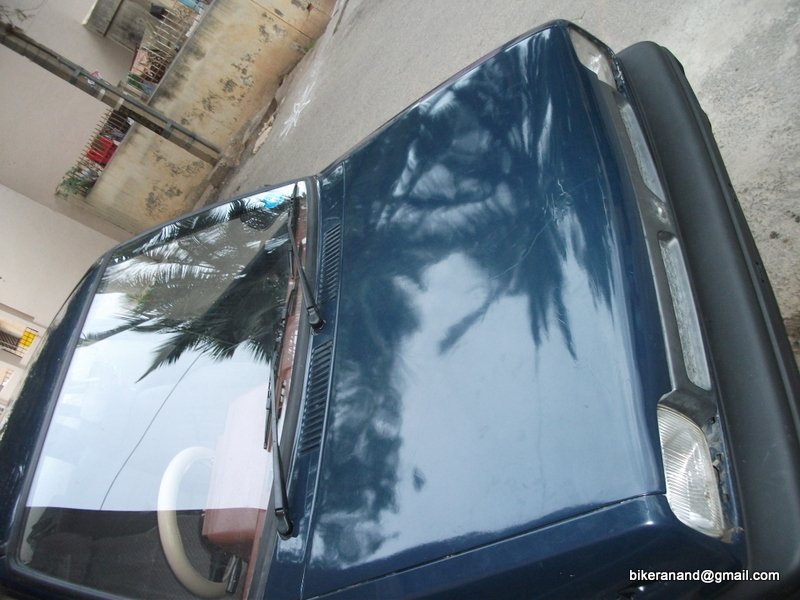
I am sharing a few pics of after polish [hand polish only, scared to use the machine now :C ]
Thanks mate, shape & condition of bumper affects the overall looks very much.
Music_Swift: Thanks again. DIY is a fantastic way to know things about our car. I am sure you too love to do DIY :)
Varun: I have sort of liked this naked looks (I mean no mud flaps thing) will try to stick to it for some days. But when I fix new mud flaps they will the Omni ones like yours (does the real job of a mud flap)
I will post pictures in a few mins from now. Just downsizing them right now
@SS
What an effort to bring in a su............
What an effort to bring in a su............
First of all congrats on acquiring the new parts, the new set of bumpers have transformed the look of the car.
Regarding the leakage, as Varun previ.............
......... costs around Rs 60 a pc. Majority of times a worn out CV boot (rubber) is the culprit of kat kat noise while turning wheels.
As you might be aware of, these rubber boots act as a d..........
Also repainted body panels always come as a surprise, am experiencing this in my 800 too. T................... so don't worry much about that. BTW what polish did you use on the car's body.
Anyways i hope you are able to complete the installation without much worries & am eager to see the updated pics of your beloved 800, do share the exterior pics especially the panels you recently polished.
I am sharing a few pics of after polish [hand polish only, scared to use the machine now :C ]
ss80 the new bumper gave sporty looks to your car.
Music_Swift: Thanks again. DIY is a fantastic way to know things about our car. I am sure you too love to do DIY :)
Varun: I have sort of liked this naked looks (I mean no mud flaps thing) will try to stick to it for some days. But when I fix new mud flaps they will the Omni ones like yours (does the real job of a mud flap)
I will post pictures in a few mins from now. Just downsizing them right now
Thread Starter
#225
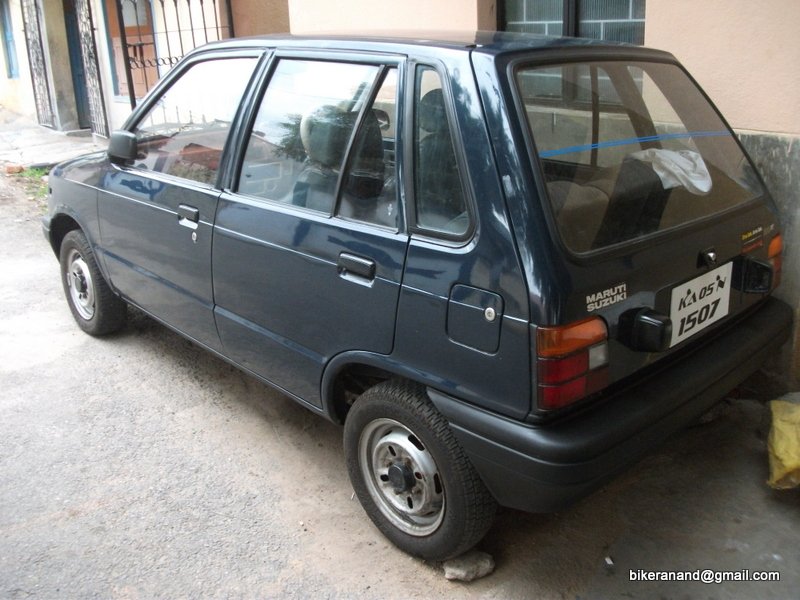
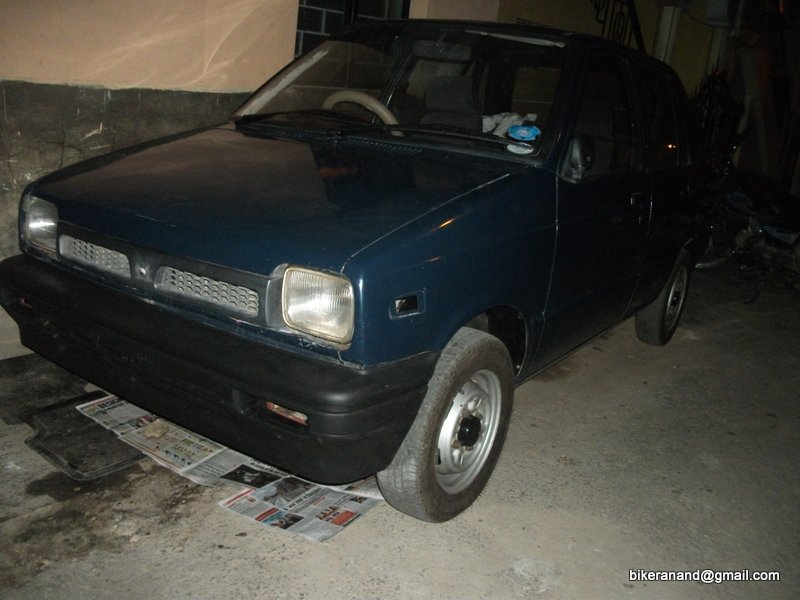
Here are the photos of my car after Polishing, I used waxpol (black bottle - 70Rs.)
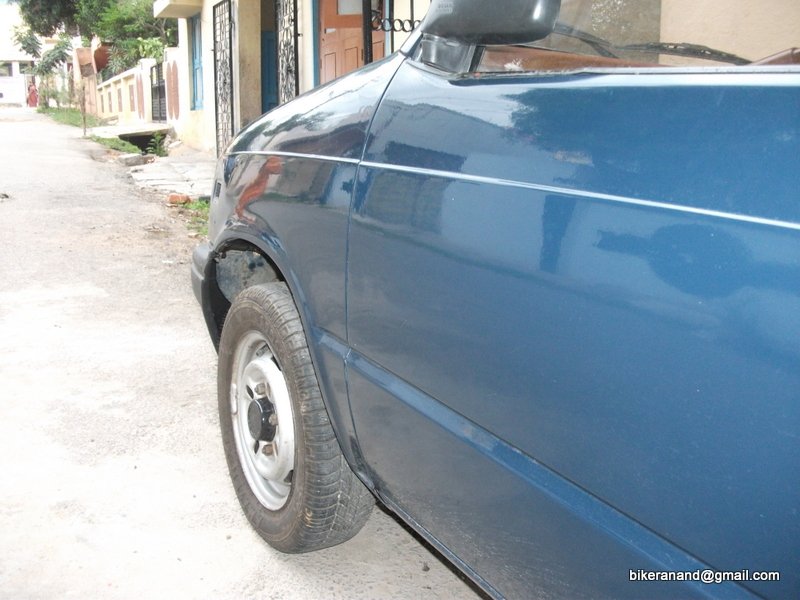
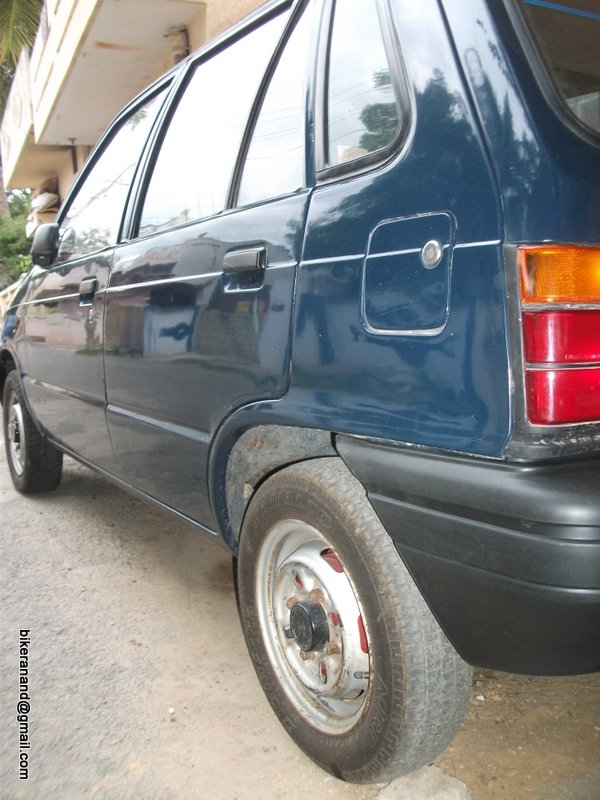
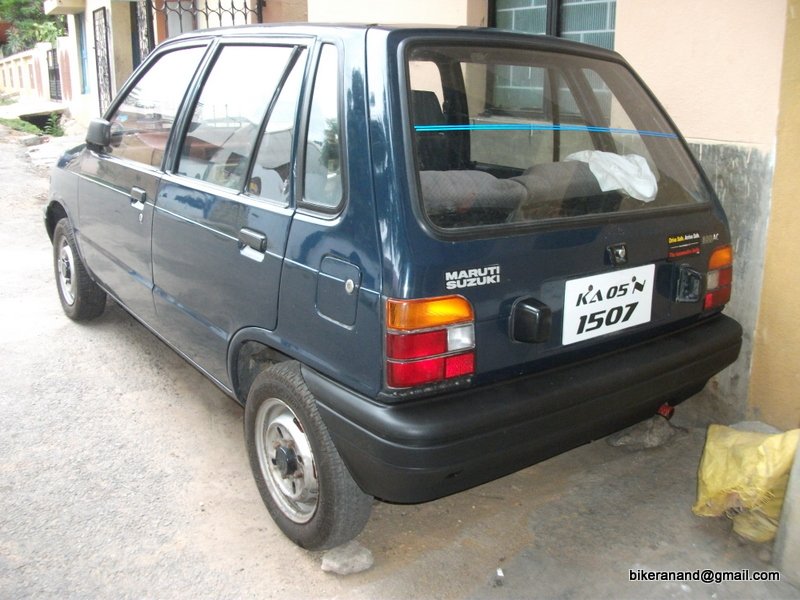
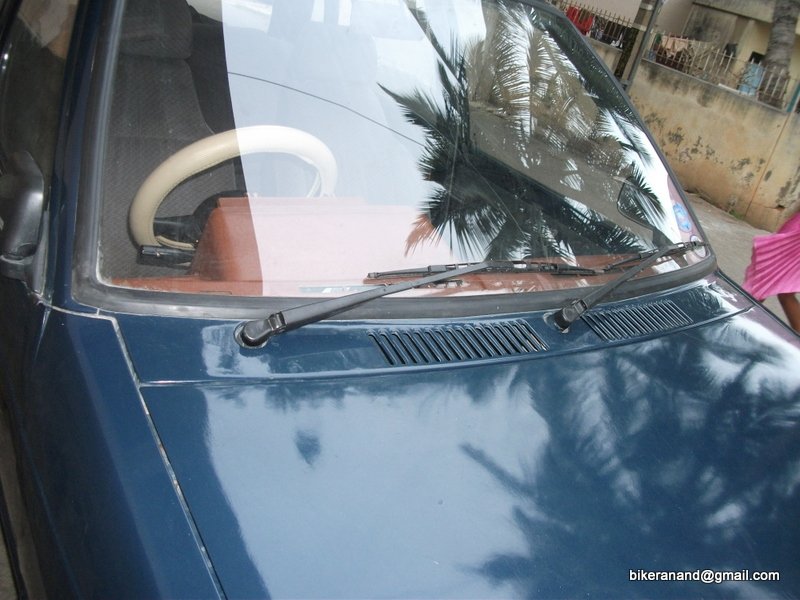
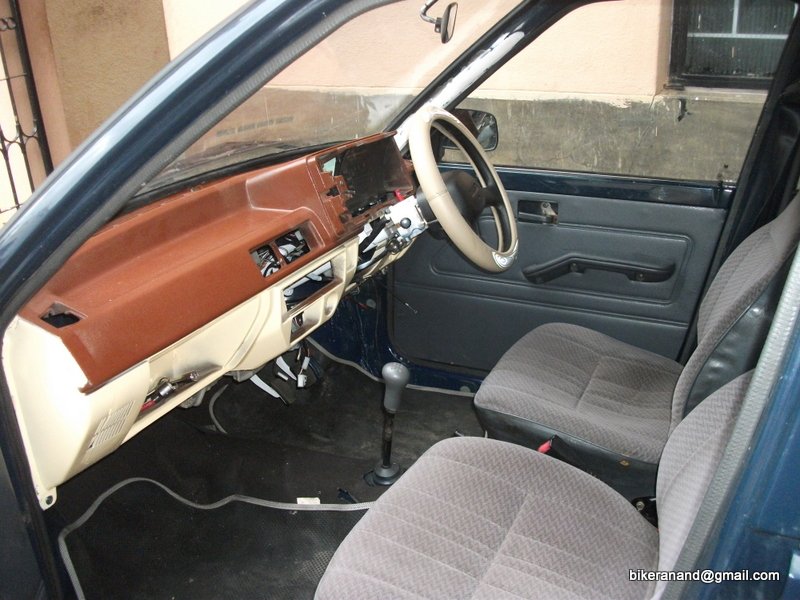
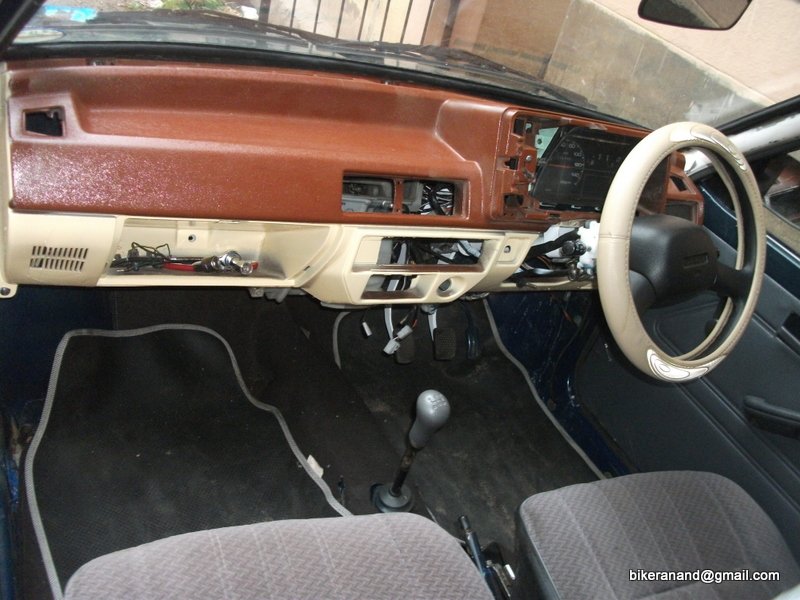
Dashboard is fit temporarily with just 5screws & speedo in it.
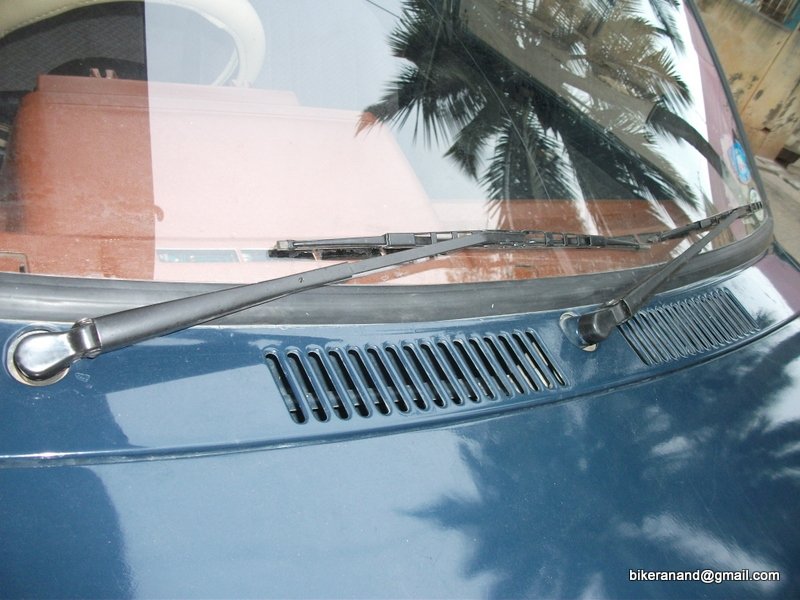
Type 2 Wipers are a clean fit & does job much better than Type 1 wiper set (Thanks Varun for the idea)
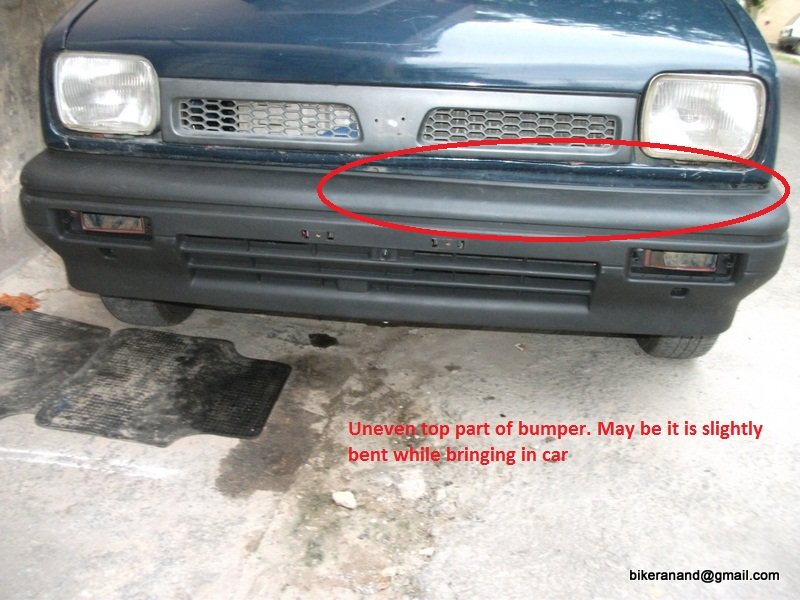
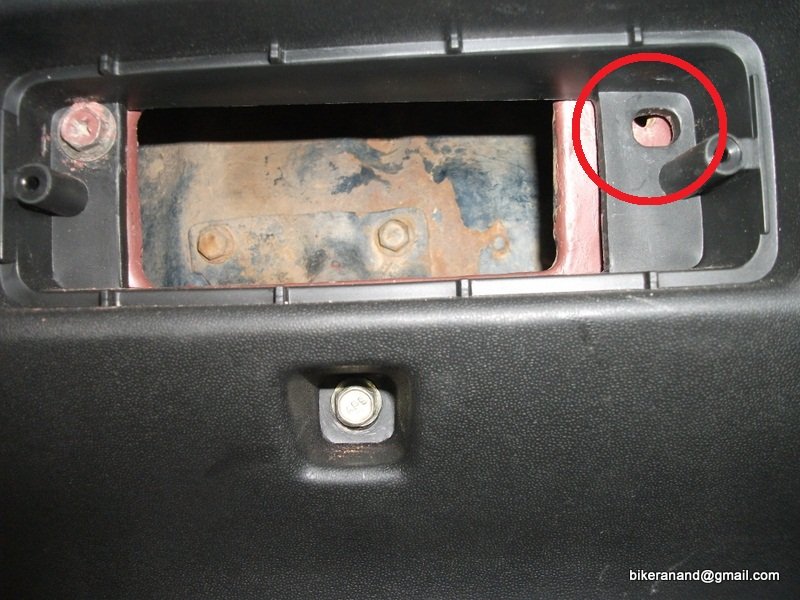
The bumper is a bit uneven, may be I have to put some force to pull it up & fix the bolts.
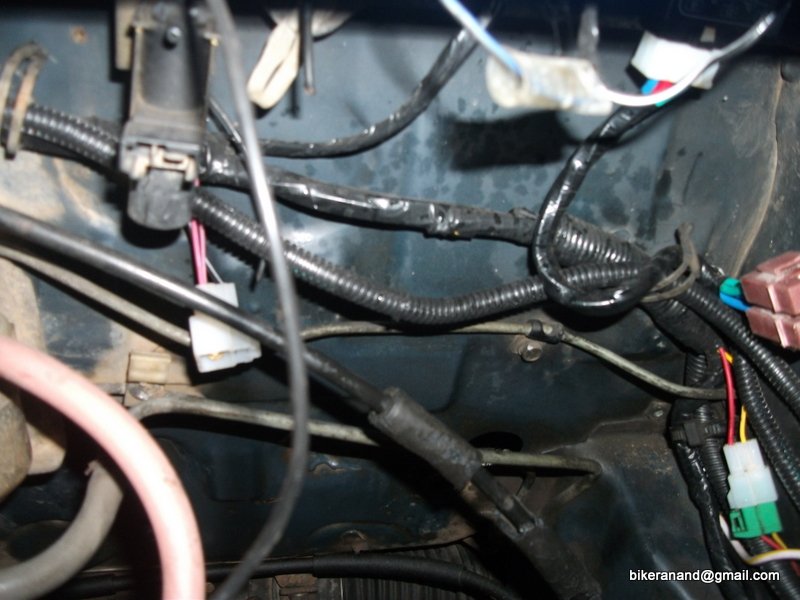
Oil Spill that I noticed in the engine bay after day before yesterday's drive.
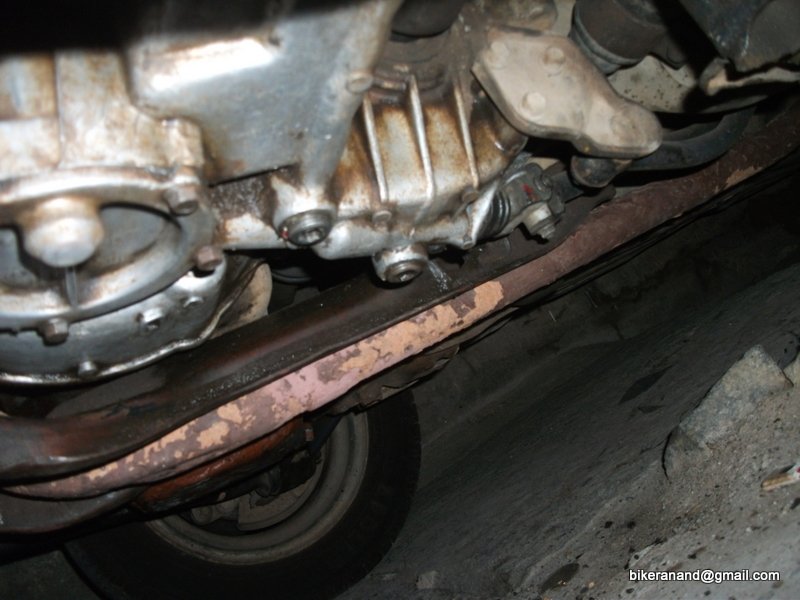
Today cleaned the underbosy of engine (near oil leakage area) with kerosene, tooth brush, cotton waste & finally thinner.
Tonmorrow morning I should be able to source exactly where the oil is leaking from & take further action on it.
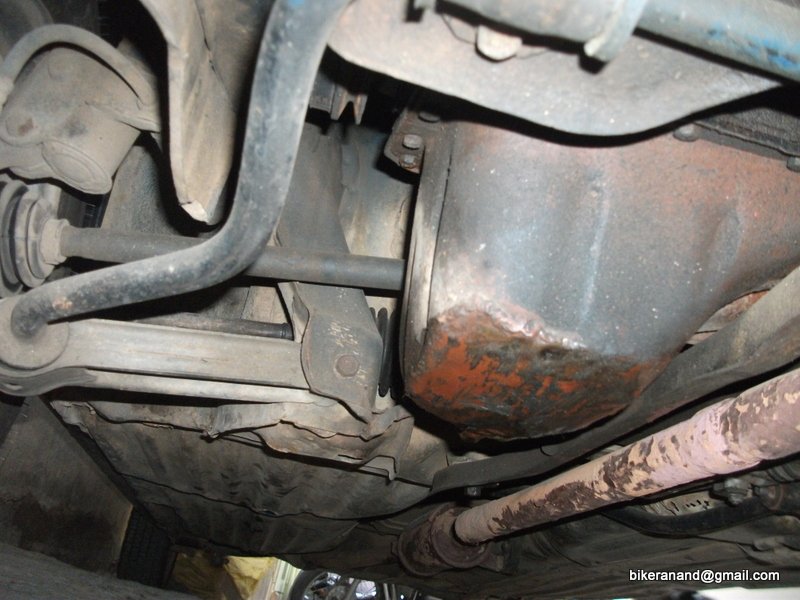
Picture Before cleaning
Photos of underbody after cleaning.
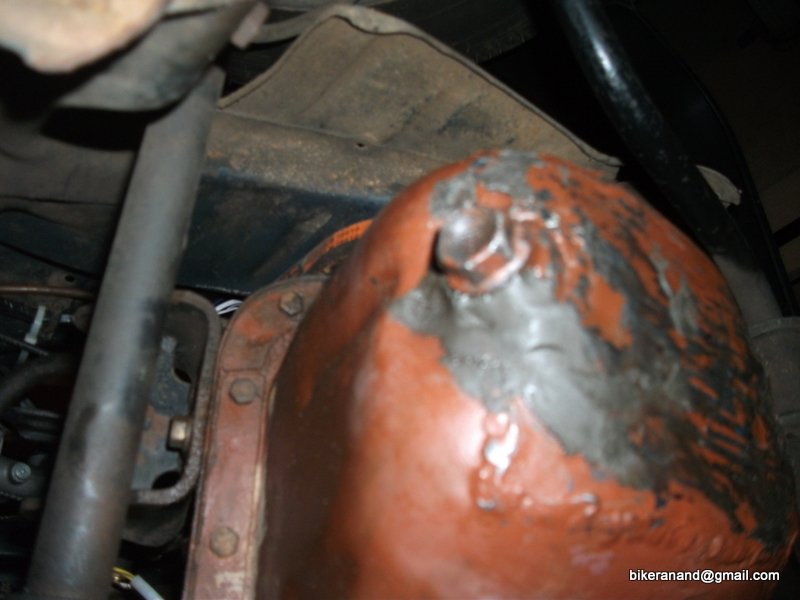
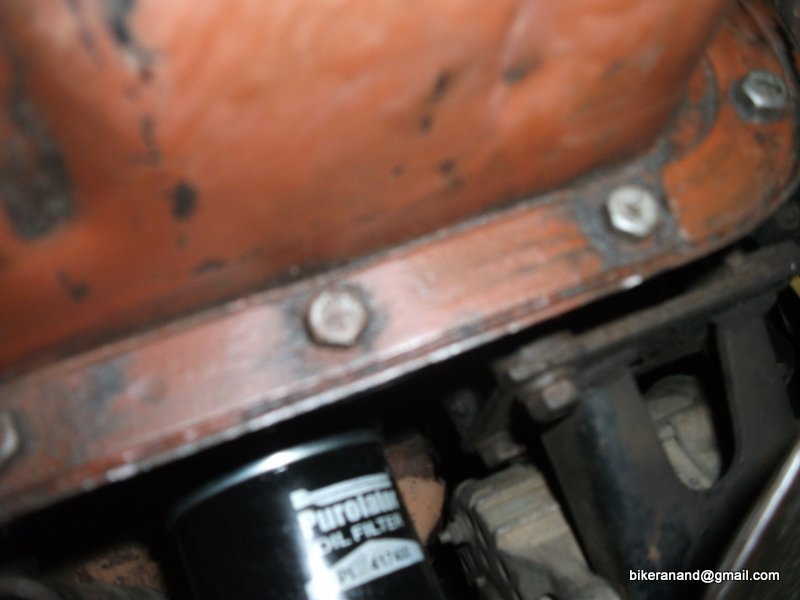
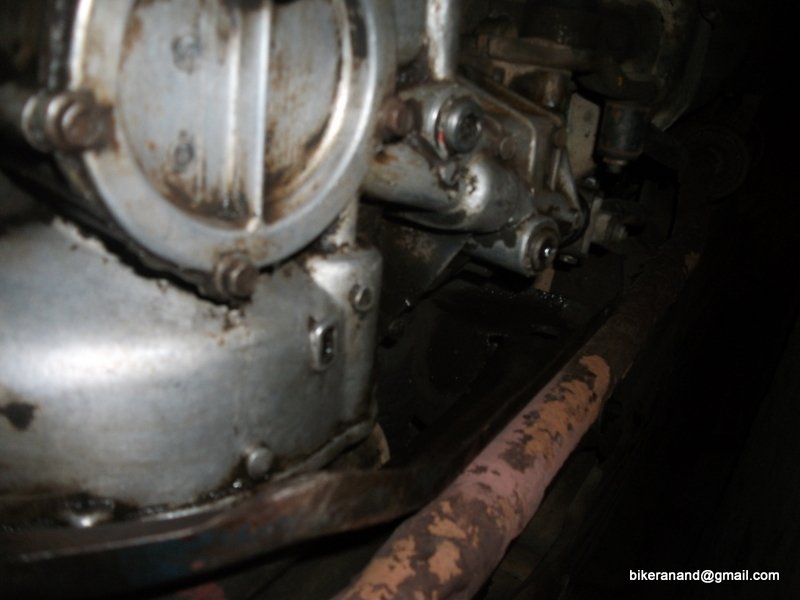
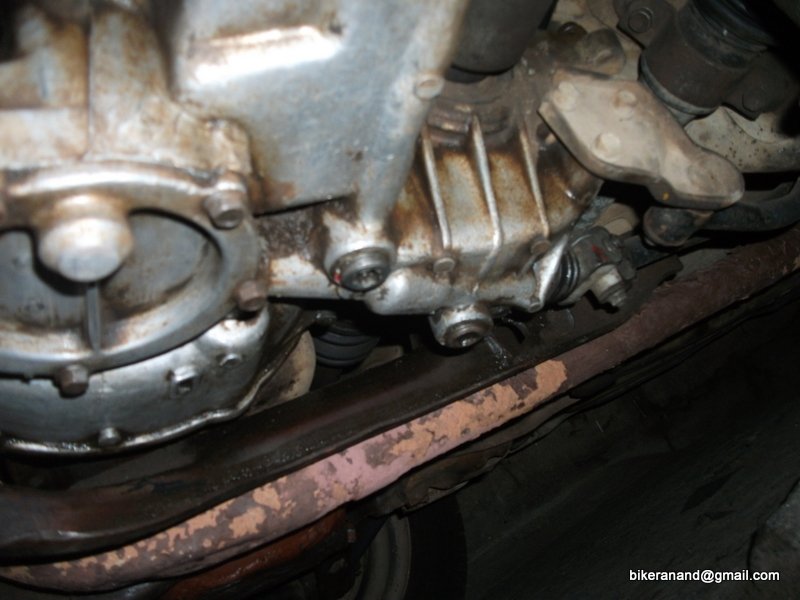
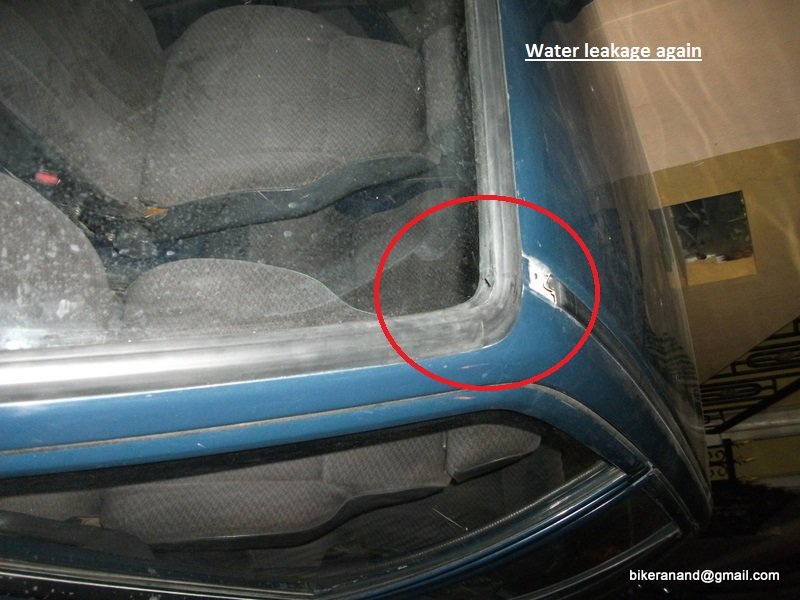
Here below is the new issue, water leakage through the roof end (although I replaced the front windshield beeding)


Dashboard is fit temporarily with just 5screws & speedo in it.

Type 2 Wipers are a clean fit & does job much better than Type 1 wiper set (Thanks Varun for the idea)


The bumper is a bit uneven, may be I have to put some force to pull it up & fix the bolts.

Oil Spill that I noticed in the engine bay after day before yesterday's drive.
Today cleaned the underbosy of engine (near oil leakage area) with kerosene, tooth brush, cotton waste & finally thinner.
Tonmorrow morning I should be able to source exactly where the oil is leaking from & take further action on it.

Picture Before cleaning
Photos of underbody after cleaning.


Here below is the new issue, water leakage through the roof end (although I replaced the front windshield beeding)
Attachments
-
163.8 KB Views: 2,740
- Status
- Not open for further replies.


![Big Smile [:D] [:D]](https://www.theautomotiveindia.com/forums/images/smilies/Big%20Smile.gif)
