Bought My First Car - Maruti 800 AC
- Thread Starter ss80
- Start date
- Status
- Not open for further replies.
Thanks for the update.
This time the wiper stalk has only high and low, may be previous one was type 2 with int mode.
Why not route the wiring which goes to the rear into the side pillar ?
The single plug near the carburetor is for the idler switch, just remove that green cable and plug this. This is very important one which keeps the idle rpm constant.
The coil thing is a switch/sensor which controls the RPM of your car when A/C is on.
Also the 3 pin connector is for A/C relay which not required as of now.
And for the firing order, sorry I will not able to comment as it is different in my car.
May be Jarpickle and Rao might help you.
Thread Starter
#153
Re:
Thanks Mr.Rao, I will wait for your updates.
Thanks for tons of info, I will reroute the wiring to the side ASAP. The AC switch/sensor will be removed. I will also connect the idling switch. The old stalks although they had the int mode, it never worked. I guess you are right it must have been some other later model car part (Type2/3). The underbody was washed but he did as much cleaning as possible.
Thanks a lot, more updates coming soon....
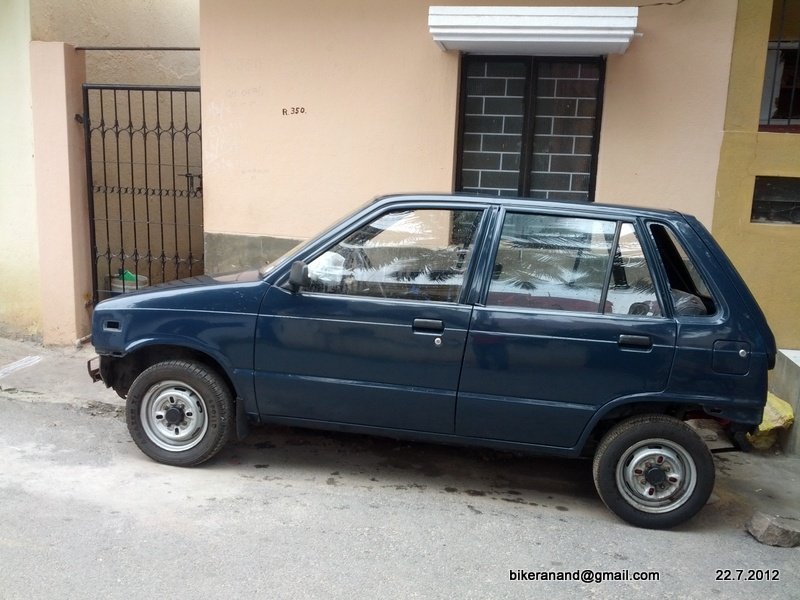
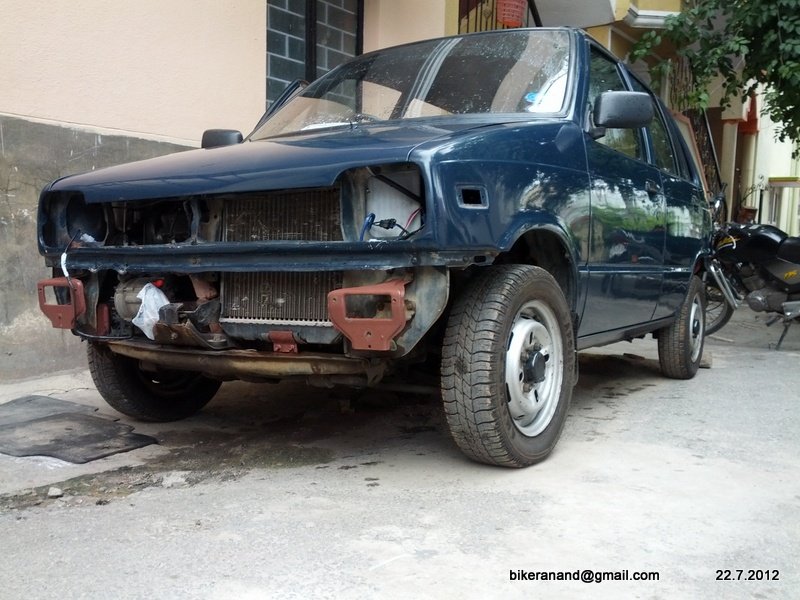
Here is a pic of it after the wash
Hi,
I think some mistake is there in connecting the spark plug wires. I will confirm 2 moroow after consulting. I think because of this problem your car's engine is not running perfectly..![Roll Eyes [roll] [roll]](https://www.theautomotiveindia.com/forums/images/smilies/Roll.gif)
I think some mistake is there in connecting the spark plug wires. I will confirm 2 moroow after consulting. I think because of this problem your car's engine is not running perfectly..
![Roll Eyes [roll] [roll]](https://www.theautomotiveindia.com/forums/images/smilies/Roll.gif)
Thanks for the update.
This time the wiper stalk has only high and low, may be previous one was type 2 with int mode.
Why not route the wiring which goes to the rear into the side pillar ?
The single plug near the carburetor is for the idler switch, just remove that green cable and plug this. This is very important one which keeps the idle rpm constant.
The coil thing is a switch/sensor which controls the RPM of your car when A/C is on.
Also the 3 pin connector is for A/C relay which not required as of now.
And for the firing order, sorry I will not able to comment as it is different in my car.
May be Jarpickle and Rao might help you.
This time the wiper stalk has only high and low, may be previous one was type 2 with int mode.
Why not route the wiring which goes to the rear into the side pillar ?
The single plug near the carburetor is for the idler switch, just remove that green cable and plug this. This is very important one which keeps the idle rpm constant.
The coil thing is a switch/sensor which controls the RPM of your car when A/C is on.
Also the 3 pin connector is for A/C relay which not required as of now.
And for the firing order, sorry I will not able to comment as it is different in my car.
May be Jarpickle and Rao might help you.
OMG...this is one heck of a thread. reading through it, i have been speechless.
this is sheer love and dedicated and more over, perseverance, going through the whole process.
all the best and i will be hooked to this thread!
this is sheer love and dedicated and more over, perseverance, going through the whole process.
all the best and i will be hooked to this thread!
Here is a pic of it after the wash


Last edited:
May be the idler switch might be the cause for the throttle issue, try connecting that and see. Also check for the carburetor jets it might have blocked because of not starting the car for a long time.
Car is shining !! Don't forget to paint the cross member, in the pic it seam to be rusted.
What about the quarter panel glass ?
Finally : One question, how did you manage to take the car with out seats ?
Car is shining !! Don't forget to paint the cross member, in the pic it seam to be rusted.
What about the quarter panel glass ?
Finally : One question, how did you manage to take the car with out seats ?
Thread Starter
#156
Sanding started
Just started sanding today. Got pretty tired in one hour itself.
Here are a few pictures..
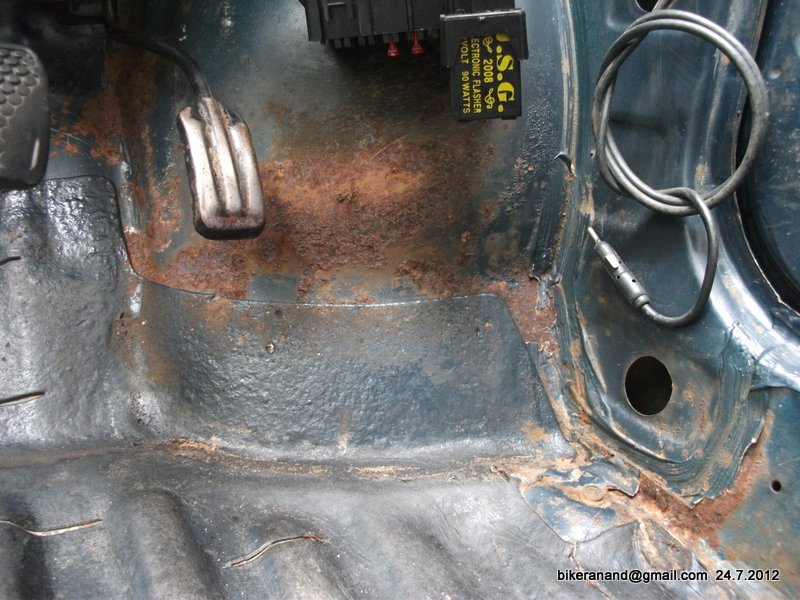
Right footwell area before sanding
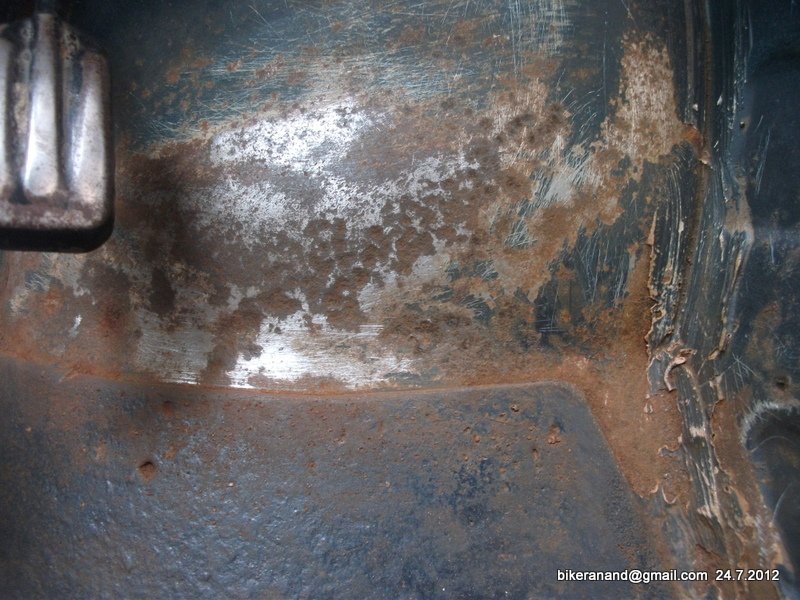
Right footwell after sanding
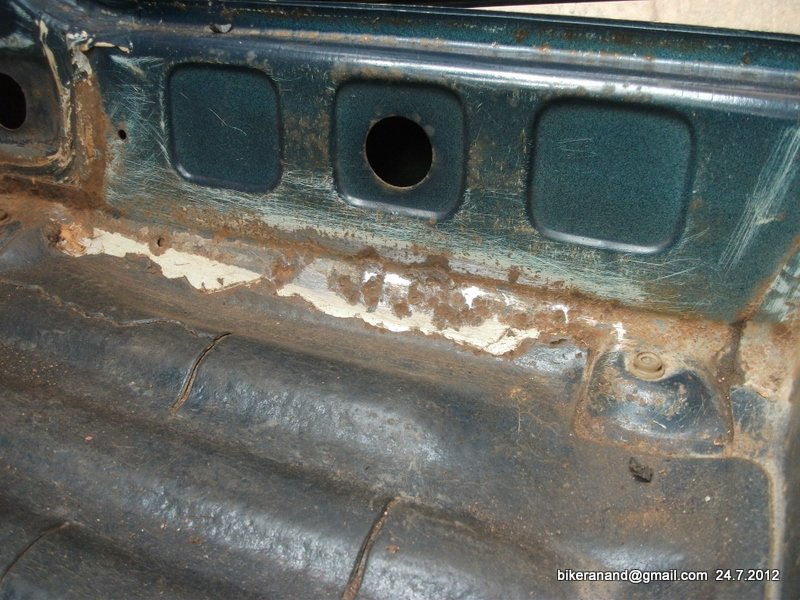
Left side of floor hump before sanding
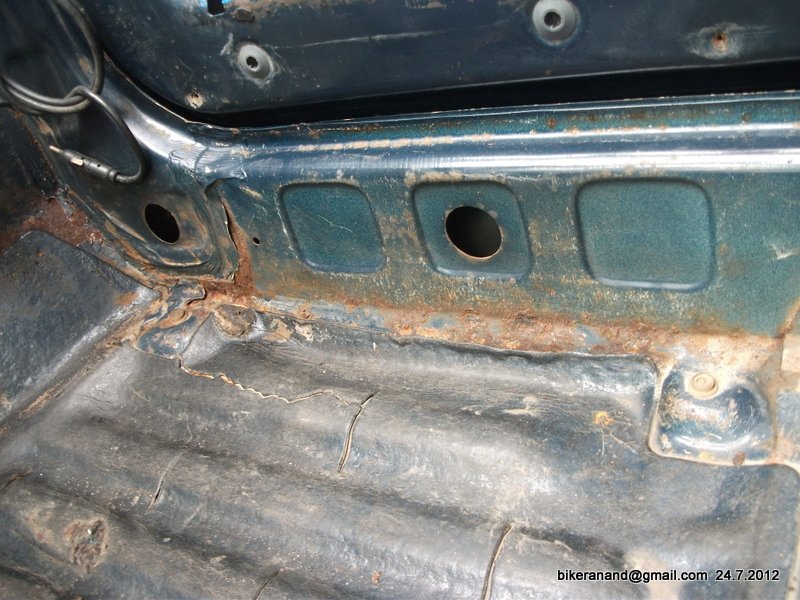
left side of floor hump after sanding
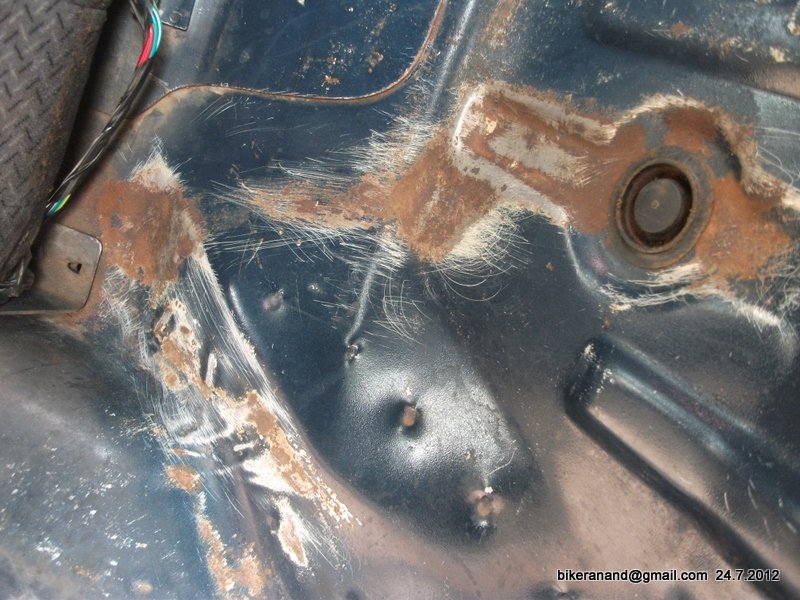
Below backseat after sanding
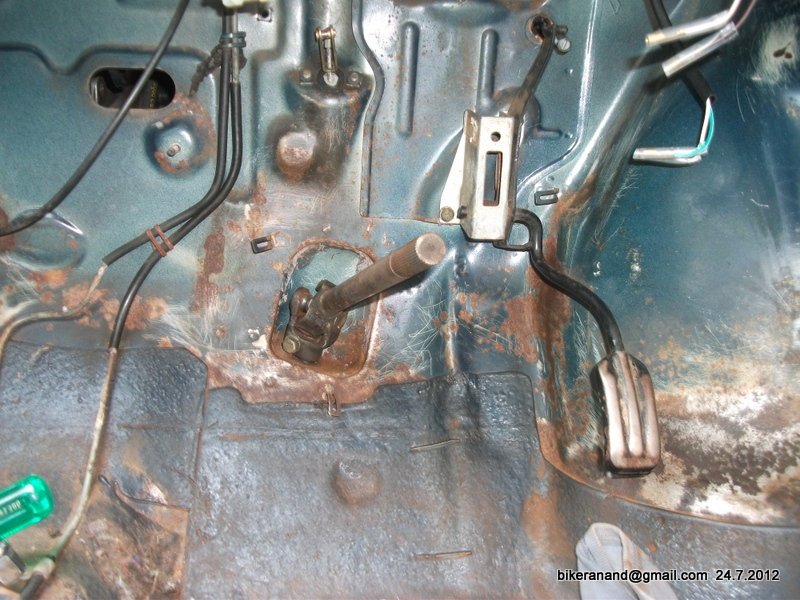
STeering column & brake pedals removed
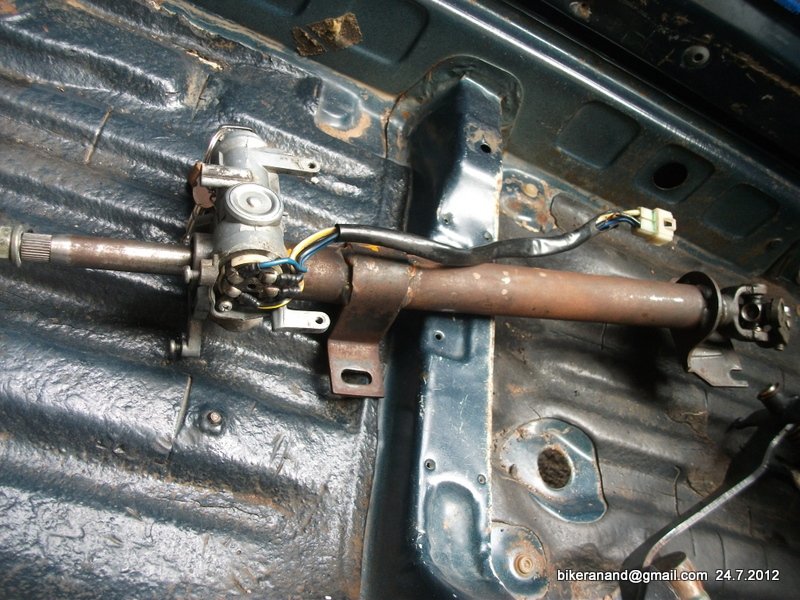
Steering column - thinking of painting it/ getting it chromed![Big Smile [:D] [:D]](https://www.theautomotiveindia.com/forums/images/smilies/Big%20Smile.gif)
Just started sanding today. Got pretty tired in one hour itself.
Here are a few pictures..

Right footwell area before sanding

Right footwell after sanding

Left side of floor hump before sanding

left side of floor hump after sanding

Below backseat after sanding

STeering column & brake pedals removed

Steering column - thinking of painting it/ getting it chromed
![Big Smile [:D] [:D]](https://www.theautomotiveindia.com/forums/images/smilies/Big%20Smile.gif)
Attachments
-
309.7 KB Views: 1,810
Oh great, you have removed the steering column too ![Surprise [surprise] [surprise]](https://www.theautomotiveindia.com/forums/images/smilies/Surprise.gif) .
.
Don't waste money on getting the chrome thing on steering column as it is not visible after the dash is fixed.
Better apply body paste to all the rusted parts then paint them.
Also I suggest you get get a new indicator relay as I can see its not the original one which makes the indicator blink fast (it wont look good![Wink [;)] [;)]](https://www.theautomotiveindia.com/forums/images/smilies/Wink.gif) )
)
![Surprise [surprise] [surprise]](https://www.theautomotiveindia.com/forums/images/smilies/Surprise.gif) .
.Don't waste money on getting the chrome thing on steering column as it is not visible after the dash is fixed.
Better apply body paste to all the rusted parts then paint them.
Also I suggest you get get a new indicator relay as I can see its not the original one which makes the indicator blink fast (it wont look good
![Wink [;)] [;)]](https://www.theautomotiveindia.com/forums/images/smilies/Wink.gif) )
)
Thread Starter
#158
I will change the indicator relay asap along with new tail lamps. I read in the internet (mustang forums) that it is good if you first put primer then body paste. As body filler absorbs a bit of moisture/water. Is that correct? Bcoz while sanding i noticed that below body filler there was rust!
What is your advice? Primer then filler or vice versa?
Also I am thinking of buying Orbital sander or something similar so that I can sand whole of interiors instead of just floor.
What is your advice? Primer then filler or vice versa?
Also I am thinking of buying Orbital sander or something similar so that I can sand whole of interiors instead of just floor.
Thread Starter
#159
Primer 0r Body filler? which one first
I will change the indicator relay asap along with new tail lamps. I read in the internet (mustang forums) that it is good if you first put primer then body paste. As body filler absorbs a bit of moisture/water. Is that correct? Bcoz while sanding i noticed that below body filler there was rust!
What is your advice? Primer then filler or vice versa?
Also I am thinking of buying Orbital sander or something similar so that I can sand whole of interiors instead of just floor.
You could use it in any order doesn't make a difference.
If you sand the panels properly the filler will stick to it else you need primer so that the filler sticks to the primer.
What's the deal with that idler switch hanging out like that.Find the other end and plug it together.
Why do you have a fuel filter in your engine bay?
Does this mean you have two fuel filters or did you just move the one from the bottom into your engine bay?
Last edited:
Corrosion should be arrested at the source thus IMO best will be to use the Primer (Zinc?) first followed by a light coat of body filler (if necessary).
A suggestion, if possible remove all the drain hole plugs (including small ones) and treat the surface for rust protection. IIRC there are 4 rubber and 6 plastic plugs on the floor.
A suggestion, if possible remove all the drain hole plugs (including small ones) and treat the surface for rust protection. IIRC there are 4 rubber and 6 plastic plugs on the floor.
Last edited:
Re: Sanding started
View attachment 57764
Steering column - thinking of painting it/ getting it chromed![Big Smile [:D] [:D]](https://www.theautomotiveindia.com/forums/images/smilies/Big%20Smile.gif) [/QUOTE]
[/QUOTE]
I guess this is a non-collapsible steering column. Can we replace it with a collapsible one? WHat wud be the approx cost?
View attachment 57764
Steering column - thinking of painting it/ getting it chromed
![Big Smile [:D] [:D]](https://www.theautomotiveindia.com/forums/images/smilies/Big%20Smile.gif) [/QUOTE]
[/QUOTE]I guess this is a non-collapsible steering column. Can we replace it with a collapsible one? WHat wud be the approx cost?
I have gone through your thread from start end, never commented, I was waiting for getting your work completed, Couldn't stop myself from complimenting you! Hats off to you man!This is real passion and dedication. Once your car is ready its value for you will be far more than any brand new merc /bmw or audi. Cheers mate! Keep it up n all the best.
Waiting for your next update.
PS: @350Z TAI should start some kind of award or recognition for such outstanding DIY jobs.
Waiting for your next update.
PS: @350Z TAI should start some kind of award or recognition for such outstanding DIY jobs.
Thread Starter
#164
Replies & Sanding progress
Thanks for the info on the filler & primer thing. The previous owner has relocated the fuel filter. I dont know the actual location of the fuel filter (yet to see in other cars), Yep, that idler wire will be back to its normal position.
I have already removed the rubber drain hole plugs, now removed the plastic ones below rear seat too. Yes I am using a Zinc Primer (Yellow colour) instead of the usual grey coloured stuff.
I guess this is a non-collapsible steering column. Can we replace it with a collapsible one? WHat wud be the approx cost?[/QUOTE]
Will repaint the steering column, I have no idea about the non-collapsible steering column in Maruti 800. Did the type 2/3 come with those? Can you please share any info on that. Although I am not planning for it now it might be useful in the near future![Smile [:)] [:)]](https://www.theautomotiveindia.com/forums/images/smilies/Smile.gif)
Thank you so much drivetech4. Yes you are absolutely right, when this (interiors) is done it will be like E-class to me ![Laugh [lol] [lol]](https://www.theautomotiveindia.com/forums/images/smilies/Laugh.gif) . This car has made tremendous changes in my life. I left my old desk job, working on car for atleast few hours everyday, borrowed loans, DIY addiction, learning so much & it goes on like this. Infact I am happier than ever before, this car has changed the way people look at me. I owe a lot to her.
. This car has made tremendous changes in my life. I left my old desk job, working on car for atleast few hours everyday, borrowed loans, DIY addiction, learning so much & it goes on like this. Infact I am happier than ever before, this car has changed the way people look at me. I owe a lot to her.
Small update:
Tried sanding more today & found there are more of these rust dots (kind of bubbles) here & there. Instead of doing patch work, I better repaint the whole floor. I have seen a couple of powertools -
Grinding tool - Rs.1500/-
Orbital Sander/ DA (Dual Action) Sander - 2500/-
Air compressor - 15ltrs tank capacity - 0.5HP - Rs.8000/-
I had plans of opening a Water Wash Center that also does Dashboard & pillar trims painting. But thanks to a unexpected cheque bounce all my loan applications & plans are paused for a month atleast. If I buy these tools I will be able to do a clean paintwork for my car interiors & later use them in my business too, if at all I succeed in starting one.
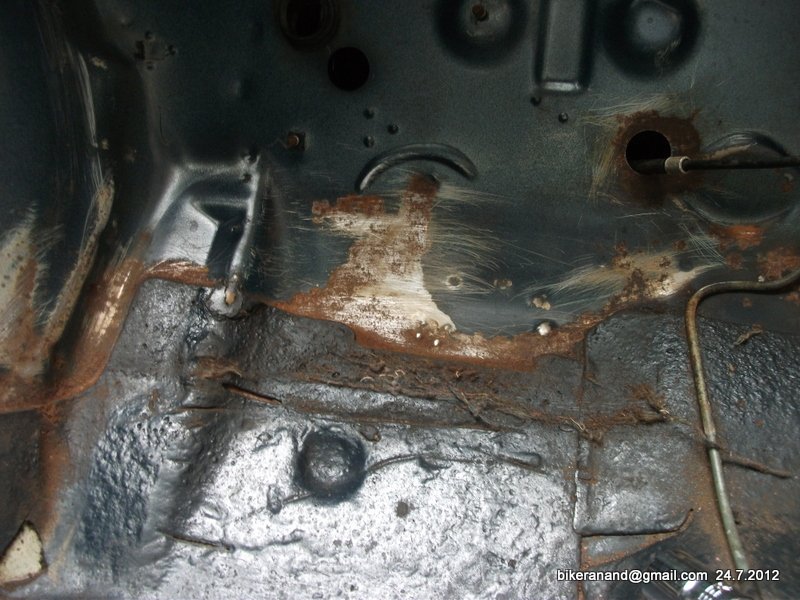
Here are a few pics of sanding + applied little primer on the metal using brush. I know brush work just cant provide that finishing still just wanted to try it.
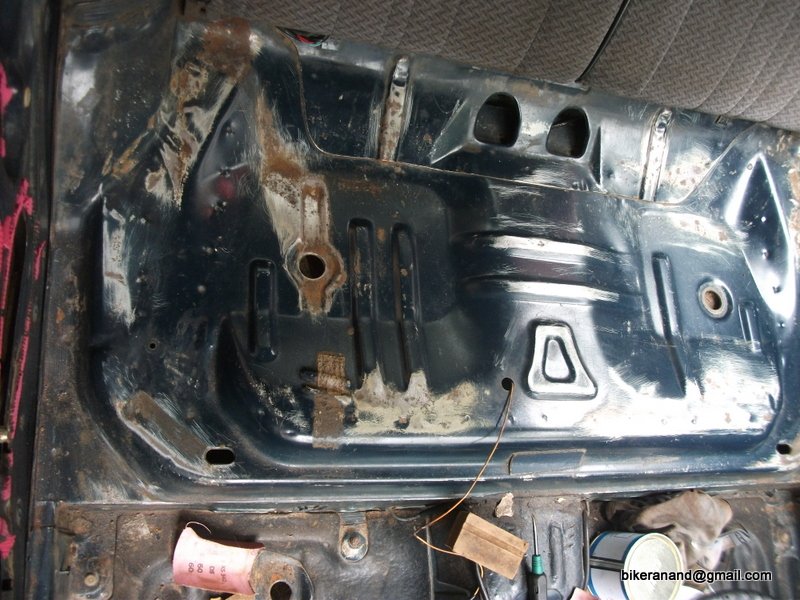
Rear Seat area
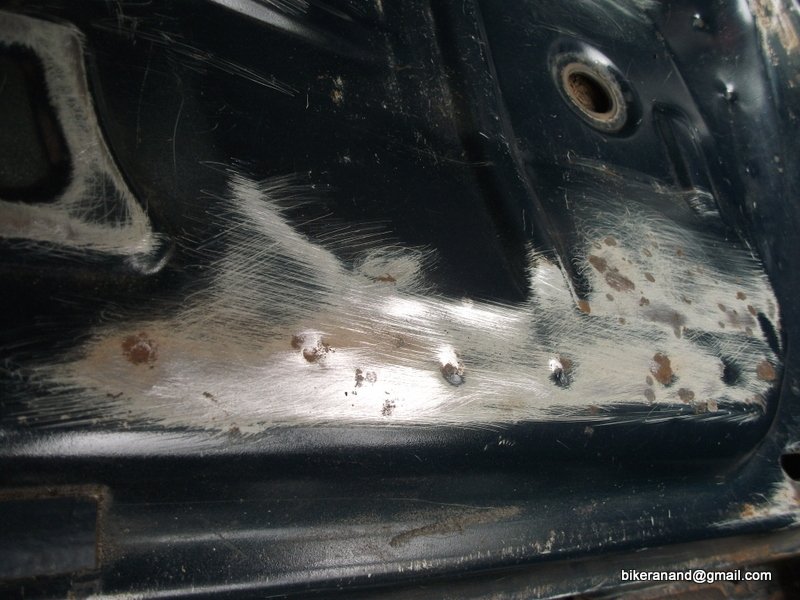
Sanding edges & rust dots
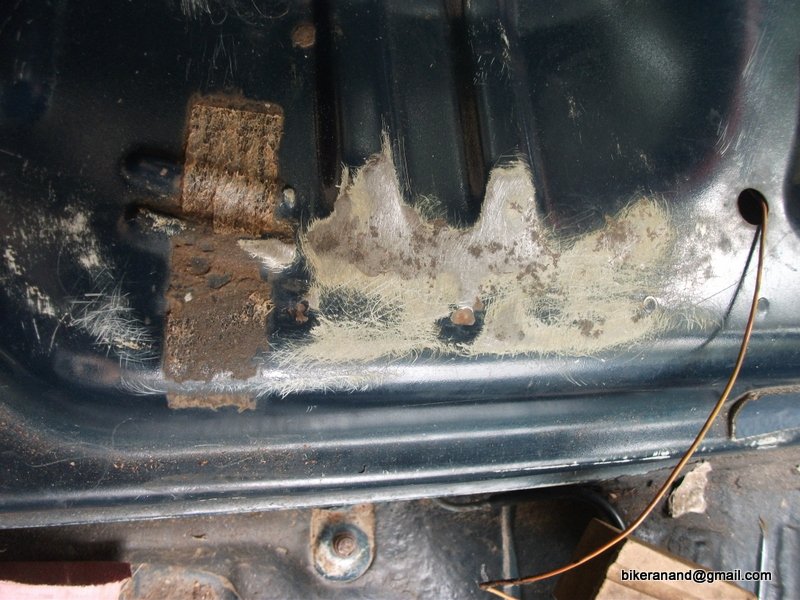
Without primer
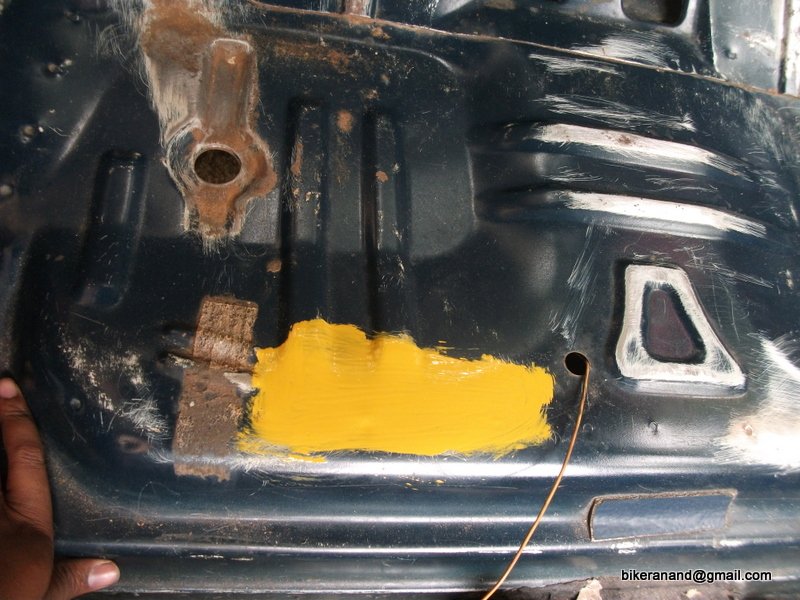
WIth primer (not diluted)
You could use it in any order doesn't make a difference.
If you sand the panels properly the filler will stick to it else you need primer so that the filler sticks to the primer.
What's the deal with that idler switch hanging out like that.Find the other end and plug it together.
Why do you have a fuel filter in your engine bay?
did you just move the one from the bottom into your engine bay?
Corrosion should be arrested at the source thus IMO best will be to use the Primer (Zinc?) first followed by a light coat of body filler (if necessary).
A suggestion, if possible remove all the drain hole plugs (including small ones) and treat the surface for rust protection. IIRC there are 4 rubber and 6 plastic plugs on the floor.
A suggestion, if possible remove all the drain hole plugs (including small ones) and treat the surface for rust protection. IIRC there are 4 rubber and 6 plastic plugs on the floor.
Will repaint the steering column, I have no idea about the non-collapsible steering column in Maruti 800. Did the type 2/3 come with those? Can you please share any info on that. Although I am not planning for it now it might be useful in the near future
![Smile [:)] [:)]](https://www.theautomotiveindia.com/forums/images/smilies/Smile.gif)
I have gone through your thread from start end, never commented, I was waiting for getting your work completed, Couldn't stop myself from complimenting you! Hats off to you man!This is real passion and dedication. Once your car is ready its value for you will be far more than any brand new merc /bmw or audi. Cheers mate! Keep it up n all the best.
Waiting for your next update.
PS: @350Z TAI should start some kind of award or recognition for such outstanding DIY jobs.
Waiting for your next update.
PS: @350Z TAI should start some kind of award or recognition for such outstanding DIY jobs.
![Laugh [lol] [lol]](https://www.theautomotiveindia.com/forums/images/smilies/Laugh.gif) . This car has made tremendous changes in my life. I left my old desk job, working on car for atleast few hours everyday, borrowed loans, DIY addiction, learning so much & it goes on like this. Infact I am happier than ever before, this car has changed the way people look at me. I owe a lot to her.
. This car has made tremendous changes in my life. I left my old desk job, working on car for atleast few hours everyday, borrowed loans, DIY addiction, learning so much & it goes on like this. Infact I am happier than ever before, this car has changed the way people look at me. I owe a lot to her.Small update:
Tried sanding more today & found there are more of these rust dots (kind of bubbles) here & there. Instead of doing patch work, I better repaint the whole floor. I have seen a couple of powertools -
Grinding tool - Rs.1500/-
Orbital Sander/ DA (Dual Action) Sander - 2500/-
Air compressor - 15ltrs tank capacity - 0.5HP - Rs.8000/-
I had plans of opening a Water Wash Center that also does Dashboard & pillar trims painting. But thanks to a unexpected cheque bounce all my loan applications & plans are paused for a month atleast. If I buy these tools I will be able to do a clean paintwork for my car interiors & later use them in my business too, if at all I succeed in starting one.
Here are a few pics of sanding + applied little primer on the metal using brush. I know brush work just cant provide that finishing still just wanted to try it.

Rear Seat area

Sanding edges & rust dots

Without primer

WIth primer (not diluted)
I guess the primer used is not for cars, You get an diluted primer for cars.
Try to spray the primer, instead of using a brush.
Aha I can see a seat belt provision too..
Any ways all the best for your future !! Any discounts for TAIans ?
Try to spray the primer, instead of using a brush.
Aha I can see a seat belt provision too..
Any ways all the best for your future !! Any discounts for TAIans ?

- Status
- Not open for further replies.


![Clap [clap] [clap]](https://www.theautomotiveindia.com/forums/images/smilies/Clap.gif)
