"ATOM" Real Steel Royal Enfield Classic 350 Ownership Review


Thread Starter #76
Joined
Oct 24, 2014
Messages
1,551
Likes
1,296
Location
Mangalore
@nmm mithra the made like gun would be put on the carb cover which is oval in shape. i have chromed the oval cover and upon that in black this MLG would look good will upload the pic once entire bikes complete.
 
Thread Starter #77
Joined
Oct 24, 2014
Messages
1,551
Likes
1,296
Location
Mangalore
@nanofreak checked the website bro. pretty expensive i think ill stick to my earlier plan of Blore, that would work out much cheaper. Thanks for helping out though.

BTW the project will finish by this weekend is what i believe. in the meantime was searching for original RE windshield found one matching the spec on Royalenfieldzone. also to my luck found one in one of the service centers in my place. will check out the costing of both and will decide which one to go with.
 
Thread Starter #80
Joined
Oct 24, 2014
Messages
1,551
Likes
1,296
Location
Mangalore
@general max that's a good find. those were the box type mudguard which were previously fitted on the bull. it would look nostalgic if you add these. however what do you feel about the finish on the bike wanted to know your feedback.

@nmm mithra i already have the fog lamps and indicator as well as the rod that that connects these both together. its already been purchased. yesterday had taken leave from work and was in the garage.

Most of the work is finished by another 4-5 days shall have the bike up and running.
 
Last edited:
Thread Starter #81
Joined
Oct 24, 2014
Messages
1,551
Likes
1,296
Location
Mangalore
was lost in work i mean the work of bike didn't find time to update.

Now let me come to the problems i faced with the bike.

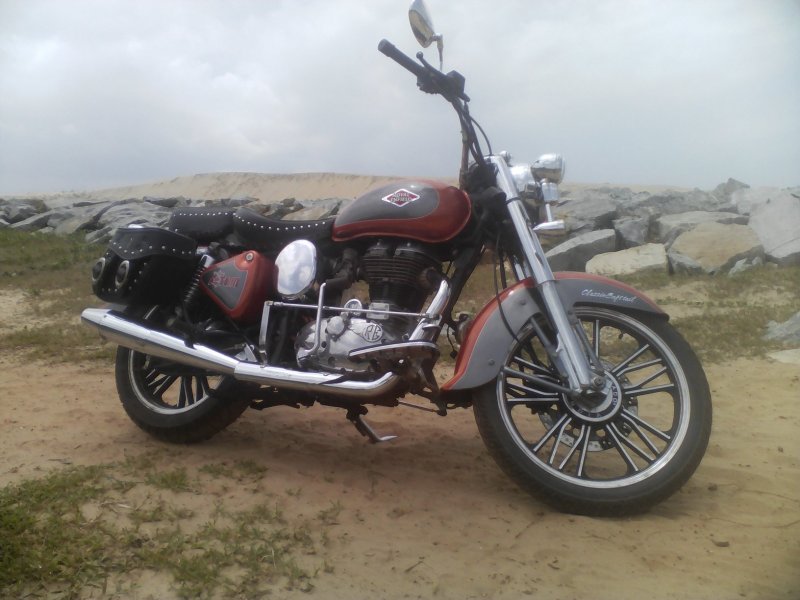
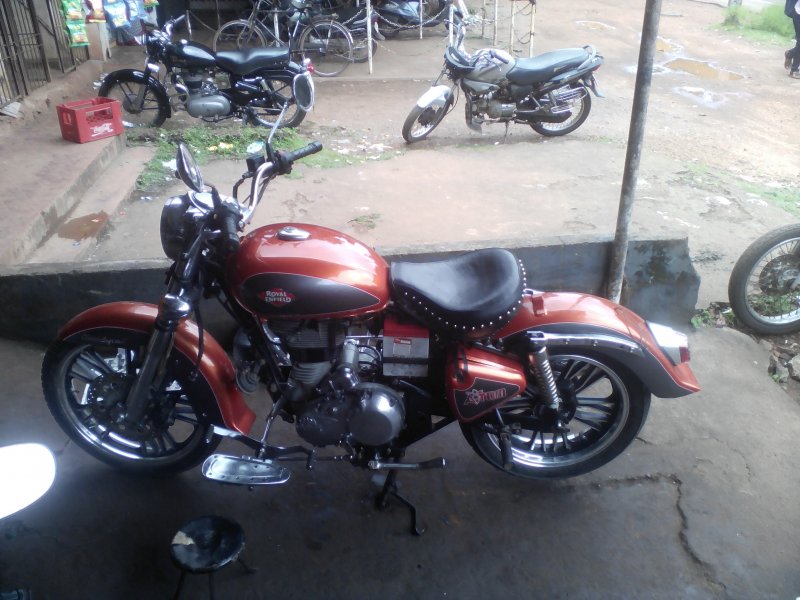
you guys must be knowing that to accommodate a Fatter Tyre i had changed the swing arm. and had run the bike for 2-3 days with the fatter Tyre. after that new parts were fabricated like the rear mudguard and the front mudguard, Everything was painted and the result was outstanding.

however the other day when the fitting was going on i noticed that the rear tyre was sitting at angle. it wasn't sitting straight.

checked thoroughly and found that the swing arm that was purchased was a bit bent may be due to transportation or parcel service negligence don't know. The bike was riding fine however there was a lot of pressure on the chain.

so dismantled it and went to the lathe shop and got the bend rectified.

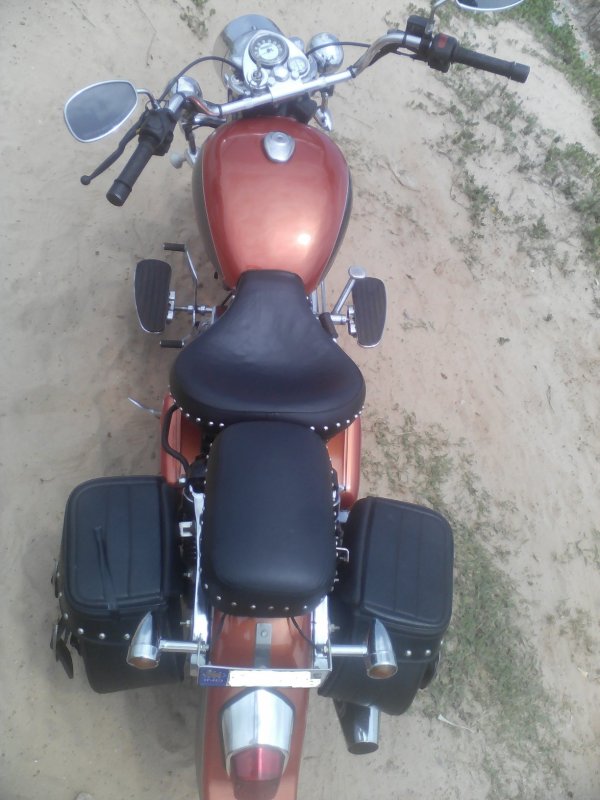
2nd problem: after the bend was sorted i found that the space between the sidewalls of the tire and the chain was too less at instances it did touch the tire.

so dismantled it once again.checked and found that we had changed the tire to broader once but hadn't changed the rear axle bolt bush ( the bush that fills the space between the axle rod and swing arm.) to be of stock size i mean that bush was made to accommodate the stock Tyre. All this issues where hidden if the Tyre was sitting slant

as we had fitted it with broader wheels that bush had to be machined.

i know i sound stupid i should have checked it earlier when we started the project. at that time i completely had overlooked it and it looked OK with the stock classic mudguard sitting over it. couldn't notice this change when before painting had assembled it with the stock rear mudguard in its place. My bad!!!

so now doing the machining job and bike should be ready in a couple of days.

its been sleepless nights for 2-3 days thinking about the bike. Loosing patience, Getting frustrated sometimes,

took 2-3 days off work spent time leisurely didn't even think about the bike.

will start afresh tomorrow.

will bee posting some teasers before the final product is ready..[:D]
 
Last edited:
Thread Starter #82
Joined
Oct 24, 2014
Messages
1,551
Likes
1,296
Location
Mangalore
This is just how it would look from the side angles once completed. it was clicked before dismantling once the test run was done on it. Hope its come out good. waiting for your comments. I Think the seat has to be changed as well as the handle would be changed. The side boxes lock wasnt working so had fixed it with insulation tape so that the test run could be done.

IMG-20150826-WA0008.jpeg
 
Last edited:
Joined
Oct 9, 2012
Messages
1,888
Likes
2,180
Location
Riyadh/Kanpur
This is just how it would look from the side angles once completed. it was clicked before dismantling once the test run was done on it. Hope its come out good. waiting for your comments. I Think the seat has to be changed as well as the handle would be changed. The side boxes lock wasnt working so had fixed it with insulation tape so that the test run could be done.

View attachment 178607
Wow what a transformation, very well executed, the wheels look swell.
enjoy your ride
 
Joined
Oct 23, 2013
Messages
1,143
Likes
865
Location
Bangalore
I would say,you had done a good job! Before change of seats,I feel change of handle is required and if done right,there may not be a need to change the seat.How do you feel with this riding position? Dual tone paint job looks nice.[clap]
 
Thread Starter #85
Joined
Oct 24, 2014
Messages
1,551
Likes
1,296
Location
Mangalore
I would say,you had done a good job! Before change of seats,I feel change of handle is required and if done right,there may not be a need to change the seat.How do you feel with this riding position? Dual tone paint job looks nice.[clap]
@ Nanofreak Thanks for the compliments. The final look is what im waiting for.

@ Generalmax with the present seating there is no problem but most of my frens said that the seat should have been a bit more sleek. hence thought of changing it. otherwise its fine.

yes the handle definitely needs a change. it has to raise by another 3 inches and the handle should be a bit broad to get that chopper feeling. Thanks for the compliments on the paint job the pin striping was pain in the butt. but somehow it turned out good.
 
Thread Starter #86
Joined
Oct 24, 2014
Messages
1,551
Likes
1,296
Location
Mangalore
I Humbly present to you, my ATOM in the new AVATAR. I rode on it last day and man WOOW!!! its so comfotable now. the cons have all gone. The seating right now is perfect for long rides no buttsore watsoever i rode 400 kms yesterday no complaints of butt sore. The Road grip is by far increased due to the rear fatter Tyre. Now the Braking is improved by leaps and bounds. Cornering was a big hassle while on the old bull due to tall riding position, that has been solved. The Mirror vibration is no more thing for me. Those Enticer mirrors do wonders even at night it doesn't get you the glare that you normally get from the vehicles light behind you. The Handle is 34" wide and does that improve the riding Posture?? a Sure shot yes. I thought that turning ATOM while on low speed below 15 km/h would be a problem with the wider handle. but i just proved myself wrong. The Clutch cable and the Accelerator cable had to be changed due to wider Handlebar. Now let the picture so the Talking.

rsz_aqua_star_ii_20150925_121946.jpg

rsz_aqua_star_ii_20150925_121946_1.jpg

rsz_aqua_star_ii_20150925_121958.jpg

rsz_aqua_star_ii_20150925_122137.jpg

rsz_aqua_star_ii_20150925_122137_1.jpg

rsz_aqua_star_ii_20150925_122147.jpg

rsz_aqua_star_ii_20150925_122210.jpg

rsz_aqua_star_ii_20150925_122210_1.jpg

rsz_aqua_star_ii_20150925_122215.jpg
 
Thread Starter #87
Joined
Oct 24, 2014
Messages
1,551
Likes
1,296
Location
Mangalore
List Of expenses incurred for this project

Alloy Wheels - 11,500/-
Broader Rear Wheel From Pirelli( 140/70/R 17) - 9500/-
Front Gear and Brake System - 6800/-
Swing Arm - 1400/-
Tail Light - 450/-
Fabrication work - 6000/-
Painting ( Two Tone with Pin striping Stickers) - 10,000/- Amber Whisky and Pearl Grey are both pearl base paint hence a bit Costly.
Handle bars - 1100/-
Mirrors - 600/-
Foot Rest Front - 1200/-
Seats - 2250/-
Seat Cover - 1000/- as i had tried three seats including the rear in which one was discarded.
Chrome Plating - 4000/-
Engine,Gearbox casing, Front shocks Polishing Charges - 1100/-
Lathe work - 1000/-
Steel Number plate and rear Indicator holding Assembly - 400/-
Indicators 4 nos - 700/-
Showroom Servicing @ accelerator and clutch cable change - 2500/-
Fuel Tank - 3500/-
Fog Lights - 800/-
Fog light and Front indicator Rod - 600/-
IND Number plate - 550/-
Stickering - 600/-
Mechanic Labor charge - 7500/-
Shipping charges of Handlebar, Saddle bags, swing arm, seats, Alloys& Tyre - 2000/-
Mobile Charger Cable assembly - 350/-
Tyre Fitting charge - 130/-
Bolts & Nuts & washers - 200/-
WB RC Silencer - 3800/-
Saddle Bags - 2500/-
New Exide Battery - 3300/-

Grand Total = 87,330/-

i Feel i saved a lot considering the charge some of the modifiers charge for stage one modification which starts from 1.5 so i just spent a bit more than half of it.

I'm thinking of starting a customizing shop as a hobby for those who want it done for bit less than what these other people charge.
have already got a few customers from our riding group itself, however until now haven't taken any decision.
 
Last edited:
Thread Starter #89
Joined
Oct 24, 2014
Messages
1,551
Likes
1,296
Location
Mangalore
Thanks Bro!!! its getting so much attention now. you need to see it in flesh. [:D]. going for a ride to sakleshpur on the 11th should see how it performs in the ghat.

Wifey is mad though, as there is no backrest or sissy bars added as if now.

Next week the backrest would get ready as i'm fabricating the backrest and giving it for chrome plating.

people suggested i go for avenger backrest but that wont complement the look hence going for a customized one.
 
Joined
Apr 17, 2015
Messages
64
Likes
14
Location
DEHRADUN
sir bike looking awsome ![clap], you have made royalharley 350 cruiser, sir the rear side of the bike looks like harley , btw sir the indicator lense is not matching the bike apperance as the colour of indicator lense is lightly dull , anyway sir wonderful job done [clap][:D]
 
Top Bottom