Nice one bro. if you told me earlier i would have got my sierra to you to get the seat covers fixed 
 . jokes apart its indeed come out nice however i feel you shuld have pulled it more so that the wrinkles that appear would not be there when finished. but for a DIY its a fab Job..
My Tata Nano: A New Journey Begins
- Thread Starter ss80
- Start date
- Status
- Not open for further replies.
Re: Seat Cover
Good DIY Anand. Enjoyed going through the same!
rselva & incarnation: Everything is good about nano, nothing like a deal breaker as such. People have to test drive it to know it, not just by looks. I too witness a lot of bullying by men when they see a women driving car.
Few pics of seat cover DIY. Bought it from J.C.ROad, R.K.Seat covers for 3100/- and fixed it myself. If I had given it to any shop, they end up stitching through the foam to get the tight finish. Nano seats are already pretty thin (foam thickness is bad) so dint want to risk tearing foam on long run. Hence did it myself. Now even if kids walk or kneel on seat, the stitches wont tear apart.
Few pics of seat cover DIY. Bought it from J.C.ROad, R.K.Seat covers for 3100/- and fixed it myself. If I had given it to any shop, they end up stitching through the foam to get the tight finish. Nano seats are already pretty thin (foam thickness is bad) so dint want to risk tearing foam on long run. Hence did it myself. Now even if kids walk or kneel on seat, the stitches wont tear apart.
Thread Starter
#48
Thanks a lot guys. Few more pics of the car interiors. Silver car with Greyish interiors (luckily the pre existing steering grip matched it).
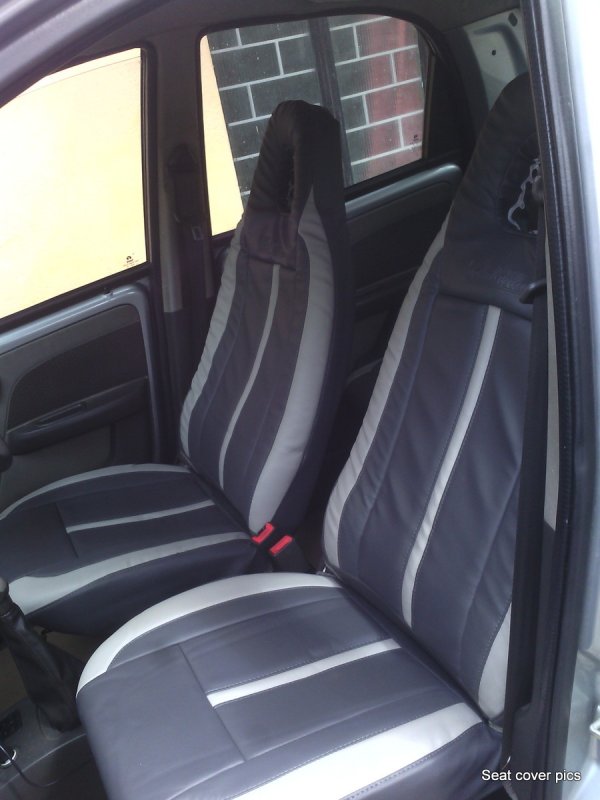
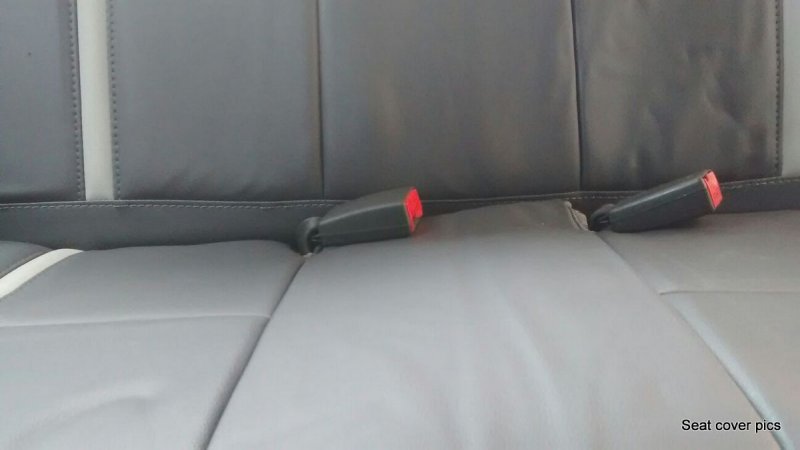
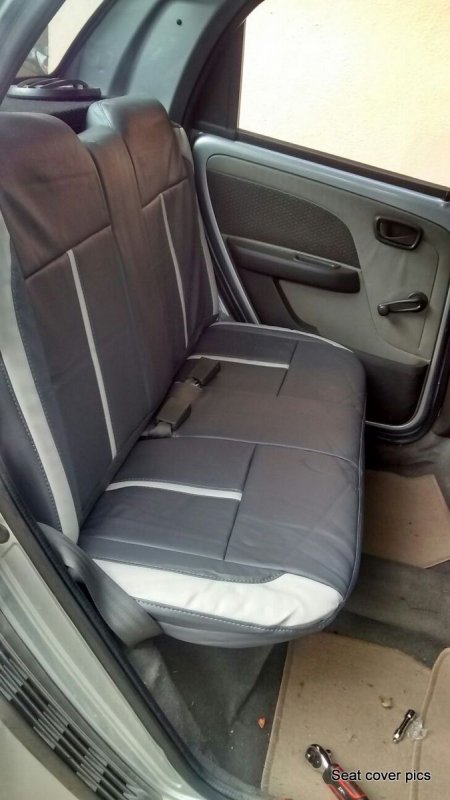
I have 3niece and 1 nephew who travel pretty frequently and hence just cant afford to end up tearing seat covers, no matter how many times I tell them, they still kneel and the youngest one walks on seat (cons of having a spacious car I guess). So I have just left it with wrinkles.
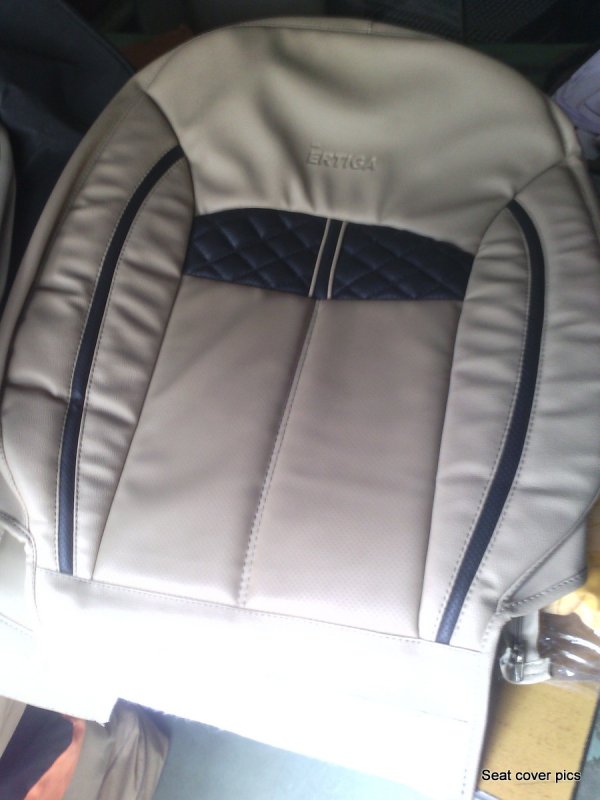
These seat covers are pre sticthed with car measurements, more like readymade garments of fixed sizes. All you got to do, fit it with a lot of muscle force and stretch it to desired fit. Available for almost all cars, in fabric, leather, art leather etc. starts from 1.5K till 7K. Some cars like ertiga etc get very neat designs though like this one below.
Ertiga design
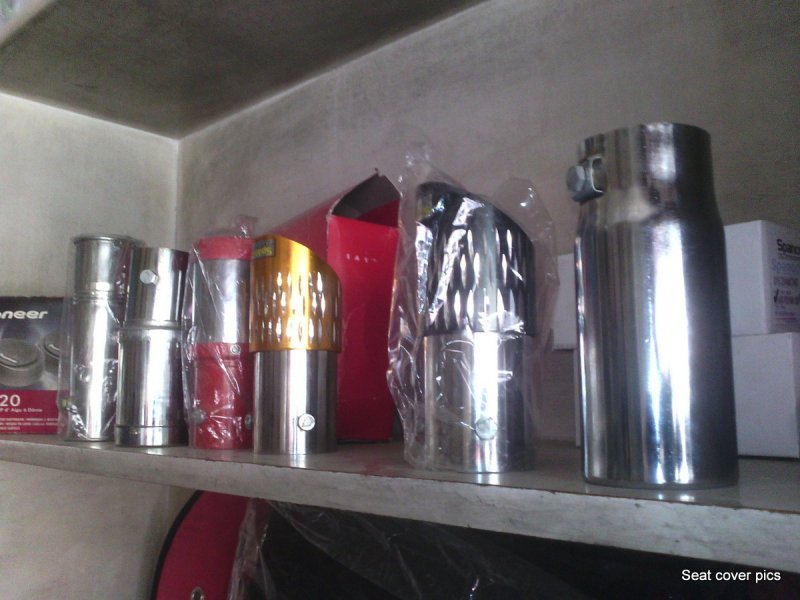
Some accessories in shop (dint buy it)
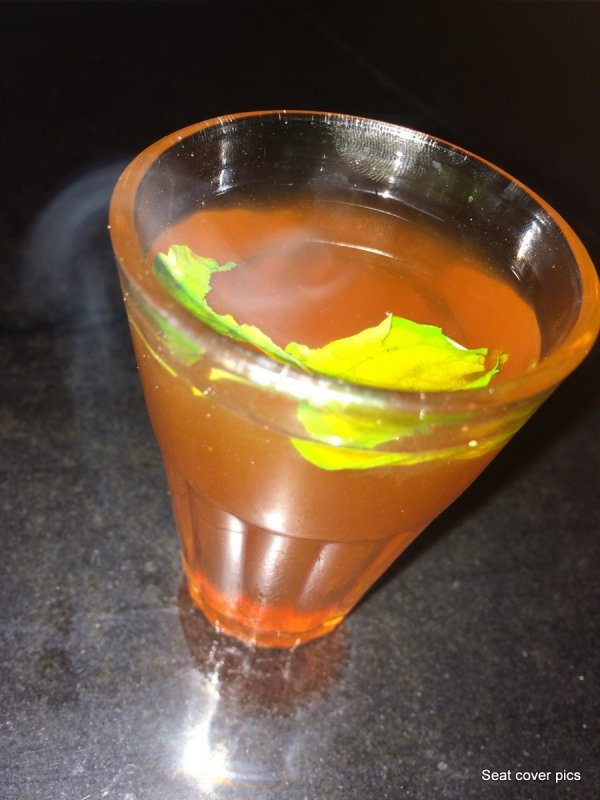
After all this hard work, had this lime tea (Savera Chai house) and clicked a pic of it using friend's Iphone. What a satisfying day it was![Smile [:)] [:)]](https://www.theautomotiveindia.com/forums/images/smilies/Smile.gif)


I have 3niece and 1 nephew who travel pretty frequently and hence just cant afford to end up tearing seat covers, no matter how many times I tell them, they still kneel and the youngest one walks on seat (cons of having a spacious car I guess). So I have just left it with wrinkles.
These seat covers are pre sticthed with car measurements, more like readymade garments of fixed sizes. All you got to do, fit it with a lot of muscle force and stretch it to desired fit. Available for almost all cars, in fabric, leather, art leather etc. starts from 1.5K till 7K. Some cars like ertiga etc get very neat designs though like this one below.
Ertiga design

Some accessories in shop (dint buy it)


After all this hard work, had this lime tea (Savera Chai house) and clicked a pic of it using friend's Iphone. What a satisfying day it was
![Smile [:)] [:)]](https://www.theautomotiveindia.com/forums/images/smilies/Smile.gif)
Last edited:
These Seat covers suit your car perfectly.![Thumbs & Wink [thumbswink] [thumbswink]](https://www.theautomotiveindia.com/forums/images/smilies/Thumbs%20&%20Wink.gif)
![Thumbs & Wink [thumbswink] [thumbswink]](https://www.theautomotiveindia.com/forums/images/smilies/Thumbs%20&%20Wink.gif)
Thread Starter
#50
2 months and 3200kms completed :)
Its exactly same time 2months back I had test driven my Nano for the first time. 3200kms has been completed with comfort, chill and awesomeness.![Clap [clap] [clap]](https://www.theautomotiveindia.com/forums/images/smilies/Clap.gif)
I never myself to be this happy with this egg shaped wonder![Big Smile [:D] [:D]](https://www.theautomotiveindia.com/forums/images/smilies/Big%20Smile.gif)
Its exactly same time 2months back I had test driven my Nano for the first time. 3200kms has been completed with comfort, chill and awesomeness.
![Clap [clap] [clap]](https://www.theautomotiveindia.com/forums/images/smilies/Clap.gif)
I never myself to be this happy with this egg shaped wonder
![Big Smile [:D] [:D]](https://www.theautomotiveindia.com/forums/images/smilies/Big%20Smile.gif)
don't wonder about the egg shape. its a wonder that is so wonderful that people often wonder whats this wonder ![Big Smile [:D] [:D]](https://www.theautomotiveindia.com/forums/images/smilies/Big%20Smile.gif)
![Big Smile [:D] [:D]](https://www.theautomotiveindia.com/forums/images/smilies/Big%20Smile.gif)
![Smile [:)] [:)]](https://www.theautomotiveindia.com/forums/images/smilies/Smile.gif)
Thread Starter
#53
..yet I wonder why its sales aren't a wonder ![Smile [:)] [:)]](https://www.theautomotiveindia.com/forums/images/smilies/Smile.gif)
![Smile [:)] [:)]](https://www.theautomotiveindia.com/forums/images/smilies/Smile.gif)
As a used car nano is the best option going forward, however the new car is not worth 3+lakhs. Lots of basic things are not right, like thickness of doors (feels like 7up tin can), no disc brakes, lean front tyre, over light power steering (too much of assist from motor), no rear head rest, no Spares available outside TASS etc. I feel nano production would end within a few years no matter who promotes it. I hope my prediction fails.
Till then love the car.
Thread Starter
#54
Bonnet rust sorted out, bumpers repainted
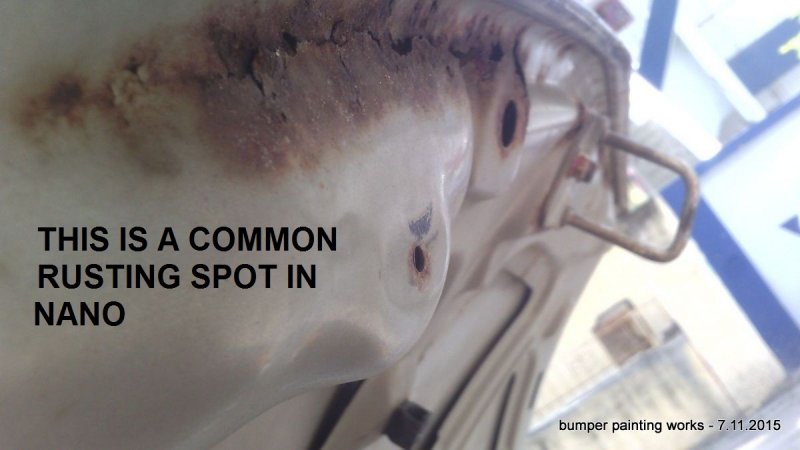
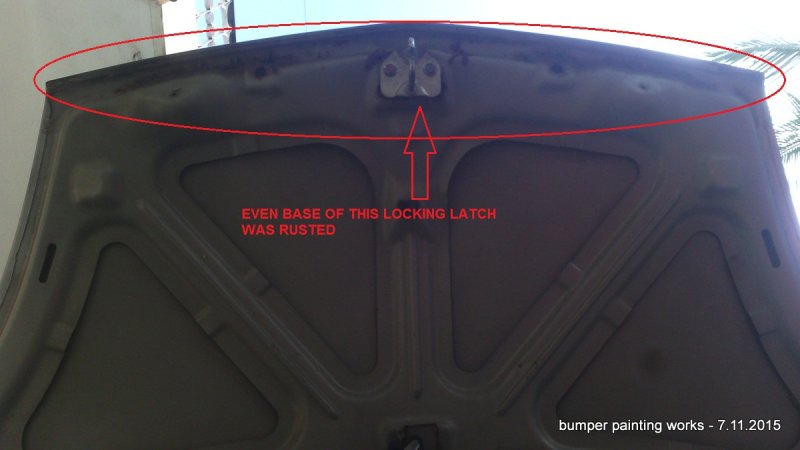
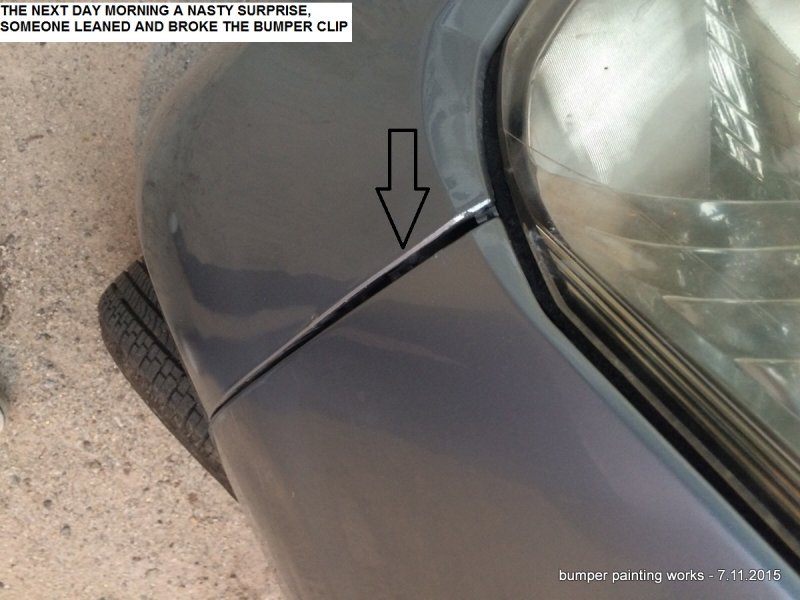
The bonnet had developed rust, in the exact same spot as many others. If you have read Akmal's thread, even his nano had same rusting. So took it to a gas welder and got it patched and then decided to paint bumpers too (too many scratches). So removed the bonnet first and got that sorted, as a result the paint on bonnet too got burnt.
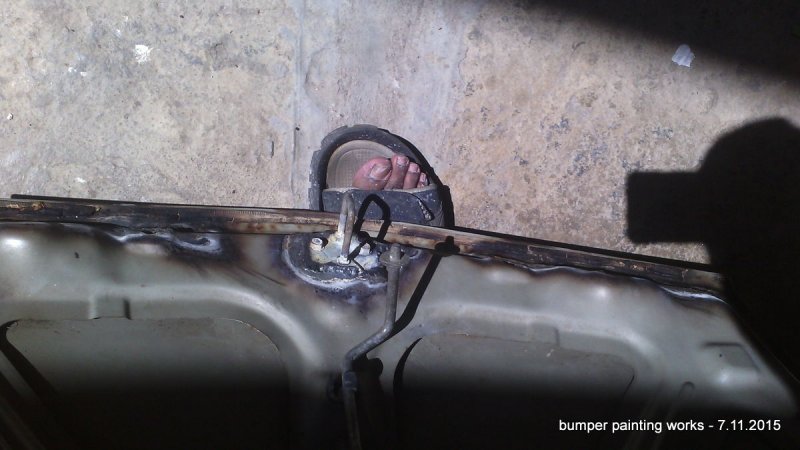
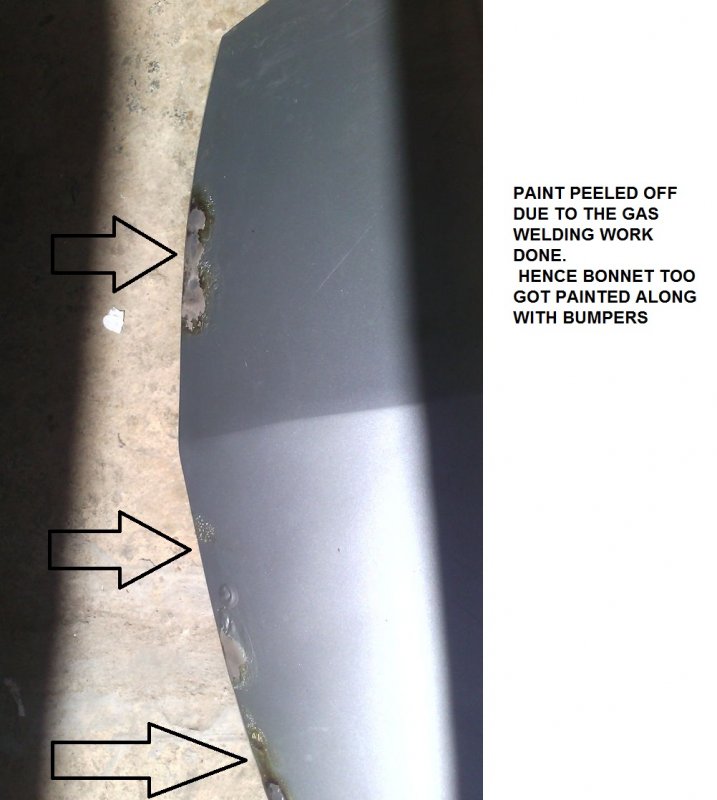
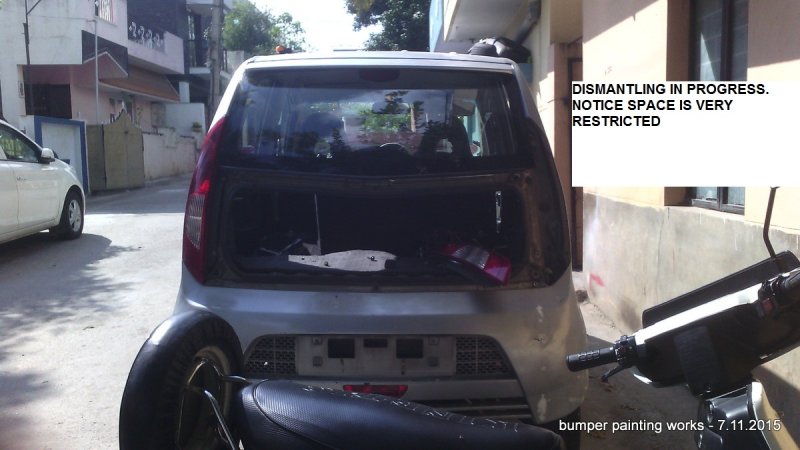
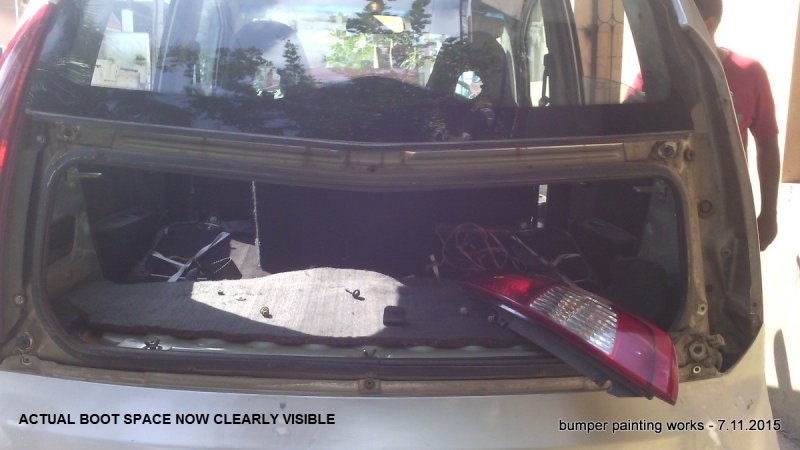
I cant paint on the street anymore, like I used to do with my 800 as the space around my home is filled with 3 cars, 1 auto and half a dozen bikes. Hence had to dismantle a lot to take out 2 bumpers and then painted it on terrace and fixed it back. The finishing is not great (only in pics it looks great), it is better than before and in this process spent 12HRS in staring an the awesomeness of TATA engineering.
Body filler applied
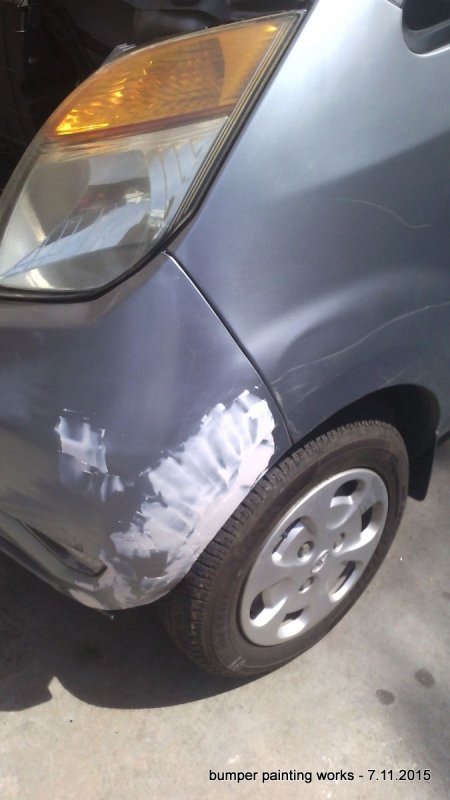
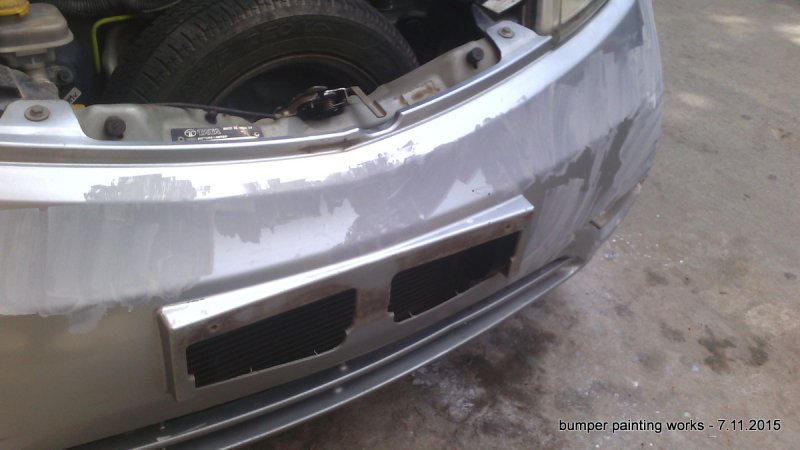
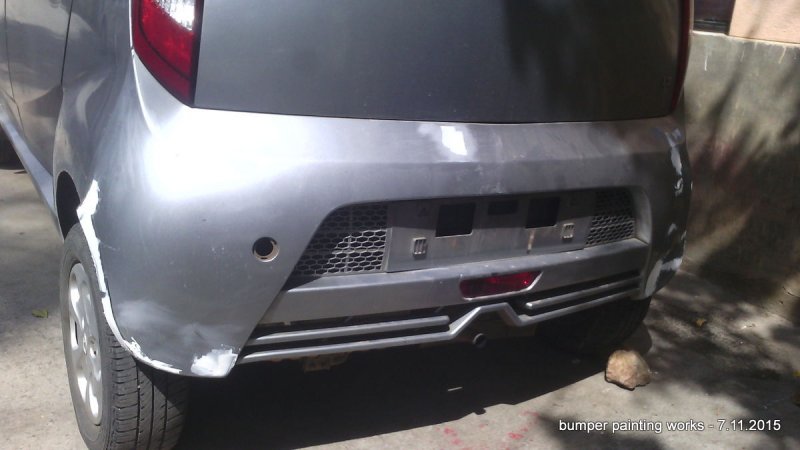
dismantling begins, the hot sun makes dismantling a tedious job.
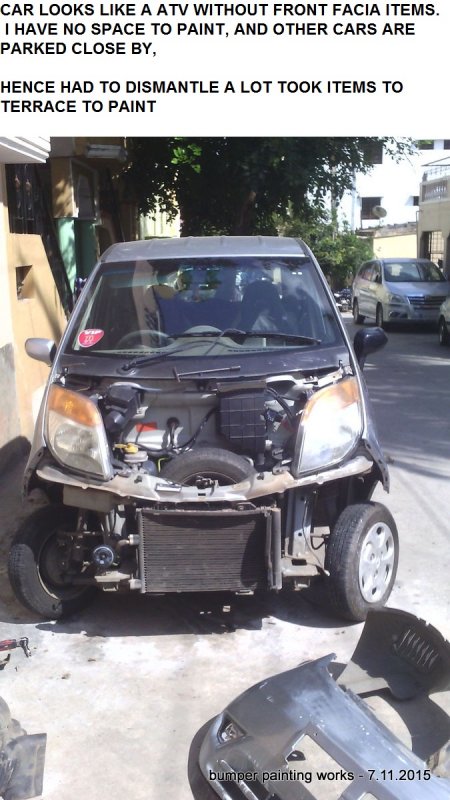
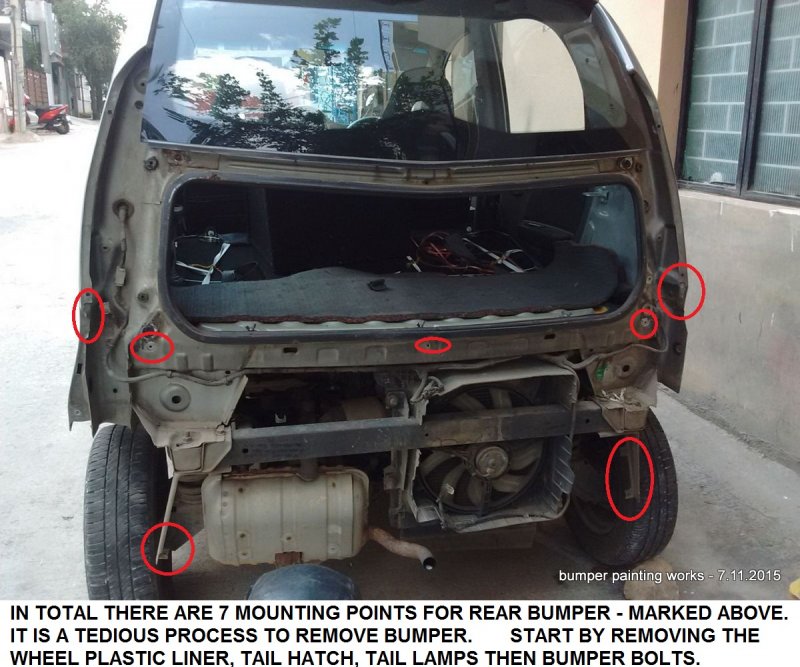
I think I am the first guy to post this state of nano here![Laugh [lol] [lol]](https://www.theautomotiveindia.com/forums/images/smilies/Laugh.gif)
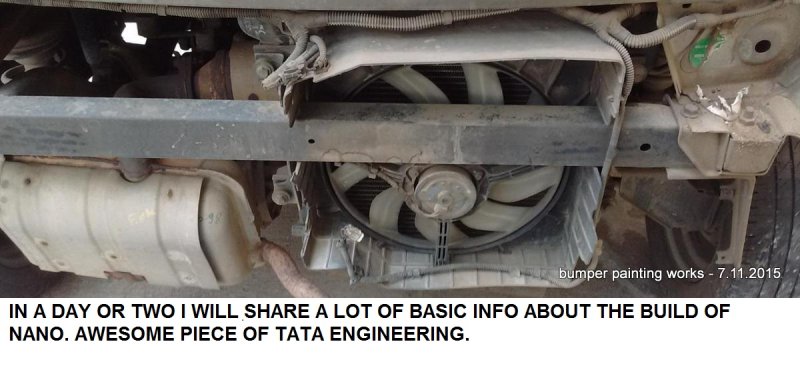
Faced a lot of issues while painting metallic shade - dust, windy place, compressor issues - but then this is what makes DIY an experience. If everything was butter smooth, then nothing special about it.
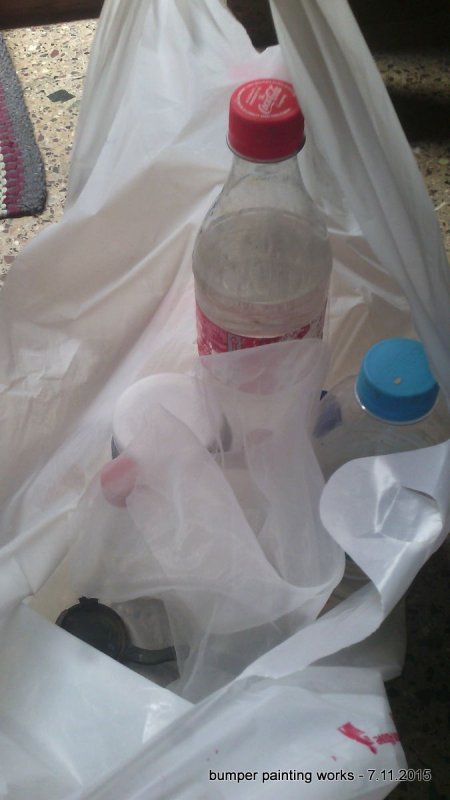
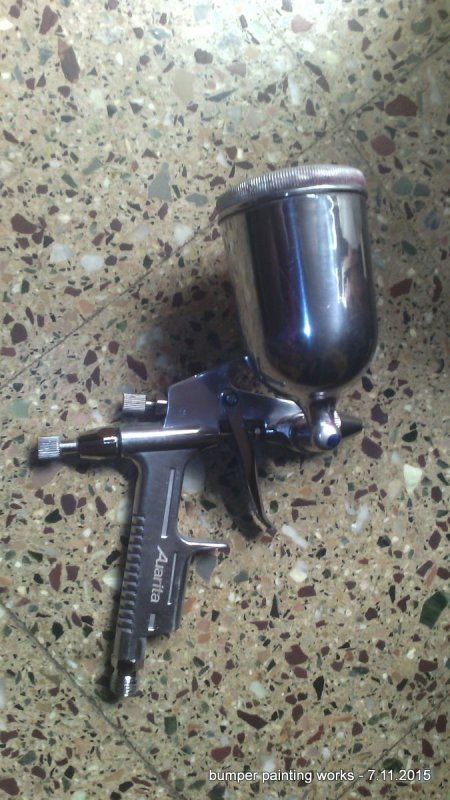
The tools - paint and a new gun (not used it as of now, used my existing HVLP gun)
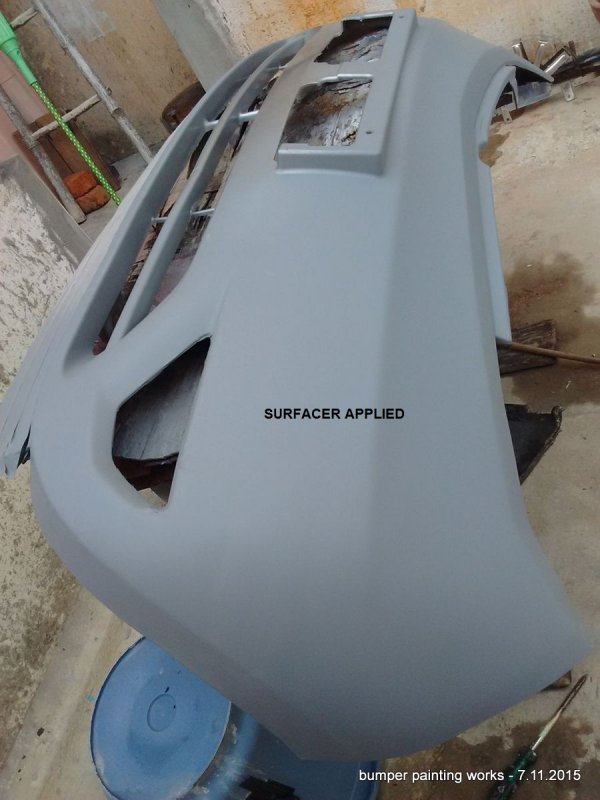
Surfacer applied
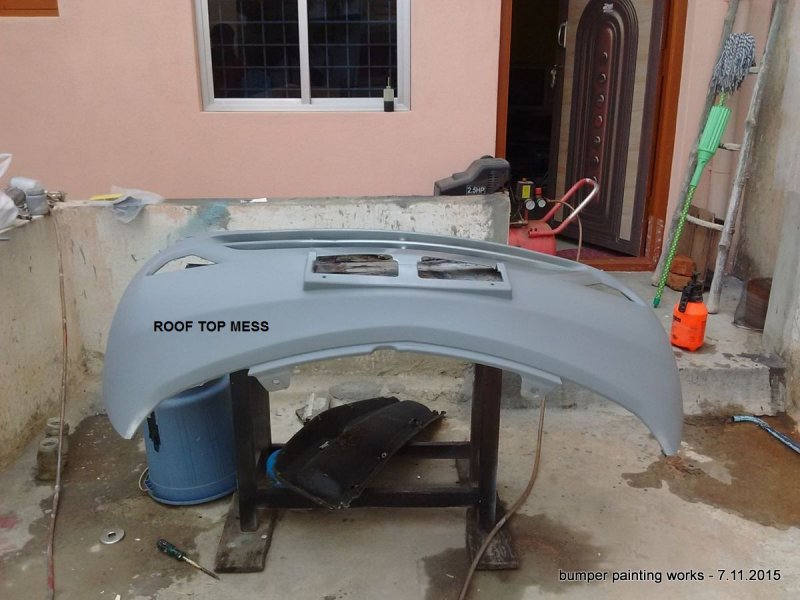
All spray works done & drying time
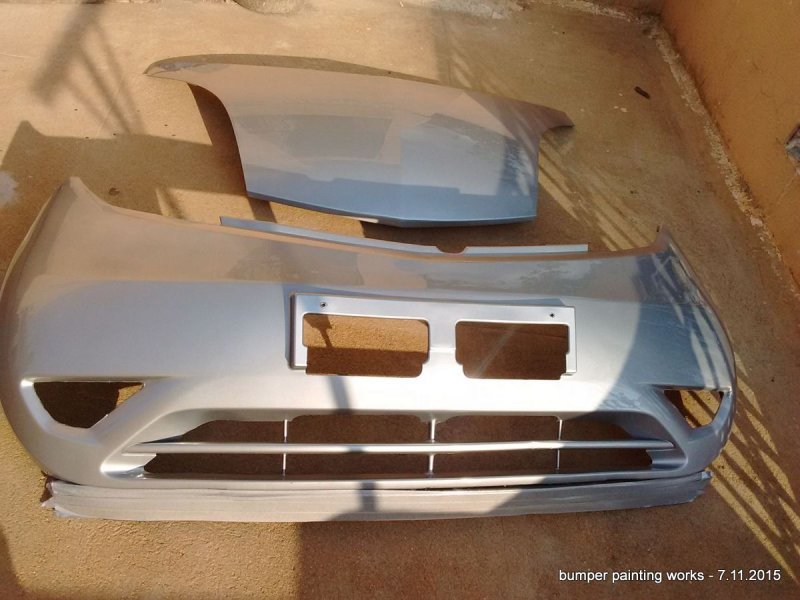
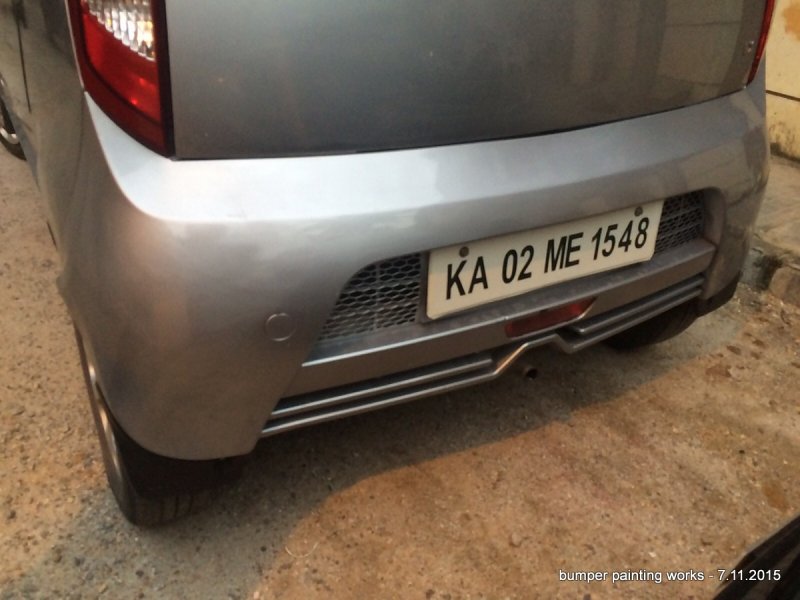
Colour mismatch is due to excess thinner in lacquer spray (I goofed up).
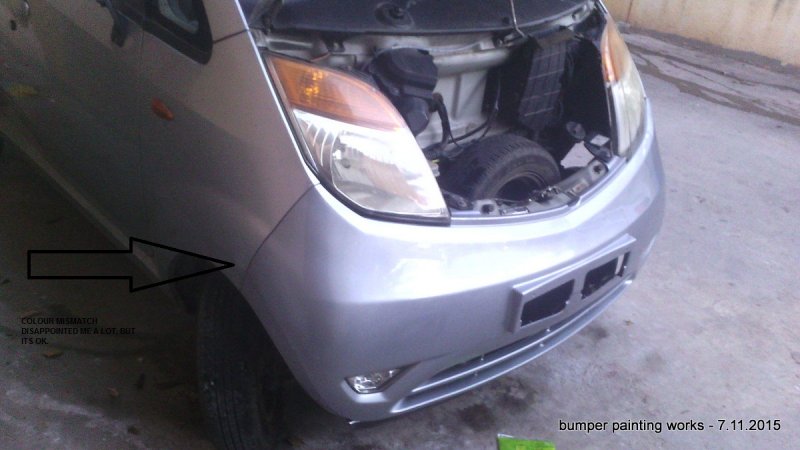
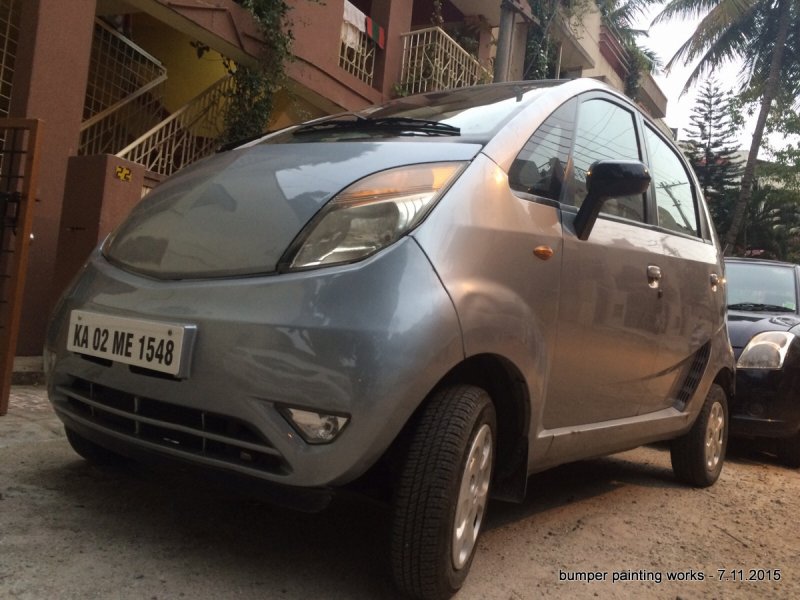
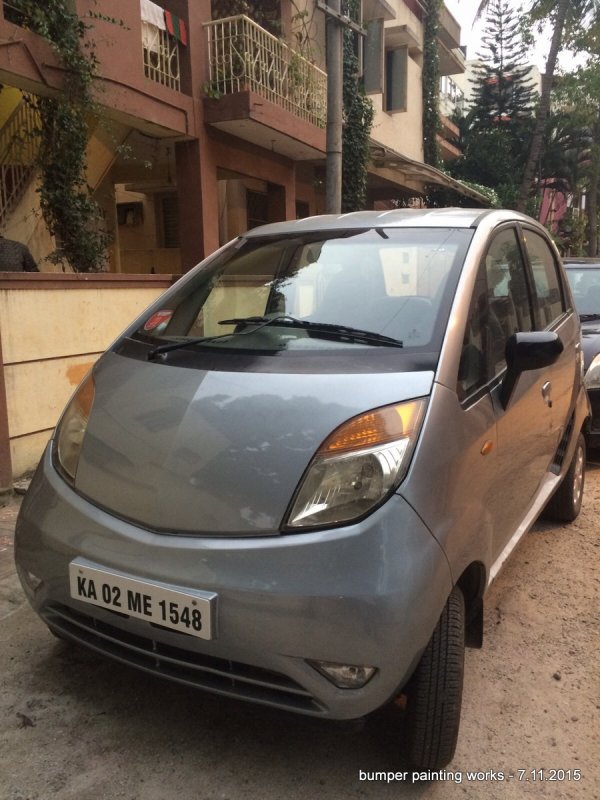
The car in full
A facebook status update![Big Smile [:D] [:D]](https://www.theautomotiveindia.com/forums/images/smilies/Big%20Smile.gif)
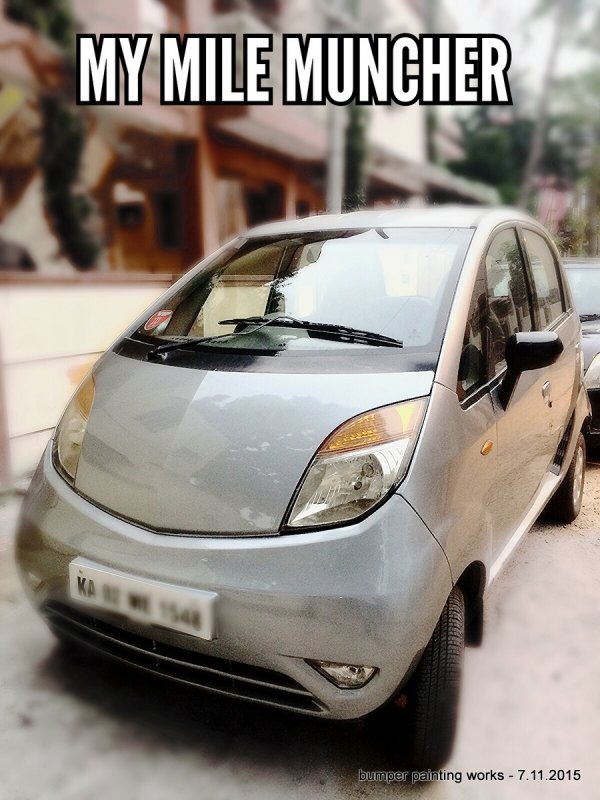
The bonnet had developed rust, in the exact same spot as many others. If you have read Akmal's thread, even his nano had same rusting. So took it to a gas welder and got it patched and then decided to paint bumpers too (too many scratches). So removed the bonnet first and got that sorted, as a result the paint on bonnet too got burnt.


I cant paint on the street anymore, like I used to do with my 800 as the space around my home is filled with 3 cars, 1 auto and half a dozen bikes. Hence had to dismantle a lot to take out 2 bumpers and then painted it on terrace and fixed it back. The finishing is not great (only in pics it looks great), it is better than before and in this process spent 12HRS in staring an the awesomeness of TATA engineering.
Body filler applied


dismantling begins, the hot sun makes dismantling a tedious job.


I think I am the first guy to post this state of nano here
![Laugh [lol] [lol]](https://www.theautomotiveindia.com/forums/images/smilies/Laugh.gif)


Faced a lot of issues while painting metallic shade - dust, windy place, compressor issues - but then this is what makes DIY an experience. If everything was butter smooth, then nothing special about it.
The tools - paint and a new gun (not used it as of now, used my existing HVLP gun)


Surfacer applied


All spray works done & drying time

Colour mismatch is due to excess thinner in lacquer spray (I goofed up).

The car in full


A facebook status update
![Big Smile [:D] [:D]](https://www.theautomotiveindia.com/forums/images/smilies/Big%20Smile.gif)

Excellent DIY job Anand.The car looks awesome after painting.![Clap [clap] [clap]](https://www.theautomotiveindia.com/forums/images/smilies/Clap.gif) Please visit my Omni thread for updates.
Please visit my Omni thread for updates.
One Suggestion-Put the tata monograms on the bonnet.
With Regards
Shrijit
![Clap [clap] [clap]](https://www.theautomotiveindia.com/forums/images/smilies/Clap.gif) Please visit my Omni thread for updates.
Please visit my Omni thread for updates.One Suggestion-Put the tata monograms on the bonnet.
With Regards
Shrijit
Last edited:
Its awesome DIY. Who cares about paint not matching up or the neatness compared to oem,its a wonderful DIY in every way. Most of us cant reach even halfway. I doubt I will ever get to see the internals of nano,the way you demonstrated.I salute your passion,your guts,to do what we can only dream of,and your humility in displaying the way to go about this DIY.![Clap [clap] [clap]](https://www.theautomotiveindia.com/forums/images/smilies/Clap.gif)
![Clap [clap] [clap]](https://www.theautomotiveindia.com/forums/images/smilies/Clap.gif)
Re: Bonnet rust sorted out, bumpers repainted
Hope proper patching work was done ! Rust is like cancer! one tiny bit is enough to spread like epidemic![Frustration [frustration] [frustration]](https://www.theautomotiveindia.com/forums/images/smilies/Frustration.gif) And that was one of the reasons why I opted for a new bonnet than any patch works!
And that was one of the reasons why I opted for a new bonnet than any patch works!
The bonnet had developed rust, in the exact same spot as many others. If you have read Akmal's thread, even his nano had same rusting. So took it to a gas welder and got it patched and then decided to paint bumpers too (too many scratches). So removed the bonnet first and got that sorted, as a result the paint on bonnet too got burnt.
View attachment 184395
View attachment 184396
View attachment 184397
View attachment 184398
I cant paint on the street anymore, like I used to do with my 800 as the space around my home is filled with 3 cars, 1 auto and half a dozen bikes. Hence had to dismantle a lot to take out 2 bumpers and then painted it on terrace and fixed it back. The finishing is not great (only in pics it looks great), it is better than before and in this process spent 12HRS in staring an the awesomeness of TATA engineering.
Body filler applied
View attachment 184399
View attachment 184400
View attachment 184401
dismantling begins, the hot sun makes dismantling a tedious job.
View attachment 184402
View attachment 184403
I think I am the first guy to post this state of nano here![Laugh [lol] [lol]](https://www.theautomotiveindia.com/forums/images/smilies/Laugh.gif)
View attachment 184404
View attachment 184405
View attachment 184406
Faced a lot of issues while painting metallic shade - dust, windy place, compressor issues - but then this is what makes DIY an experience. If everything was butter smooth, then nothing special about it.
The tools - paint and a new gun (not used it as of now, used my existing HVLP gun)
View attachment 184407
View attachment 184408
Surfacer applied
View attachment 184409
View attachment 184410
All spray works done & drying time
View attachment 184411
Colour mismatch is due to excess thinner in lacquer spray (I goofed up).
View attachment 184412
The car in full
View attachment 184413
View attachment 184414
View attachment 184415
View attachment 184416
A facebook status update![Big Smile [:D] [:D]](https://www.theautomotiveindia.com/forums/images/smilies/Big%20Smile.gif)
View attachment 184417
View attachment 184395
View attachment 184396
View attachment 184397
View attachment 184398
I cant paint on the street anymore, like I used to do with my 800 as the space around my home is filled with 3 cars, 1 auto and half a dozen bikes. Hence had to dismantle a lot to take out 2 bumpers and then painted it on terrace and fixed it back. The finishing is not great (only in pics it looks great), it is better than before and in this process spent 12HRS in staring an the awesomeness of TATA engineering.
Body filler applied
View attachment 184399
View attachment 184400
View attachment 184401
dismantling begins, the hot sun makes dismantling a tedious job.
View attachment 184402
View attachment 184403
I think I am the first guy to post this state of nano here
![Laugh [lol] [lol]](https://www.theautomotiveindia.com/forums/images/smilies/Laugh.gif)
View attachment 184404
View attachment 184405
View attachment 184406
Faced a lot of issues while painting metallic shade - dust, windy place, compressor issues - but then this is what makes DIY an experience. If everything was butter smooth, then nothing special about it.
The tools - paint and a new gun (not used it as of now, used my existing HVLP gun)
View attachment 184407
View attachment 184408
Surfacer applied
View attachment 184409
View attachment 184410
All spray works done & drying time
View attachment 184411
Colour mismatch is due to excess thinner in lacquer spray (I goofed up).
View attachment 184412
The car in full
View attachment 184413
View attachment 184414
View attachment 184415
View attachment 184416
A facebook status update
![Big Smile [:D] [:D]](https://www.theautomotiveindia.com/forums/images/smilies/Big%20Smile.gif)
View attachment 184417
![Frustration [frustration] [frustration]](https://www.theautomotiveindia.com/forums/images/smilies/Frustration.gif) And that was one of the reasons why I opted for a new bonnet than any patch works!
And that was one of the reasons why I opted for a new bonnet than any patch works!
Thread Starter
#58
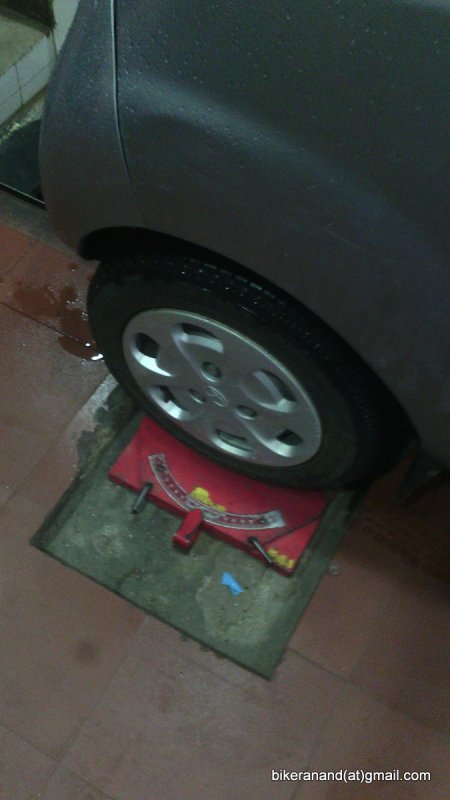
Alignment done
Thanks a lot Dixit ji, your words motivate me a lot.
Thanks Shrijit
Akmal, I thought you had repaired the bonnet. Good that you got it replaced, it costed me just 250/- for the gas welding, so thought why to visit the horrible TASS guys. Patch work is good. I have applied body filler on top of it, yet to paint inner side of the bonnet.
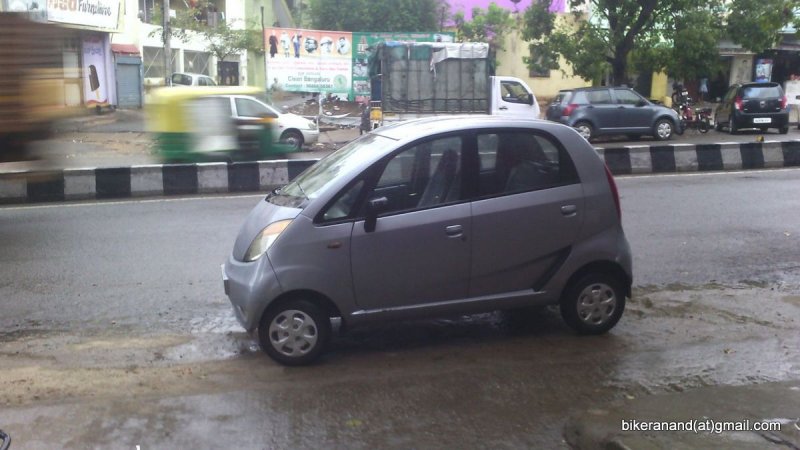
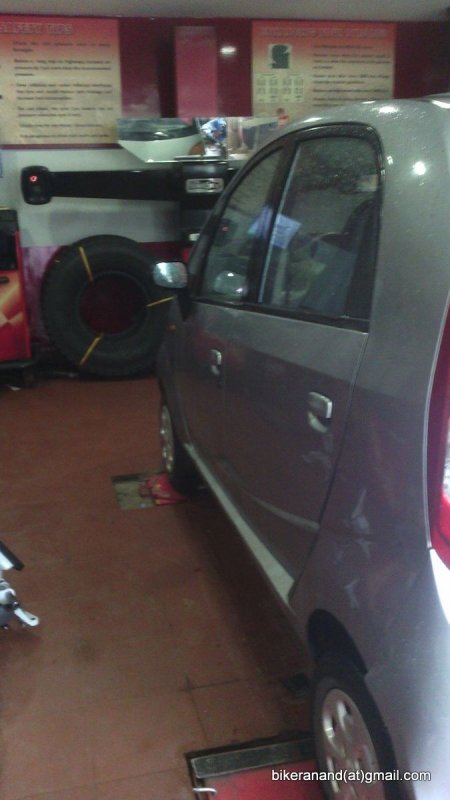
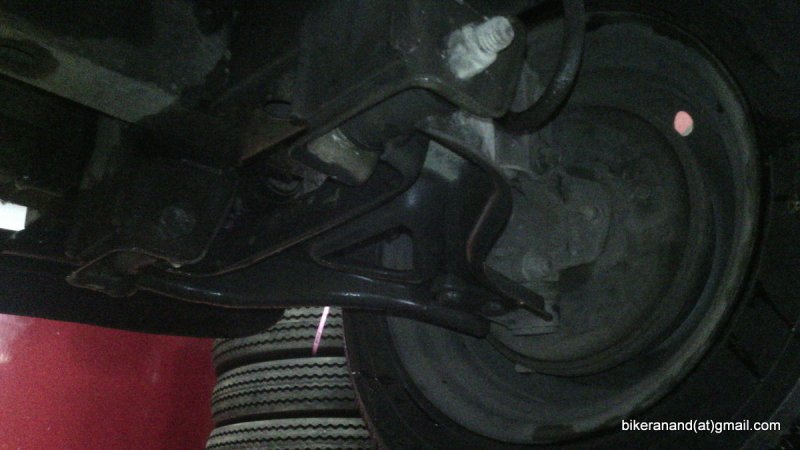
Took the car to wheel alignment, as left side pulling started few days back + right wheel inner sidewall was rubbing against the brake hose clip (due to misalignment).
Few pics.
Its awesome DIY. Who cares about paint not matching up or the neatness compared to oem,its a wonderful DIY in every way. Most of us cant reach even halfway. I doubt I will ever get to see the internals of nano,the way you demonstrated.I salute your passion,your guts,to do what we can only dream of,and your humility in displaying the way to go about this DIY.![Clap [clap] [clap]](https://www.theautomotiveindia.com/forums/images/smilies/Clap.gif)
![Clap [clap] [clap]](https://www.theautomotiveindia.com/forums/images/smilies/Clap.gif)
Excellent DIY job Anand.The car looks awesome after painting.![Clap [clap] [clap]](https://www.theautomotiveindia.com/forums/images/smilies/Clap.gif) Please visit my Omni thread for updates.
Please visit my Omni thread for updates.
One Suggestion-Put the tata monograms on the bonnet.
With Regards
Shrijit
![Clap [clap] [clap]](https://www.theautomotiveindia.com/forums/images/smilies/Clap.gif) Please visit my Omni thread for updates.
Please visit my Omni thread for updates.One Suggestion-Put the tata monograms on the bonnet.
With Regards
Shrijit
Hope proper patching work was done ! Rust is like cancer! one tiny bit is enough to spread like epidemic![Frustration [frustration] [frustration]](https://www.theautomotiveindia.com/forums/images/smilies/Frustration.gif) And that was one of the reasons why I opted for a new bonnet than any patch works!
And that was one of the reasons why I opted for a new bonnet than any patch works!
![Frustration [frustration] [frustration]](https://www.theautomotiveindia.com/forums/images/smilies/Frustration.gif) And that was one of the reasons why I opted for a new bonnet than any patch works!
And that was one of the reasons why I opted for a new bonnet than any patch works!
Took the car to wheel alignment, as left side pulling started few days back + right wheel inner sidewall was rubbing against the brake hose clip (due to misalignment).
Few pics.


Re: Bonnet rust sorted out, bumpers repainted
Hi Anand,
was patiently waiting when you will bite the DIY itch, lo and behold, super detailing and your skill shows.
awaiting your engineering detailing on this wonder called Nano, who has more than 5mil FB fans, and steadily growing on road fans
well done, keep it up.
regards
vinod
The bonnet had developed rust, in the exact same spot as many others. If you have read Akmal's thread, even his nano had same rusting. So took it to a gas welder and got it patched and then decided to paint bumpers too (too many scratches). So removed the bonnet first and got that sorted, as a result the paint on bonnet too got burnt.
View attachment 184395
View attachment 184396
View attachment 184397
View attachment 184398
I cant paint on the street anymore, like I used to do with my 800 as the space around
my home is filled with 3 cars, 1 auto and half a dozen bikes. Hence had to dismantle a
lot to take out 2 bumpers and then painted it on terrace and fixed it back. The finishing is not great (only in pics it looks great), it is better than before and in this process spent 12HRS in staring an the awesomeness of TATA engineering.
Body filler applied
View attachment 184399
View attachment 184400
View attachment 184401
dismantling begins, the hot sun makes dismantling a tedious job.
View attachment 184402
View attachment 184403
I think I am the first guy to post this state of nano here![Laugh [lol] [lol]](https://www.theautomotiveindia.com/forums/images/smilies/Laugh.gif)
View attachment 184404
View attachment 184405
View attachment 184406
Faced a lot of issues while painting metallic shade - dust, windy place, compressor issues - but then this is what makes DIY an experience. If everything was butter smooth, then nothing special about it.
The tools - paint and a new gun (not used it as of now, used my existing HVLP gun)
View attachment 184407
View attachment 184408
Surfacer applied
View attachment 184409
View attachment 184410
All spray works done & drying time
View attachment 184411
Colour mismatch is due to excess thinner in lacquer spray (I goofed up).
View attachment 184412
The car in full
View attachment 184413
View attachment 184414
View attachment 184415
View attachment 184416
A facebook status update![Big Smile [:D] [:D]](https://www.theautomotiveindia.com/forums/images/smilies/Big%20Smile.gif)
View attachment 184417
View attachment 184395
View attachment 184396
View attachment 184397
View attachment 184398
I cant paint on the street anymore, like I used to do with my 800 as the space around
my home is filled with 3 cars, 1 auto and half a dozen bikes. Hence had to dismantle a
lot to take out 2 bumpers and then painted it on terrace and fixed it back. The finishing is not great (only in pics it looks great), it is better than before and in this process spent 12HRS in staring an the awesomeness of TATA engineering.
Body filler applied
View attachment 184399
View attachment 184400
View attachment 184401
dismantling begins, the hot sun makes dismantling a tedious job.
View attachment 184402
View attachment 184403
I think I am the first guy to post this state of nano here
![Laugh [lol] [lol]](https://www.theautomotiveindia.com/forums/images/smilies/Laugh.gif)
View attachment 184404
View attachment 184405
View attachment 184406
Faced a lot of issues while painting metallic shade - dust, windy place, compressor issues - but then this is what makes DIY an experience. If everything was butter smooth, then nothing special about it.
The tools - paint and a new gun (not used it as of now, used my existing HVLP gun)
View attachment 184407
View attachment 184408
Surfacer applied
View attachment 184409
View attachment 184410
All spray works done & drying time
View attachment 184411
Colour mismatch is due to excess thinner in lacquer spray (I goofed up).
View attachment 184412
The car in full
View attachment 184413
View attachment 184414
View attachment 184415
View attachment 184416
A facebook status update
![Big Smile [:D] [:D]](https://www.theautomotiveindia.com/forums/images/smilies/Big%20Smile.gif)
View attachment 184417
Hi Anand,
was patiently waiting when you will bite the DIY itch, lo and behold, super detailing and your skill shows.
awaiting your engineering detailing on this wonder called Nano, who has more than 5mil FB fans, and steadily growing on road fans
well done, keep it up.
regards
vinod
Re: Alignment done
Even I too thought of doing patch work; but rust had eaten a lot of good metal ![Anger [anger] [anger]](https://www.theautomotiveindia.com/forums/images/smilies/Anger.gif) . Had to struggle with the TASS at first as they refused to change the bonnet ! Then I had to blast them on facebook to replace it fully
. Had to struggle with the TASS at first as they refused to change the bonnet ! Then I had to blast them on facebook to replace it fully
Akmal, I thought you had repaired the bonnet. Good that you got it replaced, it costed me just 250/- for the gas welding, so thought why to visit the horrible TASS guys. Patch work is good. I have applied body filler on top of it, yet to paint inner side of the bonnet.
![Anger [anger] [anger]](https://www.theautomotiveindia.com/forums/images/smilies/Anger.gif) . Had to struggle with the TASS at first as they refused to change the bonnet ! Then I had to blast them on facebook to replace it fully
. Had to struggle with the TASS at first as they refused to change the bonnet ! Then I had to blast them on facebook to replace it fully- Status
- Not open for further replies.

