My First Car: Maruti 800 AC 93 Model


Thread Starter #316
Joined
Mar 28, 2012
Messages
582
Likes
81
Location
Lucknow
It would be a good thing to change the cables.
The cables will be changed soon. I was also willing to change the spark plugs, but the mechanic is saying that as the plugs are working properly so I should not disturb the setup. The plugs are old(don't know when the previous owner replaced) and were not changed when I bought the car. Any specific brand of cable ?? Which brand spark plug should I use ?
 
Joined
Apr 4, 2012
Messages
2,524
Likes
250
Location
Mumbai
Check out SS80's thread.He changed to Delphi cables.For spark plugs, check the coloring on the insulator.It should be either light pink or brown.

Check the gap, I think its 0.9mm.Platinum ones are more than enough.I'm using NGK platinum plugs that came with my MPI kit.
 
Last edited:
Thread Starter #318
Joined
Mar 28, 2012
Messages
582
Likes
81
Location
Lucknow
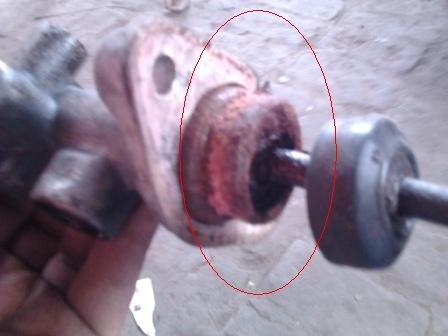
Yesterday the brakes of my car failed while returning home. I drove slowly to my home and to the garage today. I was willing to upgrade to boosters, but the mechanic kept insisting for stock brakes. At last I replaced the brake master cylinder with new one (KBX Make). While bleeding the brakes I found that one of the rear brake pipes was leaky. So replaced both the brake lines with MGP parts.

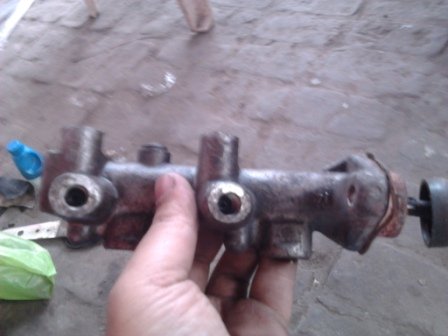
The old brake cylinder was not in a good condition.
Photo1392.jpg
Photo1391.jpg
Brake fluid was leaking from near master cylinder boot and push rod.

I also replaced the old spark plugs with BOSCH spark plugs. Earlier one of the 3 was new.
The HT cords were replaced using new DELPHI cords.
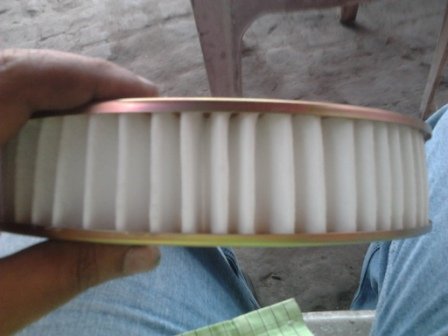
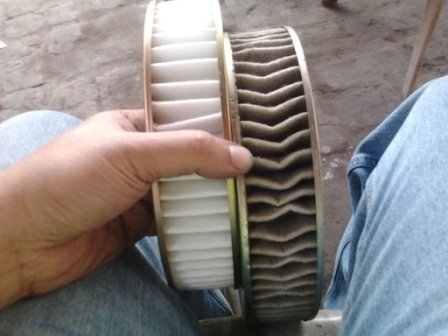
The air filter is also replaced with a new purolator filter
Photo1383.jpg
Photo1387.jpg
New and old filter.

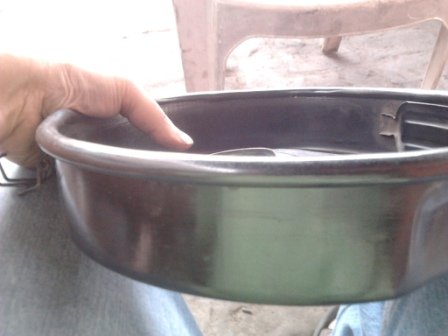
The gasket on the air filter box was worn out and broken from few places and was not available in market nearby so I replaced it using petrol pipe in scooters. By cutting the pipe and fitting it on the edge.
Photo1389.jpg

I also bought the vacuum switch (used to increase RPM when ac is on) and fitted it onto the carb.

Expenses done:
1. KBX Brake Master Cylinder 693/-
2. MGP Rear Brake Line 2 nos 210/-
3. KBX Brake Fluid 500 ml 120/-
4. BOSCH spark plugs 3 nos 170/-
5. Delphi Spark Plug Wire Set 280/-
6. Purolator Air Filter 120/-
7. Vacuum Valve 180/-
8. Petrol Pipe 30/-

TOTAL 1803/-

No Labor Charge as all work was a DIY. Also there are less photos as my hands were too dirty to handle the mobile.
 
Joined
Apr 4, 2012
Messages
2,524
Likes
250
Location
Mumbai
Your mechanic is lazy that's all.Fitting a booster is just like fitting a normal brake master cylinder.Just that the mounts are removed and the booster mount and vacuum tank is added.

Believe me the booster make a world of difference.

Btw, what color was the tip of the old spark plugs?
 
Thread Starter #320
Joined
Mar 28, 2012
Messages
582
Likes
81
Location
Lucknow
Btw, what color was the tip of the old spark plugs?
The spark plug tips were BLACK and a bit oily.


After installing the new spark plugs and cables there is a constant tak tak tak noise in the engine, which increases with rpm. I think its due to mismatched distributor timing. I'll rectify it tomorrow morning. Is it the distributor or something else ??
 
Joined
Apr 4, 2012
Messages
2,524
Likes
250
Location
Mumbai
Are you sure its oil and not petrol?

If its oil,check the level of oil.The oil should not be entering the chamber.The piston rings could be worn out and allowing oil into the chamber or the cylinder walls are damaged.The spark plug should be dry and pinkish in color.

If its petrol, the car is running too rich.Adjust the air fuel mixture on the carb.

I just checked mine two days ago and it was pinkish in color.

How many kilometers has the engine done?
 
Last edited:
Thread Starter #322
Joined
Mar 28, 2012
Messages
582
Likes
81
Location
Lucknow
Hi,
Its oil. But the oil level is fine. I don't think that piston rings are worn out as the engine was rebuilt by the previous owner before sale. The car has clocked more than 1lac 20k kms.

I'll soon check the new plugs within few days.
 
Joined
Apr 4, 2012
Messages
2,524
Likes
250
Location
Mumbai
Check the compression.Do a dry compression test if all the chambers give the same value then its ok.If not do a wet compression test.
 
Thread Starter #324
Joined
Mar 28, 2012
Messages
582
Likes
81
Location
Lucknow
Check the compression.Do a dry compression test if all the chambers give the same value then its ok.If not do a wet compression test.
Compression test was done when I bought the car. All the chambers gave same value. I think the black oily thing was some sort of carbon, etc I'll check the plugs soon for color or any carbon deposit.
 
Thread Starter #326
Joined
Mar 28, 2012
Messages
582
Likes
81
Location
Lucknow
Today I went to the garage for radiator flushing and cleaning of AC condenser and evaporator.

All work was DIY so I don't have any pics to upload. [cry]

First I flushed the radiator properly using lots of water. And then filled the radiator with
a 20:80 mixture of acid and water and kept it for half n hour. When I drained the acidic
water, it had lots and lots of dirt and green particles. Again the radiator was flushed
using normal water. The fins were cleaned using soapy water and a toothbrush.

For cleaning the water chamber of the engine, only pressurized water was used.
The overflow reservoir and fan blades were cleaned using luke warm soapy water. The fan blades turned white from grey and the humming sound of the radiator fan has vanished.
The AC condenser and evaporator fins were cleaned using pressure water and then with warm soapy water. I had sealed the inlet and outlet pipes using rubber sealer caps while cleaning with water. Later the AC components were cleaned using pressurized air.


I also checked the spark plugs, it was a little pinkish in color and had no carbon deposits.
 
Joined
Feb 8, 2011
Messages
3,863
Likes
1,169
Location
Chennai
Today I went to the garage for radiator flushing and cleaning of AC condenser and evaporator.

All work was DIY so I don't have any pics to upload. [cry]

First I flushed the radiator properly using lots of water. And then filled the radiator with
a 20:80 mixture of acid and water and kept it for half n hour. When I drained the acidic
water, it had lots and lots of dirt and green particles. Again the radiator was flushed
using normal water. The fins were cleaned using soapy water and a toothbrush.

For cleaning the water chamber of the engine, only pressurized water was used.
The overflow reservoir and fan blades were cleaned using luke warm soapy water. The fan blades turned white from grey and the humming sound of the radiator fan has vanished.
The AC condenser and evaporator fins were cleaned using pressure water and then with warm soapy water. I had sealed the inlet and outlet pipes using rubber sealer caps while cleaning with water. Later the AC components were cleaned using pressurized air.


I also checked the spark plugs, it was a little pinkish in color and had no carbon deposits.
Wow. Shantanu. you seems to be half Maruti Tech guy yaar. Wonderful job. I would really hesitate to do such experiment with my car. May be after some time i can try doing something like this with my sparky.
 
Thread Starter #329
Joined
Mar 28, 2012
Messages
582
Likes
81
Location
Lucknow
Wow. Shantanu. you seems to be half Maruti Tech guy yaar. Wonderful job. I would really hesitate to do such experiment with my car. May be after some time i can try doing something like this with my sparky.
Thanks for liking my DIYs sir. You can surely try some DIYs later on. Just don't hesitate. JUST DO IT [;)] Frankly speaking, when I was new to automobiles I used to move away from the open bonnet when the mechanics used to rev the engine for testing,etc. But now, I myself adjust RPMs, mixture etc and rev by pulling the throttle cable.
 
Thread Starter #330
Joined
Mar 28, 2012
Messages
582
Likes
81
Location
Lucknow
Today bought a colorful Holi gift for my beloved car. A multicolored LED strip with controller and remote. It has various color modes, dimmer, strobe and fading effect for Rs 850.

The LED Strip (5 mtrs in length)
Photo1412.jpg

The controller box
Photo1414.jpg

Remote
Photo1416.jpg

Various color modes:
Photo1418.jpg
Photo1419.jpg
Photo1420.jpg
Photo1421.jpg
Photo1422.jpg
Photo1424.jpg
Photo1425.jpg
Photo1427.jpg
Photo1428.jpg
Photo1429.jpg
Photo1430.jpg
 
Top Bottom