The Ford Endeavour 3.2 Titanium – Built Tough


Thread Starter #211
Joined
Nov 28, 2015
Messages
427
Likes
814
Location
Roorkee
T is it OK to connect it with the Fog Lamp ? wireless switch is no doubt a good options suggested in case they are effective .
Not sure how the Rigid wiring harness is but if it has only power lines, you need to add a relay as explained previously and tap the Fog Lamp wire for the relay coil. If the harness has a switch and separate power lines, then the switch wire can be connected to the Fog Lamp and power lines to battery. Avoid connecting the power lines directly to fog lamp since it risks overloading the BCM which in a worst case scenario can fail due to this.
 
Joined
Dec 8, 2019
Messages
5
Likes
6
Location
Kolkata
Thanks A.G this is really helpful , i also felt your idea of relay and wireless switch seems to be a better idea , without imposing any additional pressure on BCM. I would prefer to keep the rigid alone . Thank so very much again
 
Thread Starter #213
Joined
Nov 28, 2015
Messages
427
Likes
814
Location
Roorkee
Made an unscheduled visit to the service center for the Rear brake pads replacement. Since the last service, it was clear that they are nearing end of life but did not get them replaced as I was informed that an updated part which is less prone to cracking is coming out soon.

Top - old part, bottom - new updated part
Endeavour T44_1.jpg


Exhaust Gas Temperature (EGT) sensor was also replaced under warranty
Endeavour T44_2.jpg


The engine accessories belt was also making squeaking sound and was replaced as well
Endeavour T44_3.jpg


Apart from some other minor work including brake bleeding, the total expense came out to be Rs. 8700.

Couple of days later, it was pleasantly surprising to find the instrument cluster giving Key battery low warning as well

Key Battery warning
Endeavour T44_4.jpg


Opened key with battery removed
Endeavour T44_5.jpg
 
Joined
Dec 8, 2019
Messages
5
Likes
6
Location
Kolkata
Thanks AG , how do i tap the switch connection from Fog lamp ? Is there any splitter , which can help me have the connection from fog lamp connection point , can you please help me with the connection type and availability or link if you can please suggest

Thanks AG , how do i tap the switch connection from Fog lamp ? Is there any splitter , which can help me have the connection from fog lamp connection point , can you please help me with the connection type and availability or link if you can please suggest

Also can i request your number so that can have connected with you for a bit detailed help please
 
Thread Starter #215
Joined
Nov 28, 2015
Messages
427
Likes
814
Location
Roorkee
Is there any splitter , which can help me have the connection from fog lamp connection point , can you please help me with the connection type and availability or link if you can please suggest
I am using 3M Scotchlok which can tap any wire without cutting. Just buy original 3M from Amazon. The wiring is slightly exposed near the fog lamp bulb - just tap it from there and after tapping, seal it with rubber compound tape usually available at any submersible pump store.
Also can i request your number so that can have connected with you for a bit detailed help please
Check PM
 
Thread Starter #216
Joined
Nov 28, 2015
Messages
427
Likes
814
Location
Roorkee
Sharing a couple of pictures from last month's drives

A day trip to Mussoorie - luckily avoided getting stuck in the snow as we started back right after freezing rain post which it started to snow heavily

At the roof top parking
Endeavour T45_1.jpg

Endeavour T45_2.jpg

Endeavour T45_3.jpg


Stopping for tea & maggi - captured the old generation Fortuner in the same frame
Endeavour T45_4.jpg

Endeavour T45_5.jpg


Participated in the Ford's Republic Day Drive to Attari Border with stay at Amritsar

Stopping at the wrong resort
Endeavour T45_6.jpg


Regrouping with the convoy from NCR
Endeavour T45_7.jpg

Endeavour T45_8.jpg


Stickering done
Endeavour T45_9.jpg


At the Attari Border
Endeavour T45_10.jpg

Endeavour T45_11.jpg

Endeavour T45_12.jpg

Endeavour T45_13.jpg


Couple of Sunset shots
Endeavour T45_14.jpg

Endeavour T45_15.jpg


Endeavours parked at the hotel
Endeavour T45_16.jpg

Endeavour T45_17.jpg


Final Trip stats
Endeavour T45_18.jpg
 
Joined
Jan 4, 2018
Messages
323
Likes
243
Location
Chennai
Nice review. What has been your minimum (the worst) FE in city and the max in city? Similarly also see if you can share the minimum and maximum FE on highway drives.
 

mayankdixit

Honoured Member
Joined
May 16, 2014
Messages
1,891
Likes
3,371
Location
kanpur
Wonderful pics. How come the EGT sensor fouled so early.Isn't it expected to last very long?
Yours is the only endy( out of all) with the snorkel modification! Good that it stands out.
 
Last edited:
Thread Starter #219
Joined
Nov 28, 2015
Messages
427
Likes
814
Location
Roorkee
Nice review. What has been your minimum (the worst) FE in city and the max in city? Similarly also see if you can share the minimum and maximum FE on highway drives.
City FE (my daily run of 5Kms one way, total 20 Kms) - 6.1 Kmpl to 7.3 Kmpl
City FE (NCR) - 8.2 Kmpl to 13.1 Kmpl (Noida to Greater Noida)
Highway FE (2 Lane roads) - 8.5 Kmpl to 10.6 Kmpl
Highway FE (4 Lane roads & Expressway) - 10.2 Kmpl (contant 120 Kmph) to 14.5 Kmpl (constant 85 Kmph)
The FE sees a considerable drop once you start varying speed.
Wonderful pics. How come the EGT sensor fouled so early.Isn't it expected to last very long?
Yours is the only endy( out of all) with the snorkel modification! Good that it stands out.
EGT sensor was fine but the wire was having some issue. Instead of just correcting the wire, the sensor along with wire was replaced. The Snorkel really makes it stand out from the crowd apart from being the most useful mod.
 
Joined
Jan 4, 2018
Messages
323
Likes
243
Location
Chennai
City FE (my daily run of 5Kms one way, total 20 Kms) - 6.1 Kmpl to 7.3 Kmpl
City FE (NCR) - 8.2 Kmpl to 13.1 Kmpl (Noida to Greater Noida)
Highway FE (2 Lane roads) - 8.5 Kmpl to 10.6 Kmpl
Highway FE (4 Lane roads & Expressway) - 10.2 Kmpl (contant 120 Kmph) to 14.5 Kmpl (constant 85 Kmph)
The FE sees a considerable drop once you start varying speed.
.
That was a beautiful illustration and it seems considering the segment, class and size + weight of this vehicle, given FE numbers sound pretty decent, aren't they ? [drive]
 
Thread Starter #221
Joined
Nov 28, 2015
Messages
427
Likes
814
Location
Roorkee
That was a beautiful illustration and it seems considering the segment, class and size + weight of this vehicle, given FE numbers sound pretty decent, aren't they ? [drive]
Given the weight, permanent all wheel drive setup and automatic transmission, the figures are absolutely justified since for the sake of comparison, in my previous ride the Pajero Sport which was 200Kgs lighter, 2 wheel drive with manually selectable 4 wheel drive and equipped with Manual transmission, the first city figure was hardly 1Kmpl more, second had a highest limited to 12.4 Kmpl, Highway figure on 2 lane was approximately same while on 4 lanes the figures dropped to a shade above 9 Kmpl at 120 Kmph.
 
Thread Starter #222
Joined
Nov 28, 2015
Messages
427
Likes
814
Location
Roorkee
Replacing nearly all the exterior bulbs with LEDs
Except the ORVM mounted turn signals, rest all the bulbs which were left had been replaced with LEDs.

Turn signal
The picture below shows the rear tail lamp removed for replacement of LED bulb
Endeavour_T46_1.jpg


After replacing one of the Front bulbs (Left – LED, Right – Original)
Endeavour_T46_2.jpg


Rear Fog Lamps
Comparison picture of bulbs
Endeavour_T46_3.jpg


After replacing one of the Rear Fog bulb (Left – LED, Right – Original)
Endeavour_T46_4.jpg


Low Beam and Fog lamps
Upgrading the Fog Lamps to XHP70 based LED lamps was pretty straight forward. Upgrading the Low beam was a nightmare. The lights had to be removed after removing the bumper and grill. Then the bulbs had to be inserted with a collar in the space vacated by D8S HIDs. Since the ballast acts as a seal for the headlight, it was not removed and the LED driver was secured directly above it. With the wires tapped for power from the input of the ballast, everything was good to go post testing it on bench. Ending the nightmare of a DIY the reward was more light which colour matched with the Fog Lamps.

XHP70 LED Bulbs
Endeavour_T46_5.jpg


Bulb with collar in the low beam
Endeavour_T46_6.jpg


Final look
Endeavour_T46_7.jpg


High Beam LED
The High beam was upgraded to older generation 1:1 LEDs. The result is exceptional compared to stock high beam and I got to know that the newer generation of those bulbs are even brighter.

High Beam Bulbs (Left Night Breaker Unlimited, Right LED)
Endeavour_T46_8.jpg


The while light
Endeavour_T46_9.jpg


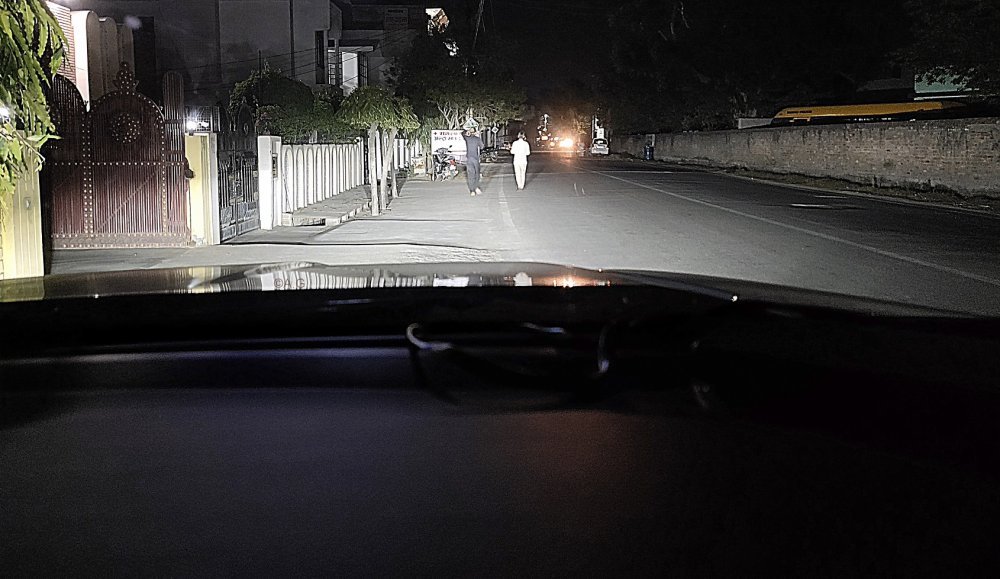
Overall beam pattern
With only Fog Lamps
Endeavour_T46_Fog.jpg


With only Low Beam
Endeavour_T46_Low.jpg


With only High Beam
Endeavour_T46_High.jpg


With Low beam + Fog Lamps
Endeavour_T46_Low+Fog.jpg


With High beam + Low beam + Fog Lamps
Endeavour_T46_All.jpg
 
Thread Starter #223
Joined
Nov 28, 2015
Messages
427
Likes
814
Location
Roorkee
Replacing the Tailgate light assembly to complete the look

The original tailgate mounted light assembly functions only for reverse. The rest of the portion (Red one) is just a dummy. To complete the look of the lights on the tailgate, replaced the original light assembly with the light assembly procured from AliExpress.

The light assembly
Endeavour T47_1.jpg


Reversing light is already via multiple LED and the wire (White) plugs straight in the original holder
Endeavour T47_2.jpg


To access the Tailgate light assembly, the grab handle houses 2 screws which are removed after removing the cover. The center part near the hinge is unlocked first
Endeavour T47_3.jpg


Next 2 come off are the 2 side panels covering the glass
Endeavour T47_4.jpg


Finally with a little bit of pulling hard, the main portion is dislodged and removed after taking care of the boot close button
Endeavour T47_5.jpg


Original light assembly removed
Endeavour T47_6.jpg


Reverse light connector from original light removed
Endeavour T47_7.jpg


A look at work in progress
Endeavour T47_7x.jpg


Removing the tail lamp to tap the wires
Endeavour T47_8.jpg


Tapping the wires (in my case I already had the 3M Scotchloks for pillar lights)
Endeavour T47_8x.jpg


Since I had US Style turn indicators enabled, I had to connect the left portion of tailgate lamp with left tail lamp and right portion of tailgate lamp with right tail lamp. In the original wiring, the connection to both the tailgate lamps was from one side. Removing the other side tail lamp to tap the wires
Endeavour T47_8y.jpg


Testing the Parking light function
Endeavour T47_9.jpg


Testing the Brake light function
Endeavour T47_10.jpg


Final look from behind – hard to distinguish between before & after when the lights are not working
Endeavour T47_14.jpg


All LED reverse light
Endeavour T47_15.jpg


Lights in action
Endeavour T47_16.jpg

Endeavour T47_17.jpg


Not sure why it does not comes like this from the factory – looks way better now. Another mod done and dusted.
 
Joined
Nov 19, 2014
Messages
2,271
Likes
1,318
Location
Trivandrum , Sydney
I don't know why , the image you poast is always quite high contrasted , with lot of noise in the image (colour noise), kindly don't edit the pics to such extend (My views , if others echo the same , please do comment).
It spoils the viewing pleasure.
 
Top Bottom