Thread Starter
#16
1992 Kinetic Honda DX Revamp: A Slow Story
- Thread Starter PANACHE
- Start date
Thread Starter
#17
Updates...
The cost of some jobs (which I am able to recall)were stated wherever relevant in earlier posts.
The number plates were made in January 2016 at Rs 400/- excluding fitting charge

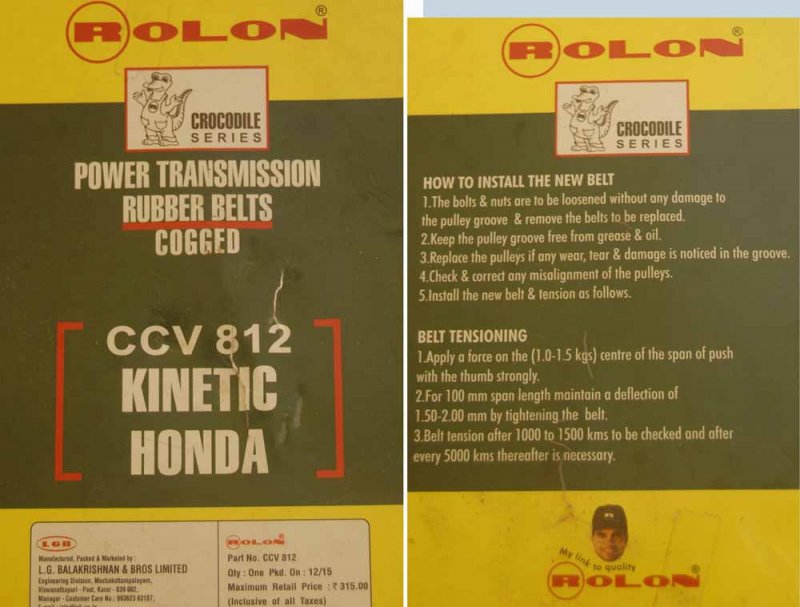
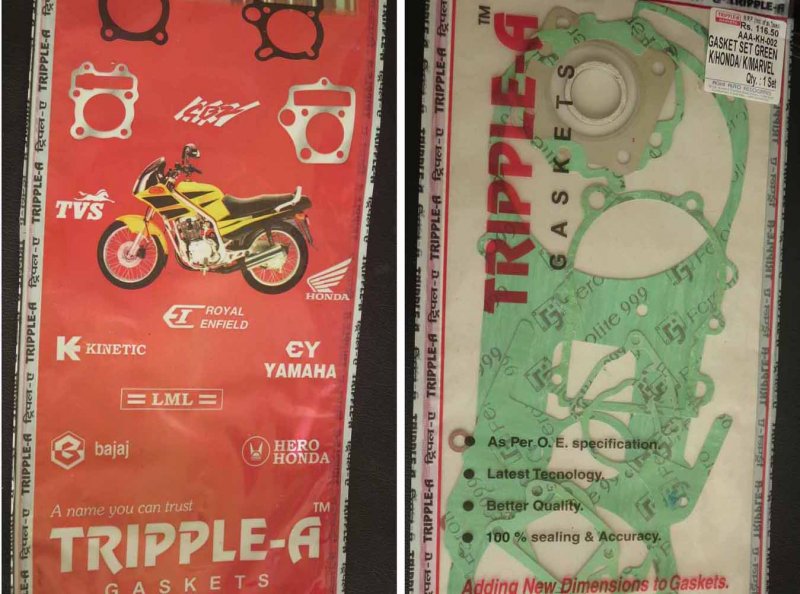
As stated in one of my earlier posts I started collecting the parts way back. Since the period of restoration is long, I lost track of the amount spent. I have lost some cartons/packages of the items purchased and hence I am posting the price tag of few spares before I lose that covers. Some of these spares were purchased for future use and are not used. A fuel and oil hose set was also purchased for replacement.
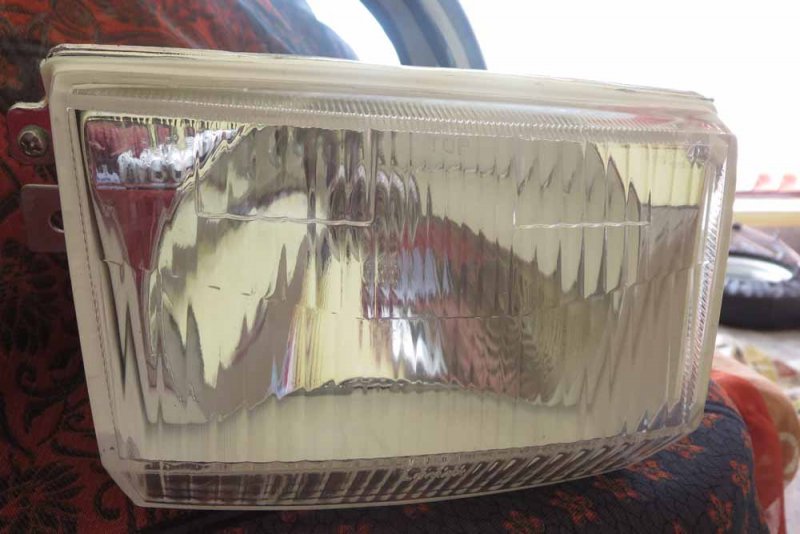
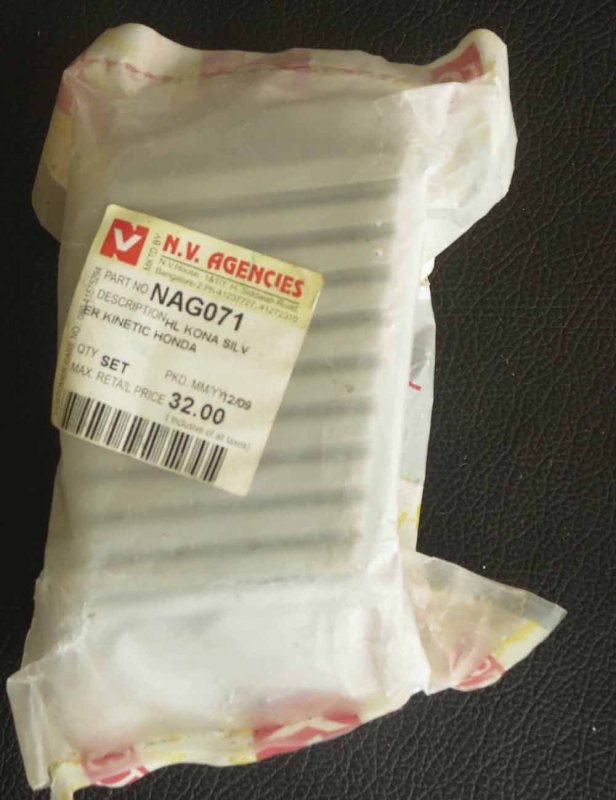


I brought the following items as from scrap market
Meter console. (for the meter assembly case)
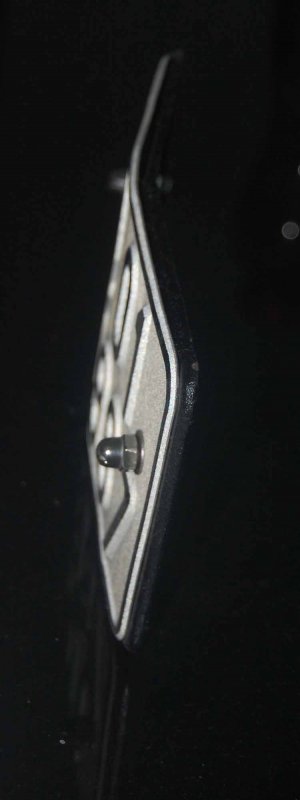
OE Front Number plate
The helmet holder beside petrol tank and later passivated it
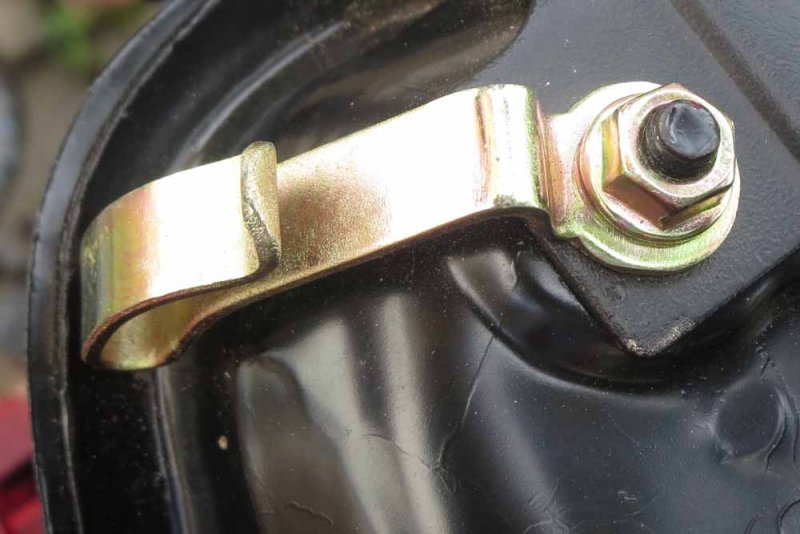
A fuel tank set for standby. I did not use it since mine was better.
The cost of some jobs (which I am able to recall)were stated wherever relevant in earlier posts.
The number plates were made in January 2016 at Rs 400/- excluding fitting charge


As stated in one of my earlier posts I started collecting the parts way back. Since the period of restoration is long, I lost track of the amount spent. I have lost some cartons/packages of the items purchased and hence I am posting the price tag of few spares before I lose that covers. Some of these spares were purchased for future use and are not used. A fuel and oil hose set was also purchased for replacement.


I brought the following items as from scrap market
Meter console. (for the meter assembly case)
OE Front Number plate
The helmet holder beside petrol tank and later passivated it

A fuel tank set for standby. I did not use it since mine was better.
Thread Starter
#18
Update on Fuel gauge repair and electrics too
The fuel gauge in my scooter was not working. The problem may occur if the voltage regulator is faulty and thereby high voltage generation. This gets augmented if the battery is also open and it consumes nil current for charging. The bulbs will get brighter on acceleration and will get fused. In my scooter all the electrics were faulty. Referring service manual of a Hondas NH 125 available to download freely, I first changed the voltage regulator and resistor. It’s essential to check the grounding using multimeter and checking the continuity in the wiring loom. I checked quite a few wires in the loom, oil; level switch, ignition switch and much more with a multimeter referring this manual
http://www.hondaspree.net/other/Honda_NH125_Service_Manual.pdf. (Almost identical to kinetic Honda)I hope the moderators would allow pasting the link here for the probable benefit of others.
The fuel gauge was also checked and repaired.
First the meter assembly is dismantled and in the process a plastic retainer broke.


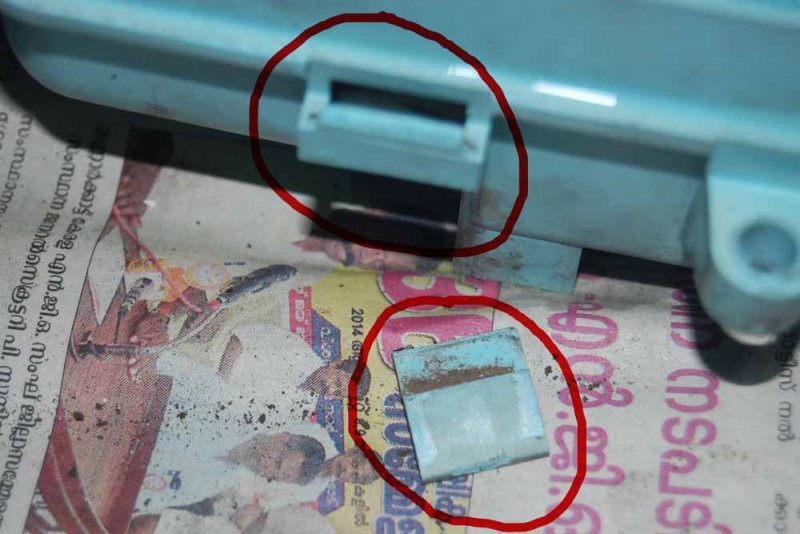

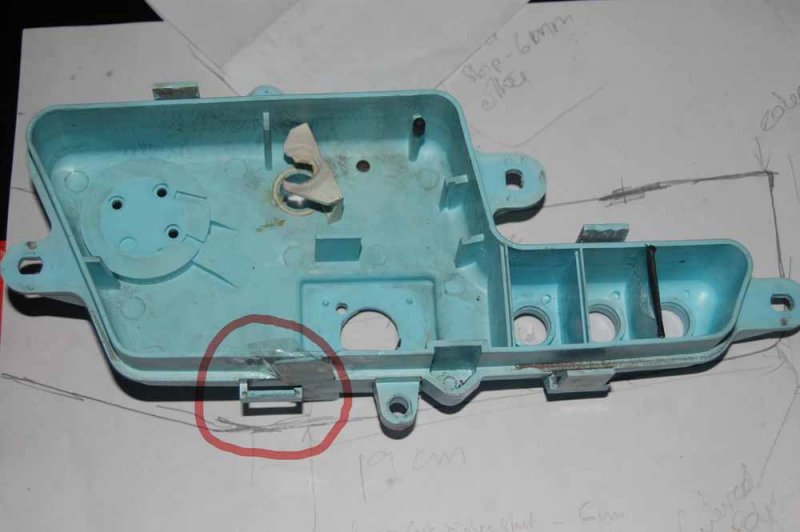

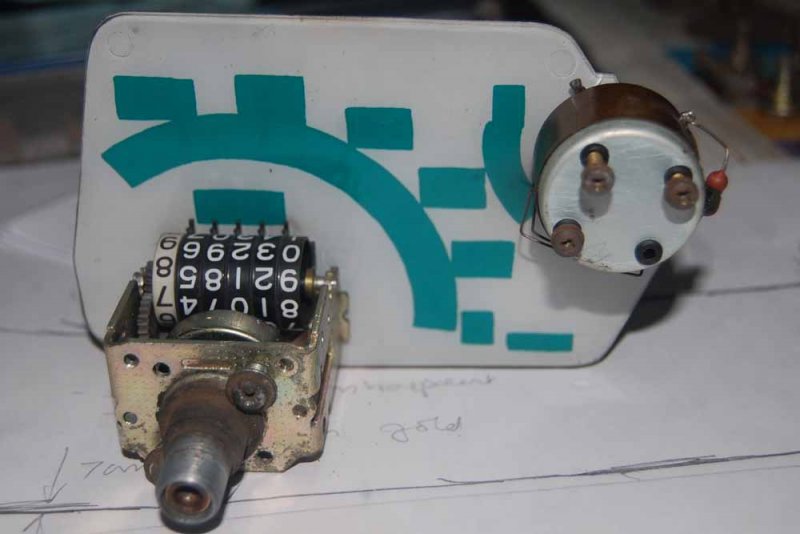

Purchased another meter assembly from scrap market, cleaned everything and used its case. The meter glass was replaced with new. The speedometer was working OK.
The fuel sensor had a problem. Though I bought a new one, I tried to rectify the old one. The resistance between the two ends of the fuel sensor unit for float movement between full and empty must be between 4 ohm to 110 ohm. It’s a variable resistance and the wiper was having loose connection with the wire wound resistor. I adjusted and bent the wiper towards the coil and the problem was rectified. The variation of resistance between the lower and upper positions was now linear. There are two wires from the sensor unit. They are yellow-white and green. Green wire is grounded. Yellow-white is the wire going to the meter.
Tank empty------float down-------high resistance--------110 ohm
Tank full----------Float up---------low resistance--------4 ohm

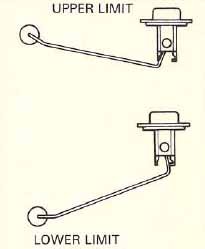
Unless this is set right the fuel gauge won’t work properly. Also checked the continuity of wires to meter console.
Now the fuel gauge part.

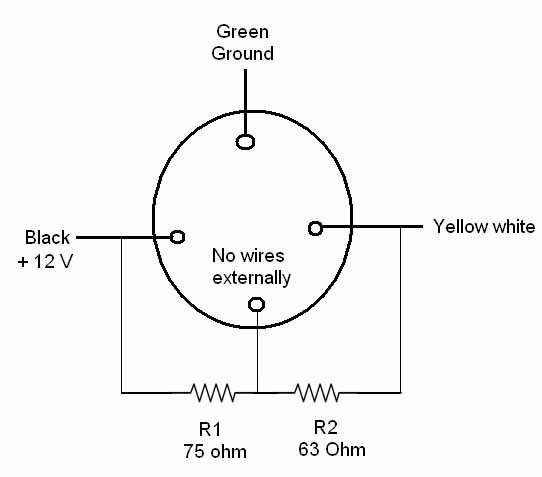
Note that three connections are required for the meter to operate. If any of the three wires are faulty the meter won’t work. Visually, the calibrating resistors have burnt. They need replacement. The resistance value is 75 ohm and 63 ohm. I used flame proof resistor available in gray color. To increase the wattage, instead of one single 63 ohm, I used two numbers of 120 ohm in parallel. Also for 75 ohm, I used three 220 ohm in parallel.
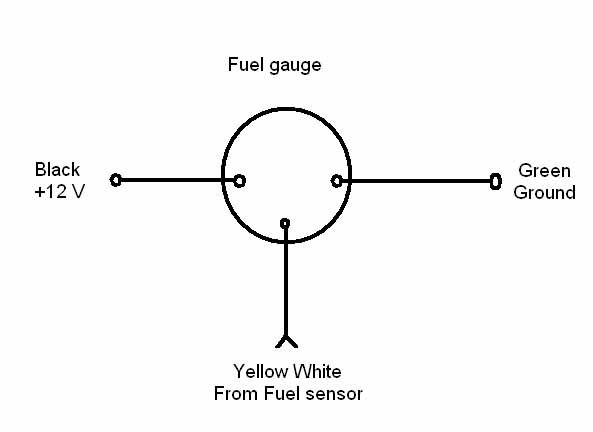
To check its working, apply 12V directly to black and green wires of meter console. The yellow-white wire when connected to ground shows full. The yellow-white when detached from ground shows empty. The meter is now working OK.
I have not taken a photo of the resistance soldered. The problem is when you are working alone, either you can do the work or take photo. I took photo after some major work. Photos are available in either my phone or a digital camera and have lots of photos. To sort it is a nightmare.
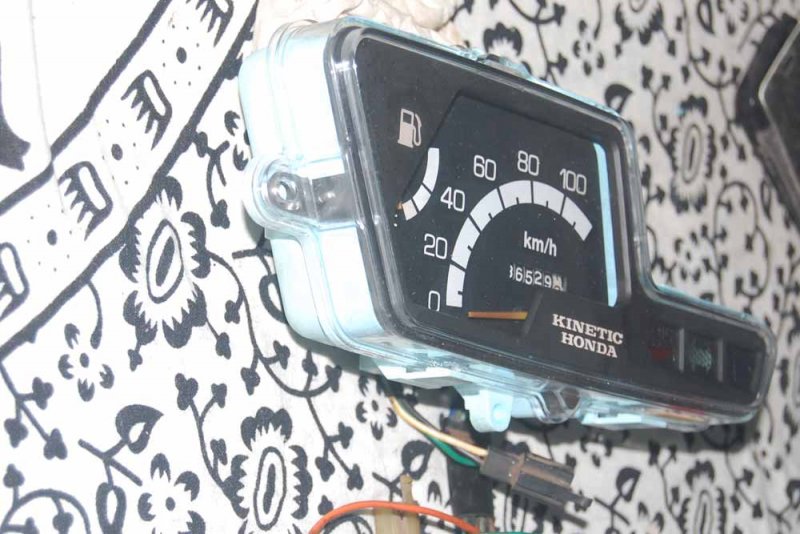
Assembled everything, changed all the meter bulbs and the new meter glass and the meter console is complete. Later fitted it to the painted meter panel and finished the console.


The fuel gauge in my scooter was not working. The problem may occur if the voltage regulator is faulty and thereby high voltage generation. This gets augmented if the battery is also open and it consumes nil current for charging. The bulbs will get brighter on acceleration and will get fused. In my scooter all the electrics were faulty. Referring service manual of a Hondas NH 125 available to download freely, I first changed the voltage regulator and resistor. It’s essential to check the grounding using multimeter and checking the continuity in the wiring loom. I checked quite a few wires in the loom, oil; level switch, ignition switch and much more with a multimeter referring this manual
http://www.hondaspree.net/other/Honda_NH125_Service_Manual.pdf. (Almost identical to kinetic Honda)I hope the moderators would allow pasting the link here for the probable benefit of others.
The fuel gauge was also checked and repaired.
First the meter assembly is dismantled and in the process a plastic retainer broke.


Purchased another meter assembly from scrap market, cleaned everything and used its case. The meter glass was replaced with new. The speedometer was working OK.
The fuel sensor had a problem. Though I bought a new one, I tried to rectify the old one. The resistance between the two ends of the fuel sensor unit for float movement between full and empty must be between 4 ohm to 110 ohm. It’s a variable resistance and the wiper was having loose connection with the wire wound resistor. I adjusted and bent the wiper towards the coil and the problem was rectified. The variation of resistance between the lower and upper positions was now linear. There are two wires from the sensor unit. They are yellow-white and green. Green wire is grounded. Yellow-white is the wire going to the meter.
Tank empty------float down-------high resistance--------110 ohm
Tank full----------Float up---------low resistance--------4 ohm


Unless this is set right the fuel gauge won’t work properly. Also checked the continuity of wires to meter console.
Now the fuel gauge part.


Note that three connections are required for the meter to operate. If any of the three wires are faulty the meter won’t work. Visually, the calibrating resistors have burnt. They need replacement. The resistance value is 75 ohm and 63 ohm. I used flame proof resistor available in gray color. To increase the wattage, instead of one single 63 ohm, I used two numbers of 120 ohm in parallel. Also for 75 ohm, I used three 220 ohm in parallel.

To check its working, apply 12V directly to black and green wires of meter console. The yellow-white wire when connected to ground shows full. The yellow-white when detached from ground shows empty. The meter is now working OK.
I have not taken a photo of the resistance soldered. The problem is when you are working alone, either you can do the work or take photo. I took photo after some major work. Photos are available in either my phone or a digital camera and have lots of photos. To sort it is a nightmare.
Assembled everything, changed all the meter bulbs and the new meter glass and the meter console is complete. Later fitted it to the painted meter panel and finished the console.


Update on Fuel gauge repair and electrics too
The fuel gauge in my scooter was not working. The problem may occur if the voltage regulator is faulty and thereby high voltage generation. This gets augmented if the battery is also open and it consumes nil current for charging. The bulbs will get brighter on acceleration and will get fused. In my scooter all the electrics were faulty. Referring service manual of a Hondas NH 125 available to download freely, I first changed the voltage regulator and resistor. It’s essential to check the grounding using multimeter and checking the continuity in the wiring loom. I checked quite a few wires in the loom, oil; level switch, ignition switch and much more with a multimeter referring this manual
http://www.hondaspree.net/other/Honda_NH125_Service_Manual.pdf. (Almost identical to kinetic Honda)I hope the moderators would allow pasting the link here for the probable benefit of others.
The fuel gauge was also checked and repaired.
First the meter assembly is dismantled and in the process a plastic retainer broke.
View attachment 209184
View attachment 209185
View attachment 209186
View attachment 209187
View attachment 209188
View attachment 209189
View attachment 209190
View attachment 209193
View attachment 209191
View attachment 209192
Purchased another meter assembly from scrap market, cleaned everything and used its case. The meter glass was replaced with new. The speedometer was working OK.
The fuel sensor had a problem. Though I bought a new one, I tried to rectify the old one. The resistance between the two ends of the fuel sensor unit for float movement between full and empty must be between 4 ohm to 110 ohm. It’s a variable resistance and the wiper was having loose connection with the wire wound resistor. I adjusted and bent the wiper towards the coil and the problem was rectified. The variation of resistance between the lower and upper positions was now linear. There are two wires from the sensor unit. They are yellow-white and green. Green wire is grounded. Yellow-white is the wire going to the meter.
Tank empty------float down-------high resistance--------110 ohm
Tank full----------Float up---------low resistance--------4 ohm
View attachment 209194 View attachment 209195
Unless this is set right the fuel gauge won’t work properly. Also checked the continuity of wires to meter console.
Now the fuel gauge part.
View attachment 209196
View attachment 209198
Note that three connections are required for the meter to operate. If any of the three wires are faulty the meter won’t work. Visually, the calibrating resistors have burnt. They need replacement. The resistance value is 75 ohm and 63 ohm. I used flame proof resistor available in gray color. To increase the wattage, instead of one single 63 ohm, I used two numbers of 120 ohm in parallel. Also for 75 ohm, I used three 220 ohm in parallel.
View attachment 209197
To check its working, apply 12V directly to black and green wires of meter console. The yellow-white wire when connected to ground shows full. The yellow-white when detached from ground shows empty. The meter is now working OK.
I have not taken a photo of the resistance soldered. The problem is when you are working alone, either you can do the work or take photo. I took photo after some major work. Photos are available in either my phone or a digital camera and have lots of photos. To sort it is a nightmare.
Assembled everything, changed all the meter bulbs and the new meter glass and the meter console is complete. Later fitted it to the painted meter panel and finished the console.
View attachment 209199
View attachment 209200
View attachment 209201
![Clap [clap] [clap]](https://www.theautomotiveindia.com/forums/images/smilies/Clap.gif) Mine was showing constant fluctuation and when I was a kid, I have seen dad repairing it with replacing resistors. Till date I was searching for the location of resistors as I had no idea where I seen it. Thanks man.
Mine was showing constant fluctuation and when I was a kid, I have seen dad repairing it with replacing resistors. Till date I was searching for the location of resistors as I had no idea where I seen it. Thanks man.The best Kinetic rebuild ever
![Clap [clap] [clap]](https://www.theautomotiveindia.com/forums/images/smilies/Clap.gif)
BTW rear shock seems from TVS. Which model? Any gas-filled compatible model?
Last edited:
The helmet holder beside petrol tank and later passivated it
View attachment 209166
View attachment 209166
![Frustration [frustration] [frustration]](https://www.theautomotiveindia.com/forums/images/smilies/Frustration.gif)
Thread Starter
#21
Thanks Deville.
About fuel gauge, I did study a bit. What I infer is that the coil has a rare chance of failure. If the coil is intact the gauge can be revived.
Regarding the rear shock absorber, the OE one did not have any make specified in it. I just bought compatible TVS shocks that were available. K090040 is the part number and costs Rs 744/-. Gabriel was preferred, but not available. Sorry, I did not enquire about Gas shocks and do not know its compatibility nor availability.
I have attached a picture of the OE shocks as well as the carton for the TVS shock absorber.

The helmet hook can be used as bag hook also. I had a studds helmet which had a metal clip at the end, which could be slipped in the helmet holder. It was lost during service long back and recently I sourced it from scrap market.
It may sound odd, I am skeptical as I am not a mechanical person. I still don’t know or would refrain to disassemble a carburetor or an engine. I know how it works in theory but not confident enough . My endeavor is to maintain it in stock condition. The future usage anticipated is about 250 Kms yearly and nothing more. It’s the passion which makes me do such weird jobs and the loss even if I fail is not tangible. If I succeed, well and good. Why I haven’t entrusted any mechanic is because they are not passionate and seldom share my excitement.
This is precisely the reason I waited until I am confident the project is a success, before posting this thread. I have now fitted the engine and started it. The pending works are relatively easy for me. I have utilized the services of at least 2 mechanics, one welder, one painter, one powder coating firm, and one electroplating firm. Besides my wife was also assisting me occasionally, especially when I couldn’t single handedly do things.
One thing is for sure. The restoration job is too slow. I spend only less than one hour every week since December 2016. The work was halted for many weeks together for want of time. I would state everything in chronological order in the coming weeks or months until the work is finished. The preparation and posting of the details is also no less a passion.
About fuel gauge, I did study a bit. What I infer is that the coil has a rare chance of failure. If the coil is intact the gauge can be revived.
Regarding the rear shock absorber, the OE one did not have any make specified in it. I just bought compatible TVS shocks that were available. K090040 is the part number and costs Rs 744/-. Gabriel was preferred, but not available. Sorry, I did not enquire about Gas shocks and do not know its compatibility nor availability.
I have attached a picture of the OE shocks as well as the carton for the TVS shock absorber.

The helmet hook can be used as bag hook also. I had a studds helmet which had a metal clip at the end, which could be slipped in the helmet holder. It was lost during service long back and recently I sourced it from scrap market.
It may sound odd, I am skeptical as I am not a mechanical person. I still don’t know or would refrain to disassemble a carburetor or an engine. I know how it works in theory but not confident enough . My endeavor is to maintain it in stock condition. The future usage anticipated is about 250 Kms yearly and nothing more. It’s the passion which makes me do such weird jobs and the loss even if I fail is not tangible. If I succeed, well and good. Why I haven’t entrusted any mechanic is because they are not passionate and seldom share my excitement.
This is precisely the reason I waited until I am confident the project is a success, before posting this thread. I have now fitted the engine and started it. The pending works are relatively easy for me. I have utilized the services of at least 2 mechanics, one welder, one painter, one powder coating firm, and one electroplating firm. Besides my wife was also assisting me occasionally, especially when I couldn’t single handedly do things.
One thing is for sure. The restoration job is too slow. I spend only less than one hour every week since December 2016. The work was halted for many weeks together for want of time. I would state everything in chronological order in the coming weeks or months until the work is finished. The preparation and posting of the details is also no less a passion.
Thread Starter
#22
Posting some specifics for cost calculation
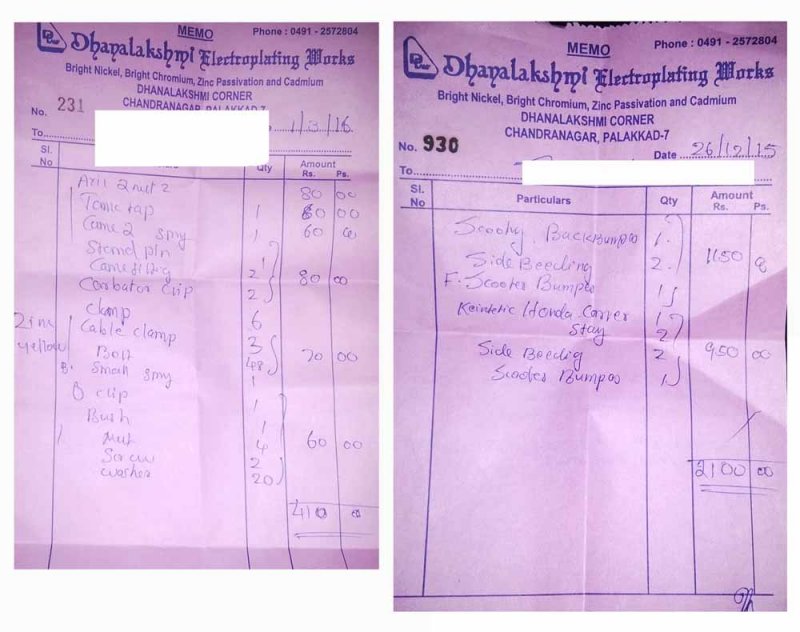
I recollected some invoice as well as business card of the powder coating firm and painter. First bill is for zinc yellow passivation and second bill is for electroplating. This includes the cost for electroplating of access scooter (entered as scooty in bill ) and kinetic Honda which I gave together for plating. I have no business or commercial interests whatsoever.

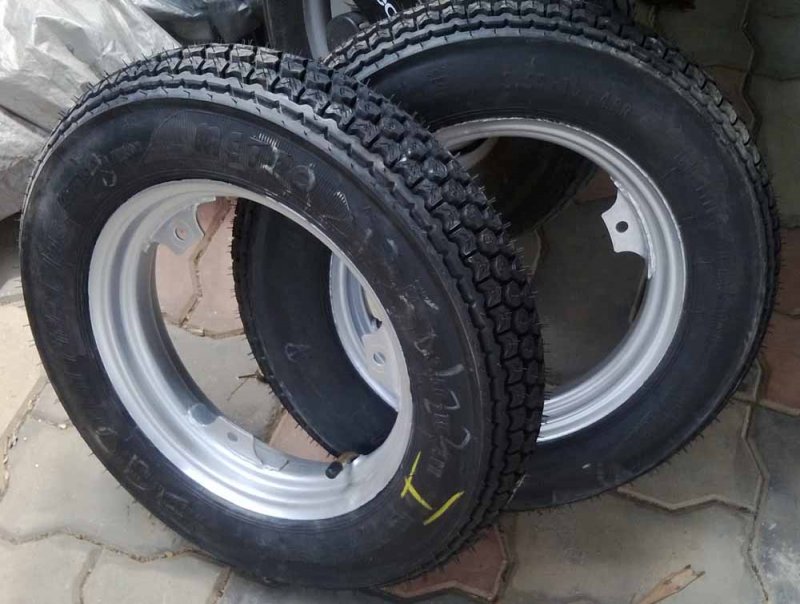
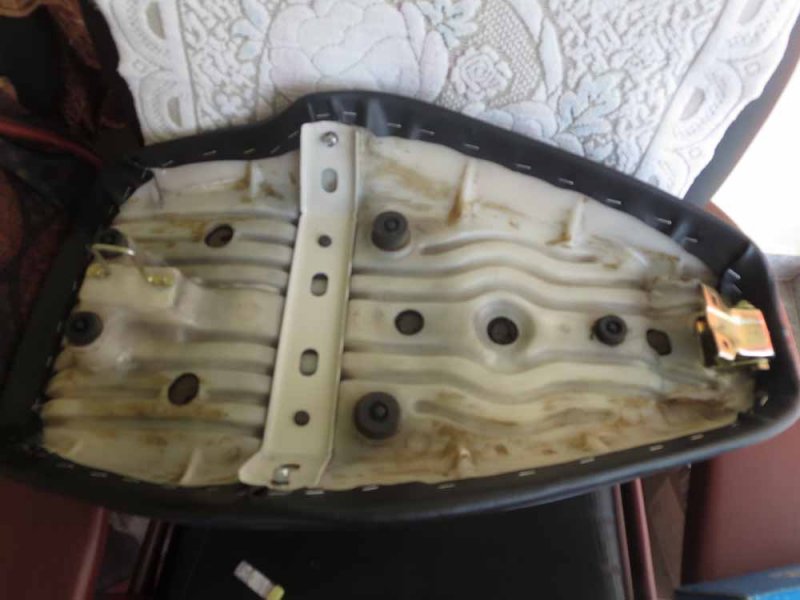
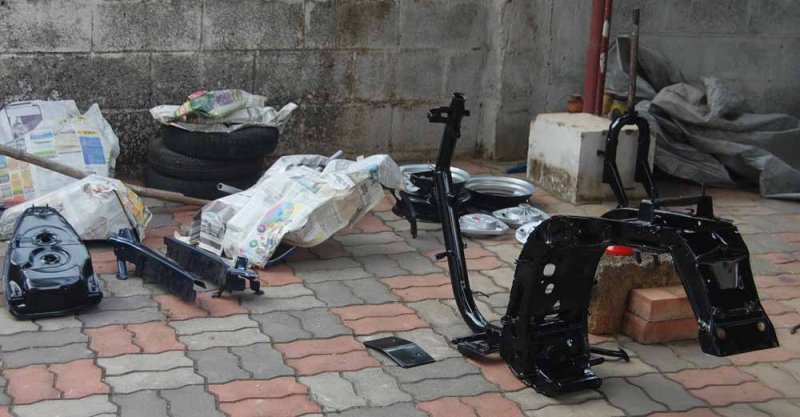
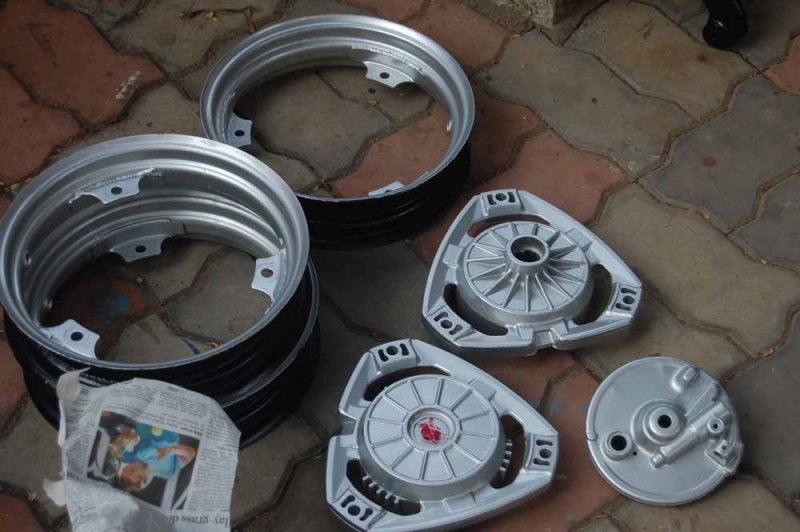
Some assorted photos of items received after painting, are given below. (Pease excuse if they are repeat postings). Now the assembly starts



The front panel after sticker work

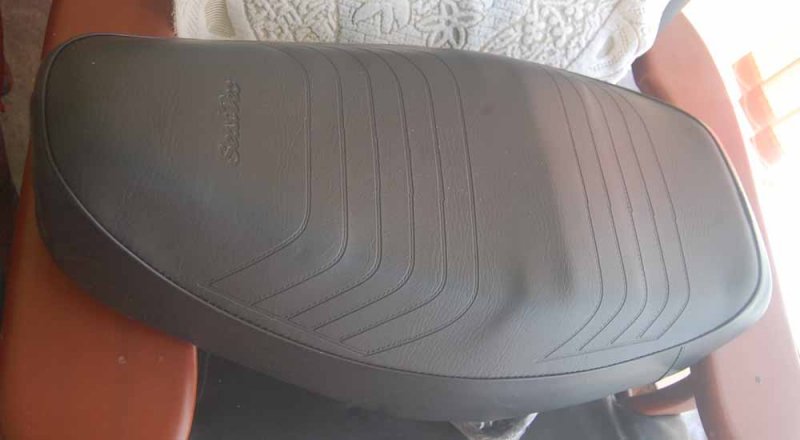
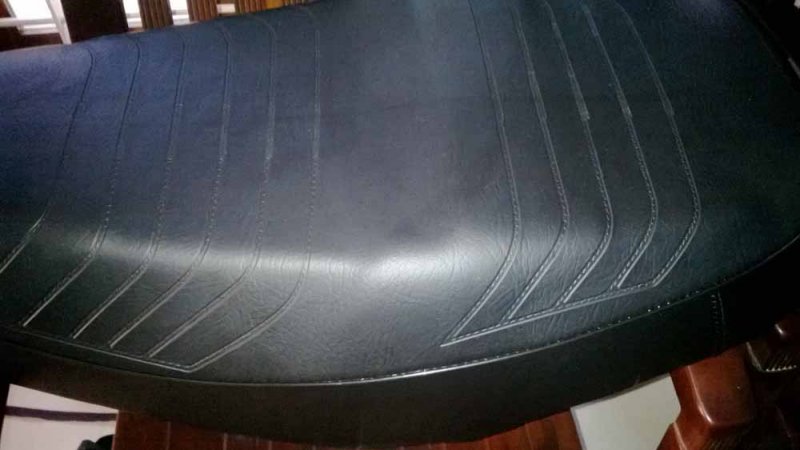
I take the liberty to post another photo of the seat which I believe have captured the texture pretty well.

I recollected some invoice as well as business card of the powder coating firm and painter. First bill is for zinc yellow passivation and second bill is for electroplating. This includes the cost for electroplating of access scooter (entered as scooty in bill ) and kinetic Honda which I gave together for plating. I have no business or commercial interests whatsoever.


Some assorted photos of items received after painting, are given below. (Pease excuse if they are repeat postings). Now the assembly starts


The front panel after sticker work

I take the liberty to post another photo of the seat which I believe have captured the texture pretty well.

I M P R E S S I V E!
Other than the quality of Restoration, you have the skill to mention it properly in Logs & Pics.
Really appreciate the effort. Restoration is looking Beautiful!
Have you tried measuring FE? or the engine is not complete yet?
Other than the quality of Restoration, you have the skill to mention it properly in Logs & Pics.
Really appreciate the effort. Restoration is looking Beautiful!
Have you tried measuring FE? or the engine is not complete yet?
Thread Starter
#24
Thanks bhvm for your kind words and appreciation.
Presently the engine was fitted to chassis and started . Had some trial run of just 400 meters. The FE part , I haven’t checked . Earlier it used to give about 30 to 35 kmpl. I had done few highway trips before 2002 and I believe it was near 40 kmpl.
I feel there is no defect with the engine and hence decided not to open.Cold start was a problem. Once the engine is hot, it was perfectly fine. I hope a battery and new plug would address it. Planning to buy a battery soon. The only reason for cosmetic revamp was the problem with starting , faulty electrics repairing and cold idling problem. These are all done in view of the 25 year mvd test in 2017.
Thread Starter
#25
Updates
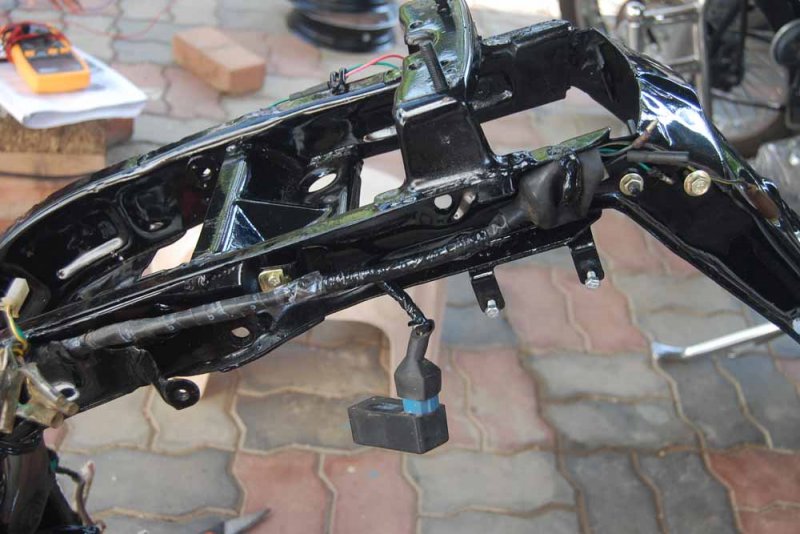
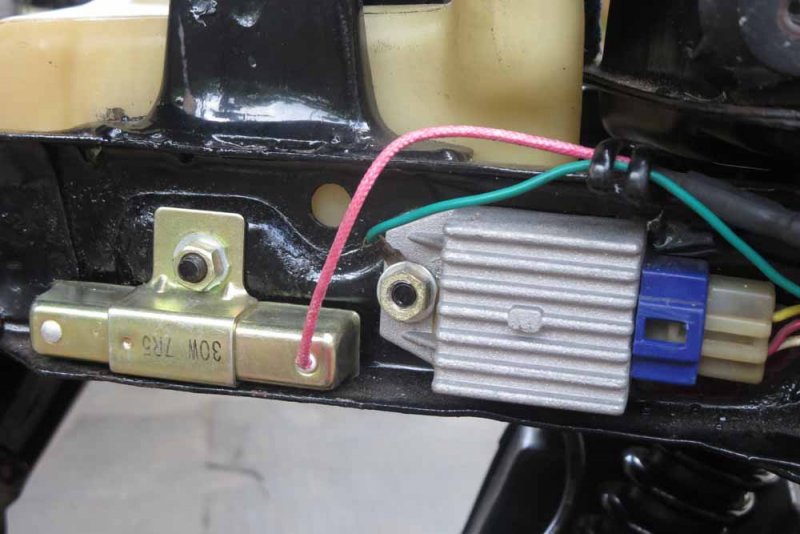
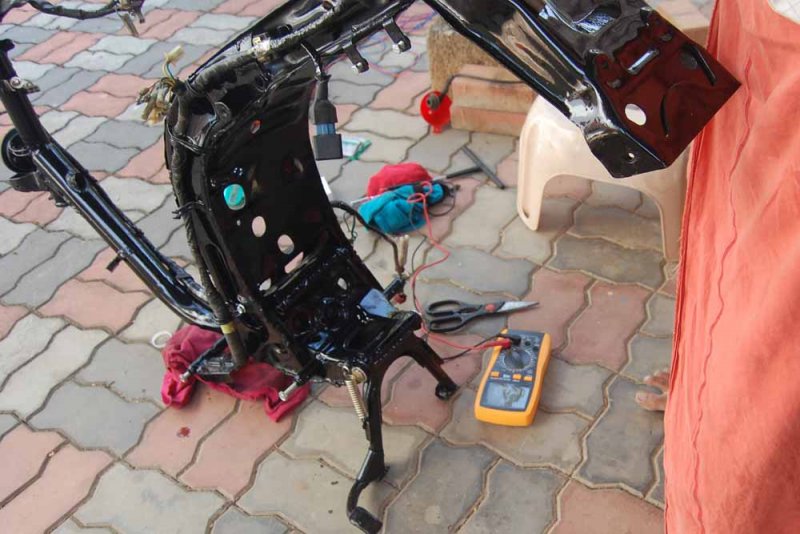
In the bare chassis, the first item to be secured was the wiring loom. Then the voltage regulator, resistor, CDI unit, ignition coil was connected. These are all straightforward processes.
Oil Sensor switch

The next item to be installed is the 2T oil tank. The oil sensor switch can be verified for its working easily as depicted in manual (see post No 18 in this thread). I checked it before mounting it in the scooter. The oil switch has three wires. Viz Green, Green-Red and black. Black is battery positive, Green is for ground and green-Red is going to a bulb in the console. Here also there is a float which moves up and down encircling a post, with a limited displacement in vertical axis. The resistance checking of sensor is given below for easier reference

If the sensor is faulty we have little scope to repair.
The steps while checking is
1. Ensure that the sensor resistance between stipulated wires is as per specified range as per table (If ok, everything is Ok!)
2. Ensure that the voltage reach the oil sensor switch as intended else rectify it
3. Check continuity between green-red wire to the oil indicator lamp in console

Auto Bystarter
It’s also called the auto choke, I suppose. I haven’t checked the auto bystarter, it seems beyond my capability right now. My scooter had cold idling problem. If autobystarter is causing it, what is the other option? Sourcing another bystarter unit is not easy. I have a hunch that a new sparkplug and battery might solve it.
In the bare chassis, the first item to be secured was the wiring loom. Then the voltage regulator, resistor, CDI unit, ignition coil was connected. These are all straightforward processes.


Oil Sensor switch

The next item to be installed is the 2T oil tank. The oil sensor switch can be verified for its working easily as depicted in manual (see post No 18 in this thread). I checked it before mounting it in the scooter. The oil switch has three wires. Viz Green, Green-Red and black. Black is battery positive, Green is for ground and green-Red is going to a bulb in the console. Here also there is a float which moves up and down encircling a post, with a limited displacement in vertical axis. The resistance checking of sensor is given below for easier reference

If the sensor is faulty we have little scope to repair.
The steps while checking is
1. Ensure that the sensor resistance between stipulated wires is as per specified range as per table (If ok, everything is Ok!)
2. Ensure that the voltage reach the oil sensor switch as intended else rectify it
3. Check continuity between green-red wire to the oil indicator lamp in console

Auto Bystarter
It’s also called the auto choke, I suppose. I haven’t checked the auto bystarter, it seems beyond my capability right now. My scooter had cold idling problem. If autobystarter is causing it, what is the other option? Sourcing another bystarter unit is not easy. I have a hunch that a new sparkplug and battery might solve it.
Killer restoration man!
I just repainted a kinetic Honda of my friend, but I dint go this deep, as we never expected the usage to be this high. Post painting he used the scooter for over 7000kms. The carb cleaning + all new cables made sure vehicle was butter smooth
All the best & post a video of the completed vehicle.
http://www.theautomotiveindia.com/forums/technical-zone/14799-restoring-kinetic-honda-2.html
Last edited:
Thread Starter
#27
Killer restoration man!
I just repainted a kinetic Honda of my friend, but I dint go this deep, as we never expected the usage to be this high. Post painting he used the scooter for over 7000kms. The carb cleaning + all new cables made sure vehicle was butter smooth
All the best & post a video of the completed vehicle.
http://www.theautomotiveindia.com/forums/technical-zone/14799-restoring-kinetic-honda-2.html
I just repainted a kinetic Honda of my friend, but I dint go this deep, as we never expected the usage to be this high. Post painting he used the scooter for over 7000kms. The carb cleaning + all new cables made sure vehicle was butter smooth
All the best & post a video of the completed vehicle.
http://www.theautomotiveindia.com/forums/technical-zone/14799-restoring-kinetic-honda-2.html
I have seen your maruti 800 restoration also and liked it. I own a 2004 Maruti 800 MPFI type 2 purchased new. It has completed 89K kms as on date. It’s in good shape and wishes to retain it for ever. A very minimal cosmetic revamp is in cards after kinetic Honda work. Presently I own only this car.
Last edited:
Thread Starter
#28
Some corrections in my earlier post and something more..
While going through my posts in this thread, I have found out some errors. I wish to correct it irrespective of its significance.
Post No 1. The work actually started in Dec 2015 and is expected to be completed by December 2016. The years have been stated wrongly in Ist post
Post No 25 The first item mounted on the chassis was the centre stand and not the wiring loom as stated. Mounting the new spring on the centre stand was really tough.
Now in continuation, the resistor I used is 7.5 ohm, of Mahindra Duro scooter ( Photograph available in earlier post). The resistance value required as per service manual is 6.7 ohm. The old resistor in scooter was 9.5 ohm. I believe it won’t have any adverse effect and would suffice. The ceramic portion in the rear of original resistor has crumbled and hence i changed it. The photo of the original resistor (multilink make) that came with the scooter is shown below.

addition: The oil sensor switch is connected to the wiring loom through a fuse. The fuse also has to be checked. Mine was blown and 200mA fuse needs replacement. I checked it directly and it worked. On routine continuity checking the loom with the wiring diagram, the blown fuse was detected.

Located some more price tags of spares and posting it for price record. The CDI unit was purchased as standby, incase the present one conks.

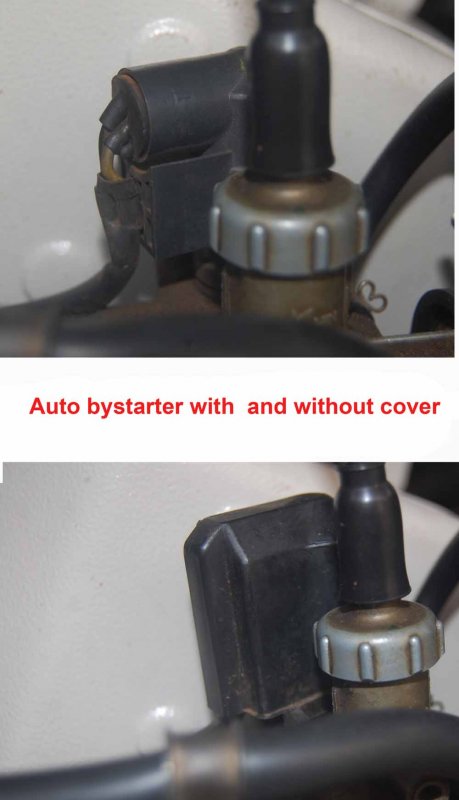
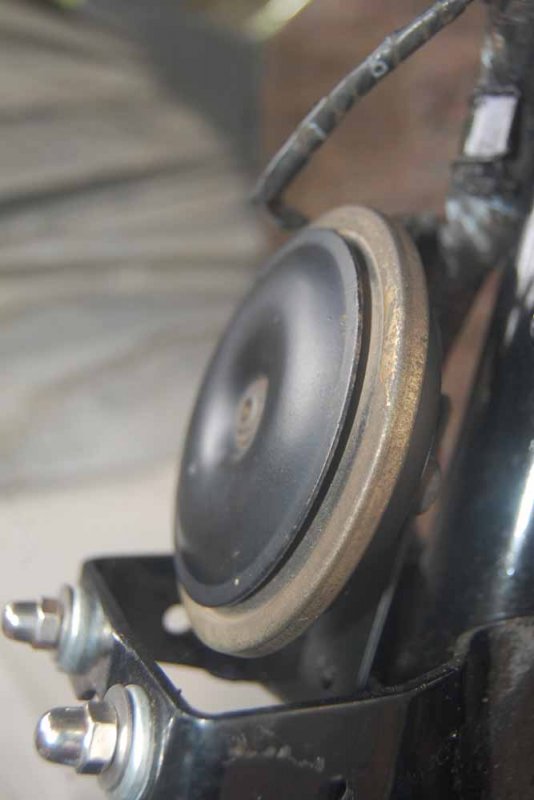
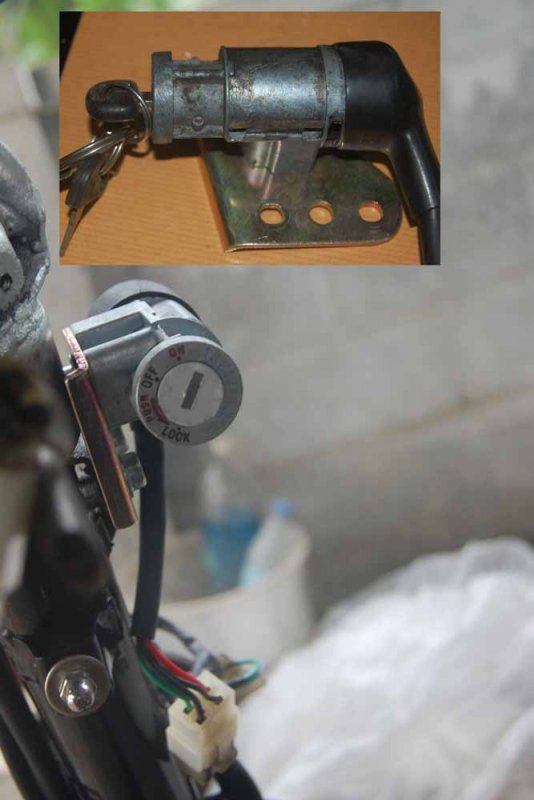
Attaching the photograph of autobystarter, the original horn (Still working), and the key kock switch .
The old keylock switch is working but was a bit difficult to lock the handle. So changed it.
Major works have already been completed while I started this project back in Dec 2016.
not yet complete and i expect it to complete it by December 2017
not yet complete and i expect it to complete it by December 2017
Updates
In the bare chassis, the first item to be secured was the wiring loom. Then the voltage regulator, resistor, CDI unit, ignition coil was connected. These are all straightforward processes.
In the bare chassis, the first item to be secured was the wiring loom. Then the voltage regulator, resistor, CDI unit, ignition coil was connected. These are all straightforward processes.
Post No 1. The work actually started in Dec 2015 and is expected to be completed by December 2016. The years have been stated wrongly in Ist post
Post No 25 The first item mounted on the chassis was the centre stand and not the wiring loom as stated. Mounting the new spring on the centre stand was really tough.
Now in continuation, the resistor I used is 7.5 ohm, of Mahindra Duro scooter ( Photograph available in earlier post). The resistance value required as per service manual is 6.7 ohm. The old resistor in scooter was 9.5 ohm. I believe it won’t have any adverse effect and would suffice. The ceramic portion in the rear of original resistor has crumbled and hence i changed it. The photo of the original resistor (multilink make) that came with the scooter is shown below.

addition: The oil sensor switch is connected to the wiring loom through a fuse. The fuse also has to be checked. Mine was blown and 200mA fuse needs replacement. I checked it directly and it worked. On routine continuity checking the loom with the wiring diagram, the blown fuse was detected.

Located some more price tags of spares and posting it for price record. The CDI unit was purchased as standby, incase the present one conks.

Attaching the photograph of autobystarter, the original horn (Still working), and the key kock switch .


The old keylock switch is working but was a bit difficult to lock the handle. So changed it.

Thread Starter
#29
Now the story about the minimal engine jobs and my bizarre journeys...
As stated in earlier posts, I was reluctant to detach the engine from chassis. However in order to paint it I was left with no choice than detach it. The painting of chassis without detaching the engine would be imperfect. So the engine was down for good.

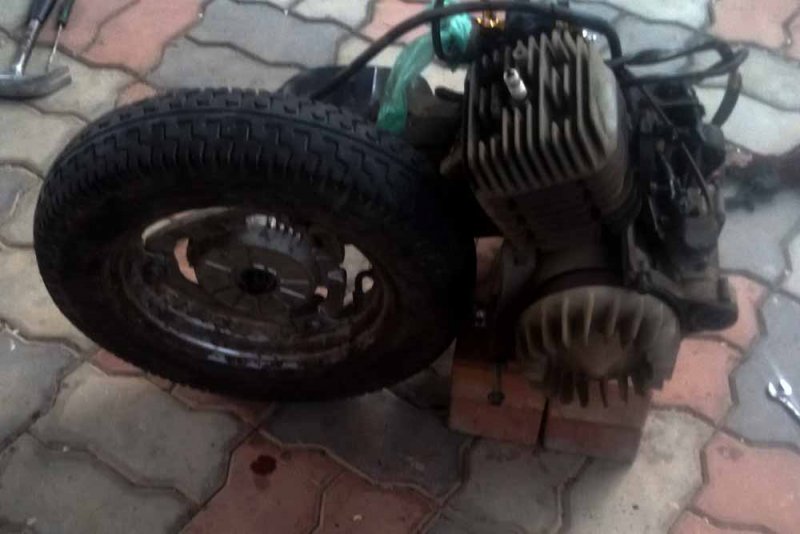
The engine in resting phase, while some parts entrusted for powder coating
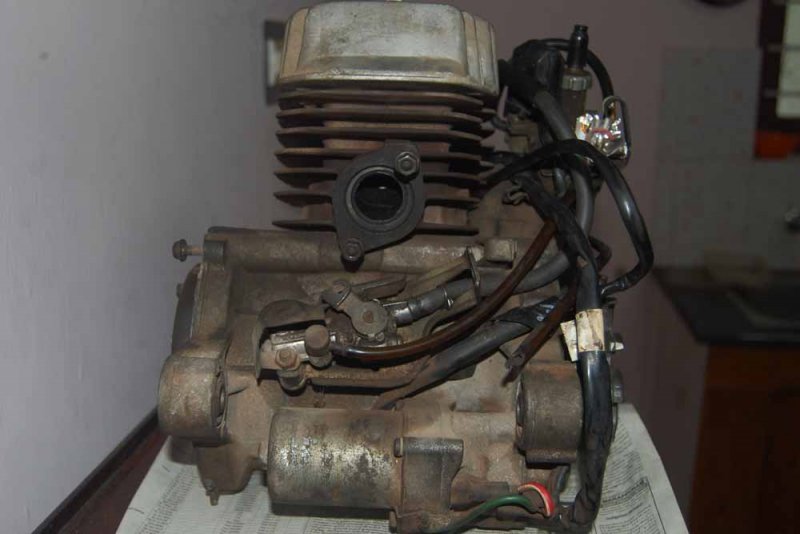
The works done in engine was minimal.
New spark plug,
Silencer decarb, Engine hanger bushes replacement, (By a mechanic at Palakkad)
Powder coating of crank case cover and engine shroud
Clutch replacement and kick shaft fitting (By a mechanic friend at Trivandrum)
The photos with me are also less.
Once the powder coated crank case cover arrived, I tried to fix it. The kicker shaft was out while a mechanic at Palakkad opened a jammed bolt of crank case cover. I was unable to fix the shaft myself to reinstall. So took the engine to the same mechanic at Palakkad but he was not available. I called an erstwhile kinetic Honda friendly mechanic at Trivandrum. He was known to me, even before I bought this scooter. He had worked with Century connections, Trivandrum, the very same dealer from whom my father bought this scooter. I had called him occasionally for advices about the method of work. He is presently working with another automobile dealer and is seldom having the time or fervor to work with a Kinetic Honda. Despite his advices over phone, I was unable to fix the kicker shaft in the engine. One night I was to leave for my home( about 330 Kms) at Trivandrum, solo by car (Maruti 800), I took the engine also.![Drive [drive] [drive]](https://www.theautomotiveindia.com/forums/images/smilies/Drive.gif) I chose the MC Road for a change. M C Road was horrible and heavy rains made it worse. At 1.00 AM, I was stopped at Changanassery by the police for routine checking. They opened the hatch and checked but did not ask me anything.
I chose the MC Road for a change. M C Road was horrible and heavy rains made it worse. At 1.00 AM, I was stopped at Changanassery by the police for routine checking. They opened the hatch and checked but did not ask me anything.
Once at Trivandrum, my friend agreed to come to my house. I had to wait for three days for him to be free. On day three, went to his house, and asked him to inspect the clutch also. It was reasonably worn. Immediately bought a new clutch assembly and changed it. Fixed the kicker shaft, the crank case cover with a new gasket in place and finally the kick lever was fixed. I would like to believe that he did the work for me based on my long term association.
Once the engine was back at Palakkad, my job was minimal and I fixed the balance components( as in photos below) on to the engine. The rear wheel was temporarily fitted without installing the brake shoes. It’s now ready to be fixed to the chassis, before which I need to fix the fork….
Meanwhile posting some photos of the finished engine

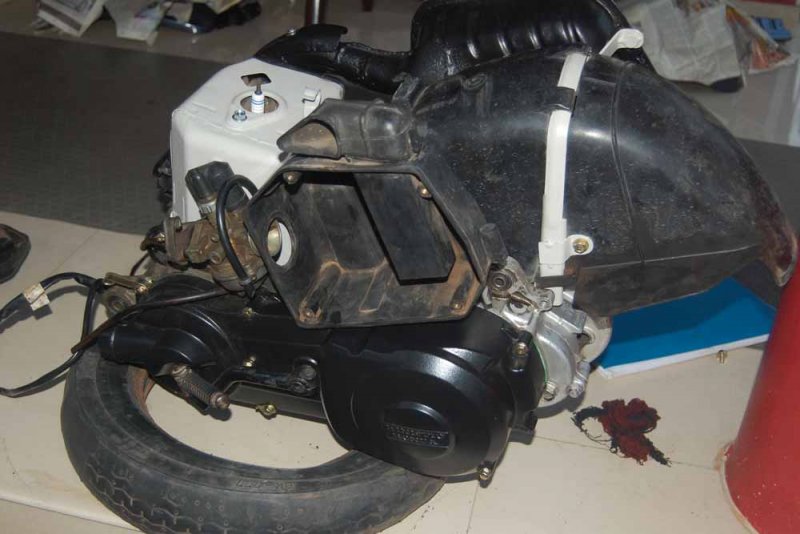


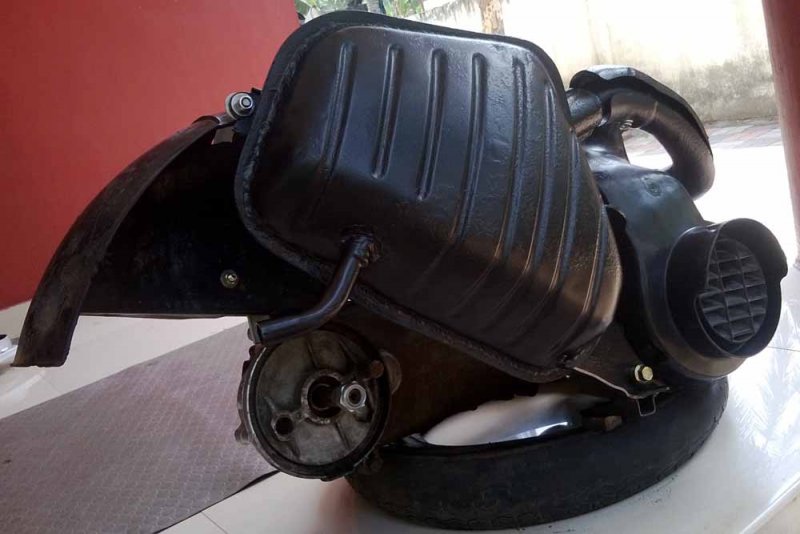


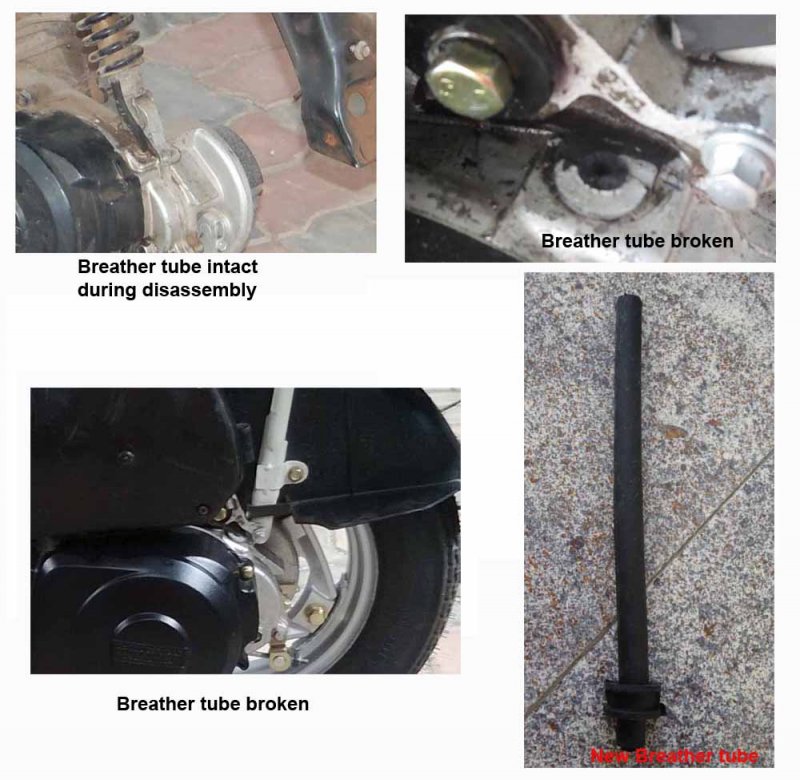
The main problem is that the breather tube was broken.![Sad [sad] [sad]](https://www.theautomotiveindia.com/forums/images/smilies/Sad.gif) . I am not taking the trouble of entrusting someone to open the transmission assembly and insert the breather tube now. Maybe, that's reserved for the scooters 30 year birthday. Besides the powder coating in the exhaust is doubtful to hold on for long. If there is further sign of corrrosion, may do a heat resistant painting later.
. I am not taking the trouble of entrusting someone to open the transmission assembly and insert the breather tube now. Maybe, that's reserved for the scooters 30 year birthday. Besides the powder coating in the exhaust is doubtful to hold on for long. If there is further sign of corrrosion, may do a heat resistant painting later.
As stated in earlier posts, I was reluctant to detach the engine from chassis. However in order to paint it I was left with no choice than detach it. The painting of chassis without detaching the engine would be imperfect. So the engine was down for good.


The engine in resting phase, while some parts entrusted for powder coating

The works done in engine was minimal.
New spark plug,
Silencer decarb, Engine hanger bushes replacement, (By a mechanic at Palakkad)
Powder coating of crank case cover and engine shroud
Clutch replacement and kick shaft fitting (By a mechanic friend at Trivandrum)
The photos with me are also less.
Once the powder coated crank case cover arrived, I tried to fix it. The kicker shaft was out while a mechanic at Palakkad opened a jammed bolt of crank case cover. I was unable to fix the shaft myself to reinstall. So took the engine to the same mechanic at Palakkad but he was not available. I called an erstwhile kinetic Honda friendly mechanic at Trivandrum. He was known to me, even before I bought this scooter. He had worked with Century connections, Trivandrum, the very same dealer from whom my father bought this scooter. I had called him occasionally for advices about the method of work. He is presently working with another automobile dealer and is seldom having the time or fervor to work with a Kinetic Honda. Despite his advices over phone, I was unable to fix the kicker shaft in the engine. One night I was to leave for my home( about 330 Kms) at Trivandrum, solo by car (Maruti 800), I took the engine also.
![Drive [drive] [drive]](https://www.theautomotiveindia.com/forums/images/smilies/Drive.gif) I chose the MC Road for a change. M C Road was horrible and heavy rains made it worse. At 1.00 AM, I was stopped at Changanassery by the police for routine checking. They opened the hatch and checked but did not ask me anything.
I chose the MC Road for a change. M C Road was horrible and heavy rains made it worse. At 1.00 AM, I was stopped at Changanassery by the police for routine checking. They opened the hatch and checked but did not ask me anything.Once at Trivandrum, my friend agreed to come to my house. I had to wait for three days for him to be free. On day three, went to his house, and asked him to inspect the clutch also. It was reasonably worn. Immediately bought a new clutch assembly and changed it. Fixed the kicker shaft, the crank case cover with a new gasket in place and finally the kick lever was fixed. I would like to believe that he did the work for me based on my long term association.
Once the engine was back at Palakkad, my job was minimal and I fixed the balance components( as in photos below) on to the engine. The rear wheel was temporarily fitted without installing the brake shoes. It’s now ready to be fixed to the chassis, before which I need to fix the fork….
Meanwhile posting some photos of the finished engine


The main problem is that the breather tube was broken.
![Sad [sad] [sad]](https://www.theautomotiveindia.com/forums/images/smilies/Sad.gif) . I am not taking the trouble of entrusting someone to open the transmission assembly and insert the breather tube now. Maybe, that's reserved for the scooters 30 year birthday. Besides the powder coating in the exhaust is doubtful to hold on for long. If there is further sign of corrrosion, may do a heat resistant painting later.
. I am not taking the trouble of entrusting someone to open the transmission assembly and insert the breather tube now. Maybe, that's reserved for the scooters 30 year birthday. Besides the powder coating in the exhaust is doubtful to hold on for long. If there is further sign of corrrosion, may do a heat resistant painting later.
Thread Starter
#30
Updates…
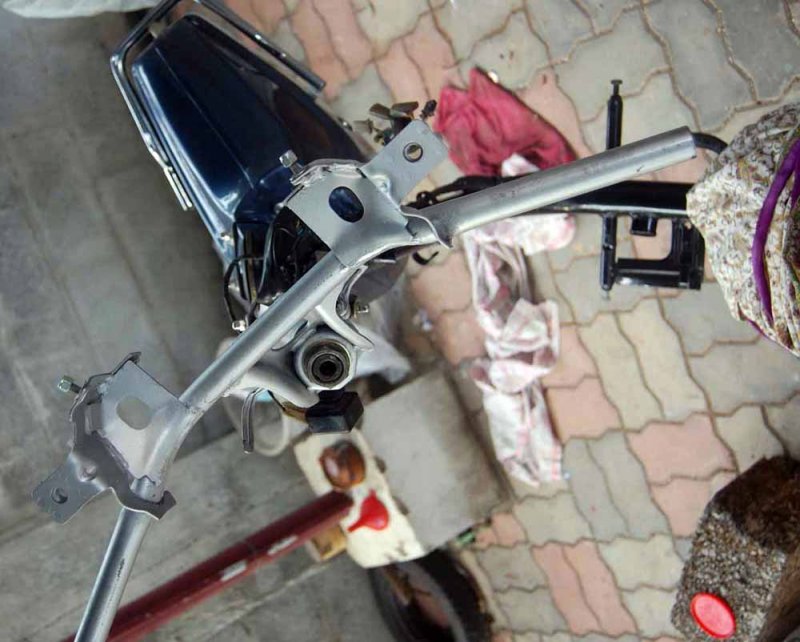
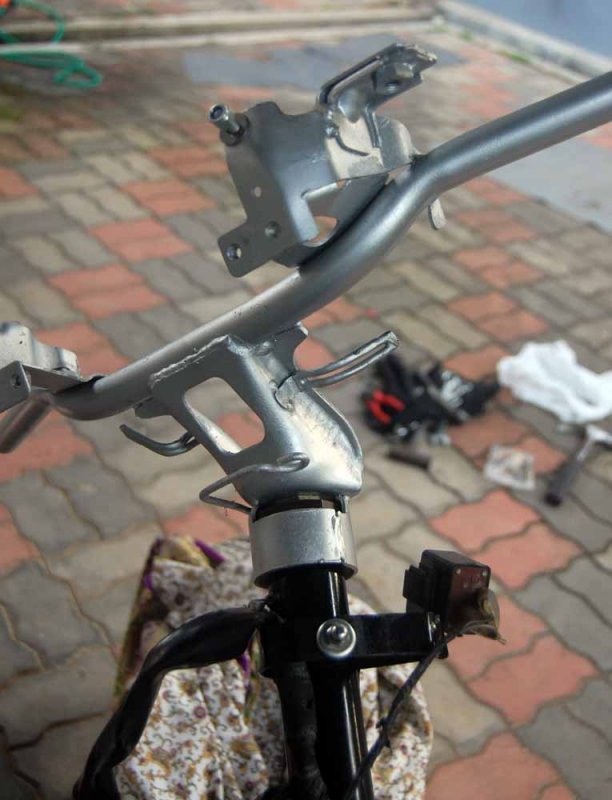
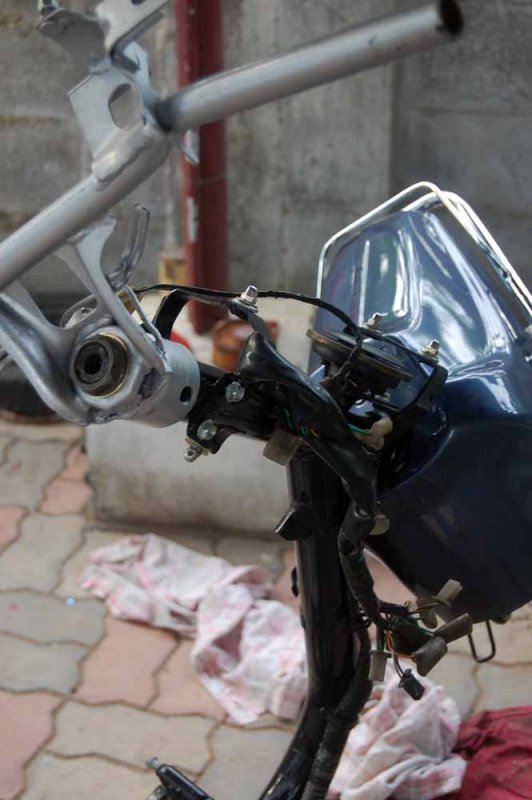
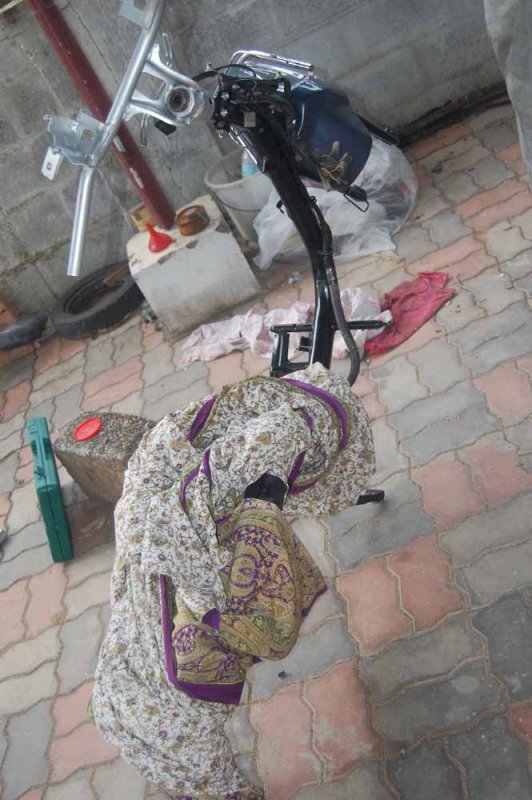
In August First week, I set off to install the front fork.

First the mudguard was fixed to the fork. Then the new shock absorber was also fitted. I had no experience with fitting ball bearings yet gave it a try. The lower and bottom cone races needs 29 and 26 steel balls respectively. First the race is coated with grease and the balls pressed to the grease in the cone. Then the fork is pushed up and the top cone race is screwed to the fork. I do not have any photograph of the same as I was doing the work. The stem rotation is checked for free rotation and zero play in its axis. Everything ok, I fixed the handlebar. The process took only one hour and I was relieved one more troublesome job is over.![Surprise [surprise] [surprise]](https://www.theautomotiveindia.com/forums/images/smilies/Surprise.gif)


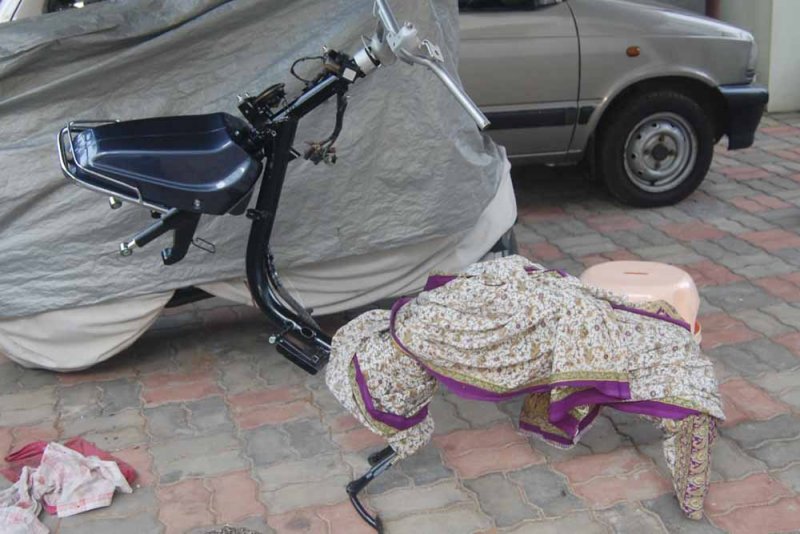
The next work was to fix the pivot arm and I was unable to remove the pivot arm bushing collar to install a new one. However hard I tried, it was stuck inside.


So again went back to the neighborhood mechanic and he changed the pivot arm bushing. The chassis was brought back to my home.
In order to fix the front wheel, I fitted two new bearings to the front wheel hub, and inserted new dust seal without tampering the speedometer gears.
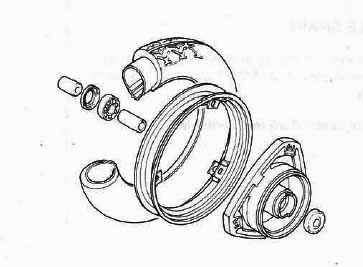

Packed grease prior to inserting the dust seal also. Inserted the brake cam, springs and cams with wear plate indicator and fixed new brake shoes. The brake panel assembly was completed and inserted to the hub and the front wheel fitted to the scooter.
Finally, the wheel was secured to the fork. Now the new brake levers were fixed and the cables routed. The throttle cable was also fixed as was the speedometer cable. The cables were connected to the respective ends in handle bar. The other end of rear brake cable and throttle cable was left aside to be connected to engine later. The key lock switch was fixed and later the speedometer console was also fixed and checked the speedometer for operation.


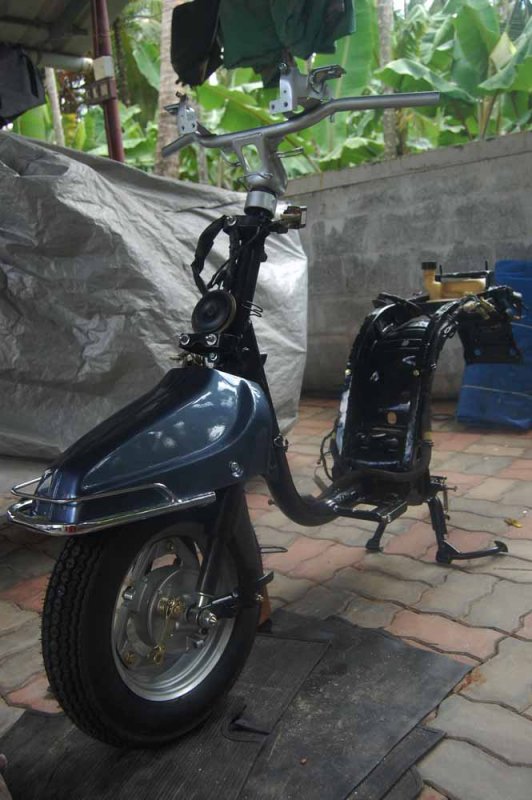
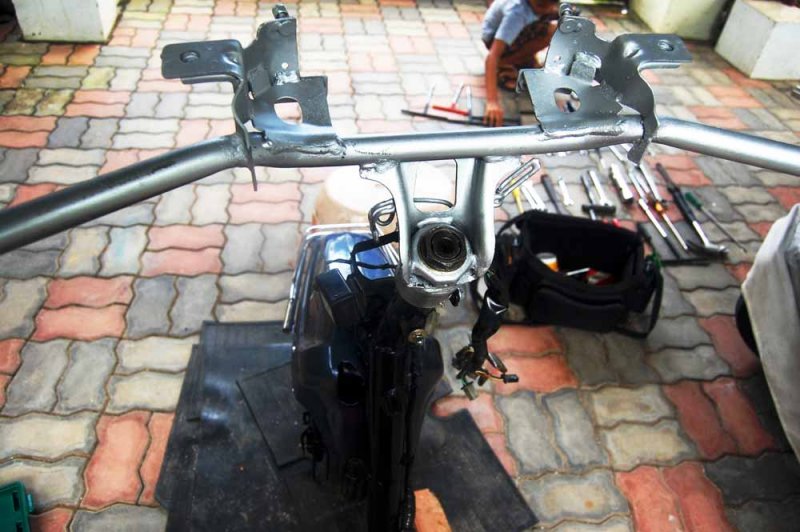

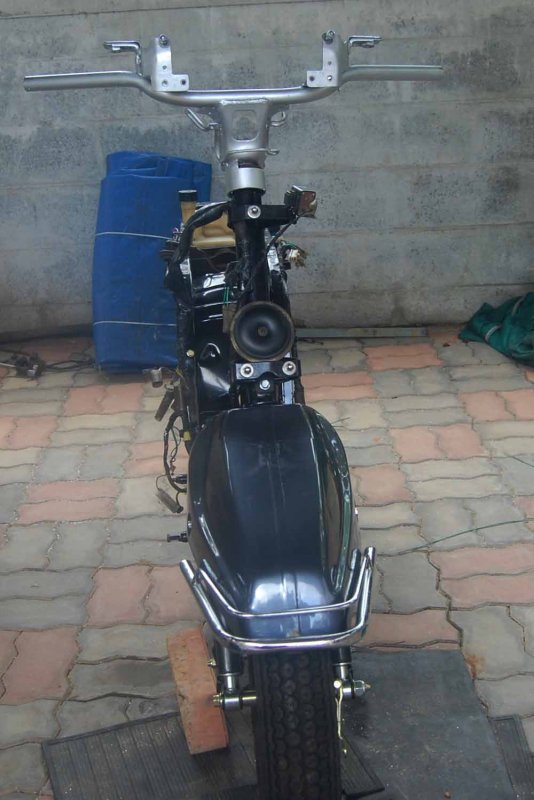
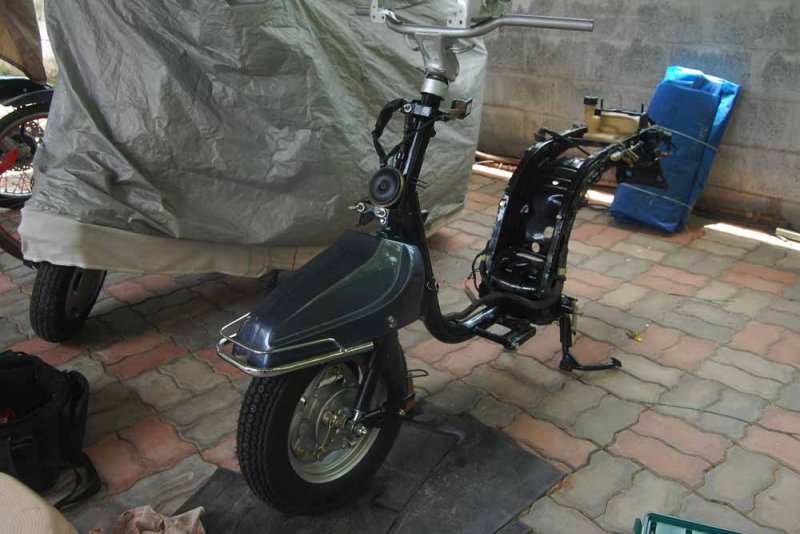

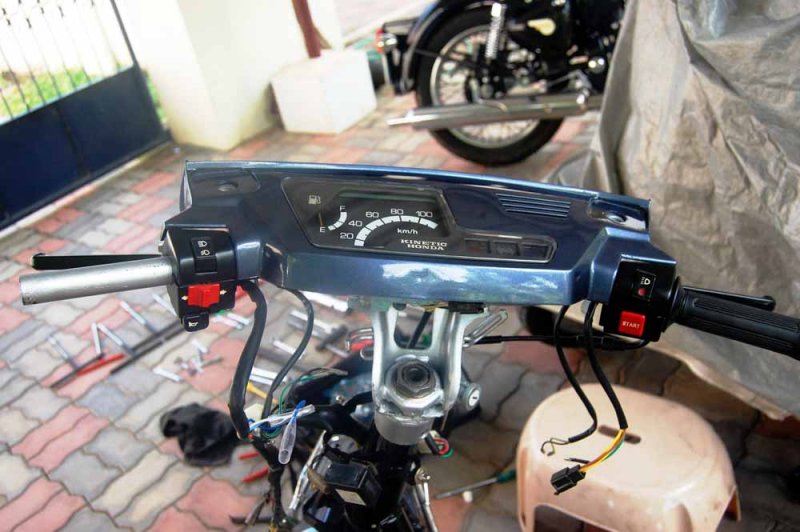


The engine is waiting to be united with the frame


I have not sieved the photos and posting it in full
The engine fixing to frame in subsequent posts...
In August First week, I set off to install the front fork.

First the mudguard was fixed to the fork. Then the new shock absorber was also fitted. I had no experience with fitting ball bearings yet gave it a try. The lower and bottom cone races needs 29 and 26 steel balls respectively. First the race is coated with grease and the balls pressed to the grease in the cone. Then the fork is pushed up and the top cone race is screwed to the fork. I do not have any photograph of the same as I was doing the work. The stem rotation is checked for free rotation and zero play in its axis. Everything ok, I fixed the handlebar. The process took only one hour and I was relieved one more troublesome job is over.
![Surprise [surprise] [surprise]](https://www.theautomotiveindia.com/forums/images/smilies/Surprise.gif)


The next work was to fix the pivot arm and I was unable to remove the pivot arm bushing collar to install a new one. However hard I tried, it was stuck inside.


So again went back to the neighborhood mechanic and he changed the pivot arm bushing. The chassis was brought back to my home.
In order to fix the front wheel, I fitted two new bearings to the front wheel hub, and inserted new dust seal without tampering the speedometer gears.


Packed grease prior to inserting the dust seal also. Inserted the brake cam, springs and cams with wear plate indicator and fixed new brake shoes. The brake panel assembly was completed and inserted to the hub and the front wheel fitted to the scooter.
Finally, the wheel was secured to the fork. Now the new brake levers were fixed and the cables routed. The throttle cable was also fixed as was the speedometer cable. The cables were connected to the respective ends in handle bar. The other end of rear brake cable and throttle cable was left aside to be connected to engine later. The key lock switch was fixed and later the speedometer console was also fixed and checked the speedometer for operation.


The engine is waiting to be united with the frame


I have not sieved the photos and posting it in full

The engine fixing to frame in subsequent posts...
Last edited:


