Thread Starter
#1
This was my first DIY activity with my Ertiga. On long drives, I always felt some pain in left arm due to lack of support to the left elbow. So searched for possibility to put an armrest on the net. In one of the thread on TAI I saw an armrest installed in Ertiga. So decided to explore more.
I searched on eBay & found the following:
Universal Armrest Centre Console Hand Rest BIG Beige Biege For Suzuki ERTIGA | eBay
So ordered it on reading Ertiga. But when I received it, there was nothing specific to Ertiga & I am sure it is the same for all the cars.
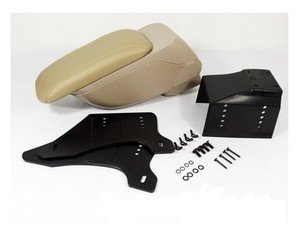
This is what I got in the package. This image is from the site. In actual package, the stand also is of beige colour & only 8 screws included instead of 12 shown. The overall size is also smaller than what I expected. But later realized that it fits perfectly between the front seats of Ertiga.
I couldn't figure out which screws to be used where as there was no installation steps or instructions included in the box. I had read the DIY by some Wagon-R owner on TAI which helped a lot.
At first, screwed the beige coloured plastic stand to the base of the armrest block. There is no way you can put nuts. So just tighten the screws into the base. I had to buy these thick screws from hardware shop.
Then took the whole unit inside the car & I found out the beige colour to be darker than that of the seat-covers. But, it was beige after all.![[:)]](https://www.theautomotiveindia.com/forums/images/smilies/Smile.gif "Smile [:)]")
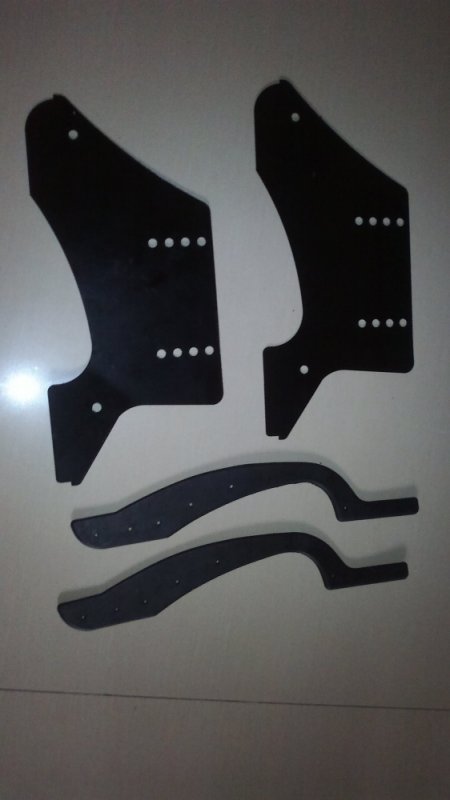
Now, the important thing was to see how to install & fix the unit into the car's parts. I tried arranging the black metallic plates to see if they align with any of the parts near the hand-brake, between the seats. But no where did they allign. Then tried putting the armrest block plus plastic beige stand directly on the centre piece & it seem to fit in there. So thought of doing away with the black metallic plates & installing the plastic stand directly onto the centre plastic panel around the hand-brake.
So these mtallic plates & it's rubber padding is not required at all.
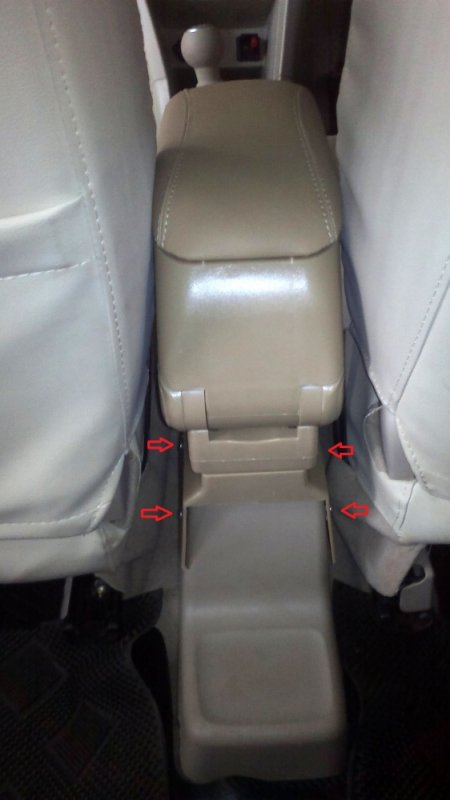
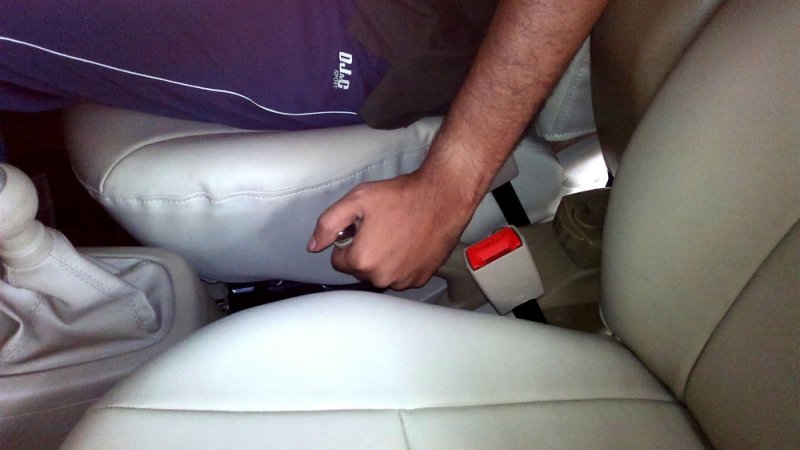
Now, the tedious thing was to drill holes in the centre panel. So tried to remove this panel. The panel has two plastic screws on one side (near middle row seats) & just pressed at the front. So this panel can be removed. The plastic screws need to be pulled out with screw-driver or something similar.

After removing the centre plastic panel, marked the postions of the holes to be drilled & used hand-drill & screw-driver to make holes that could align with the holes of the plastic stand of the armrest.
The thick screws & nuts provided in the box were used to fix the unit on the centre panel.
The set was ready to be put back.
Then fitted back the centre panel around the hand-brake & tightened the plastic screws at the back.
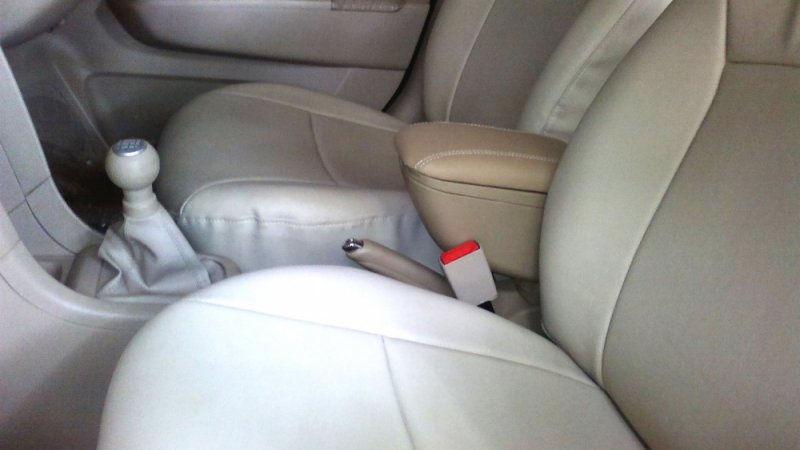
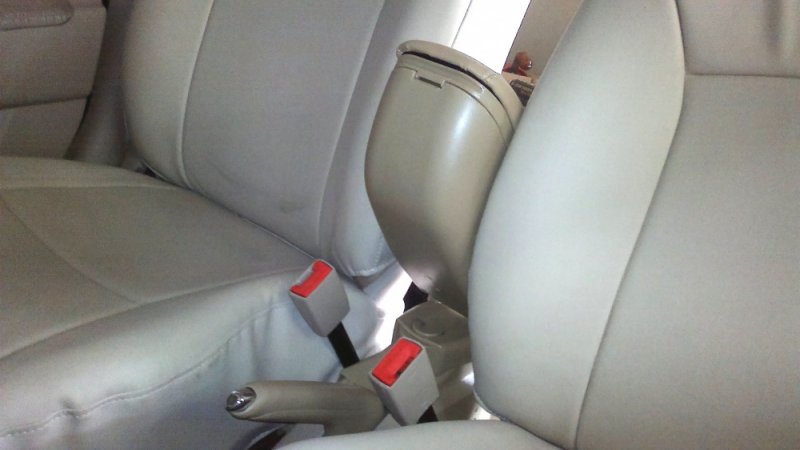
Yeah! Ertiga was ready with the armrest. Quickly checked if it was at comfortable position, operating gear lever, handbrake etc.
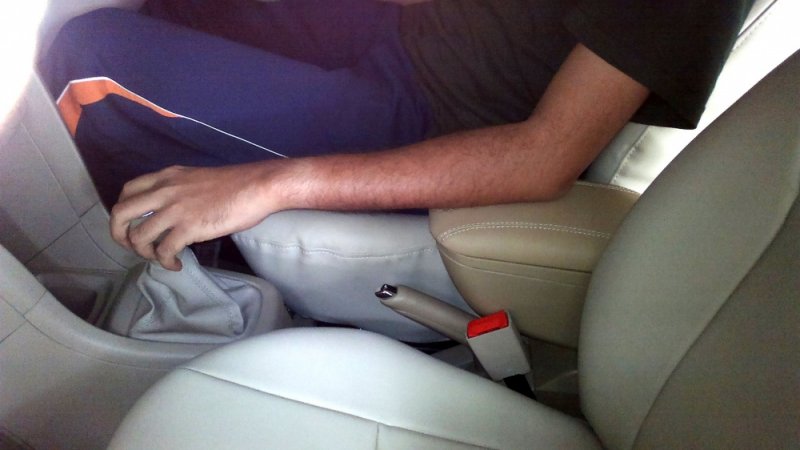
For operating hand-brake, the armrest needs to be folded up. That's it. Not much of a hurdle.
DIY mission completed!


I searched on eBay & found the following:
Universal Armrest Centre Console Hand Rest BIG Beige Biege For Suzuki ERTIGA | eBay
So ordered it on reading Ertiga. But when I received it, there was nothing specific to Ertiga & I am sure it is the same for all the cars.
This is what I got in the package. This image is from the site. In actual package, the stand also is of beige colour & only 8 screws included instead of 12 shown. The overall size is also smaller than what I expected. But later realized that it fits perfectly between the front seats of Ertiga.
I couldn't figure out which screws to be used where as there was no installation steps or instructions included in the box. I had read the DIY by some Wagon-R owner on TAI which helped a lot.
At first, screwed the beige coloured plastic stand to the base of the armrest block. There is no way you can put nuts. So just tighten the screws into the base. I had to buy these thick screws from hardware shop.
Then took the whole unit inside the car & I found out the beige colour to be darker than that of the seat-covers. But, it was beige after all.
Now, the important thing was to see how to install & fix the unit into the car's parts. I tried arranging the black metallic plates to see if they align with any of the parts near the hand-brake, between the seats. But no where did they allign. Then tried putting the armrest block plus plastic beige stand directly on the centre piece & it seem to fit in there. So thought of doing away with the black metallic plates & installing the plastic stand directly onto the centre plastic panel around the hand-brake.
So these mtallic plates & it's rubber padding is not required at all.
Now, the tedious thing was to drill holes in the centre panel. So tried to remove this panel. The panel has two plastic screws on one side (near middle row seats) & just pressed at the front. So this panel can be removed. The plastic screws need to be pulled out with screw-driver or something similar.
After removing the centre plastic panel, marked the postions of the holes to be drilled & used hand-drill & screw-driver to make holes that could align with the holes of the plastic stand of the armrest.
The thick screws & nuts provided in the box were used to fix the unit on the centre panel.
The set was ready to be put back.
Then fitted back the centre panel around the hand-brake & tightened the plastic screws at the back.
Yeah! Ertiga was ready with the armrest. Quickly checked if it was at comfortable position, operating gear lever, handbrake etc.
For operating hand-brake, the armrest needs to be folded up. That's it. Not much of a hurdle.
DIY mission completed!
![[clap]](https://www.theautomotiveindia.com/forums/images/smilies/Clap.gif "Clap [clap]") for completing you first DIY sucessfully.
for completing you first DIY sucessfully.![[:D]](https://www.theautomotiveindia.com/forums/images/smilies/Big%20Smile.gif "Big Smile [:D]")
![[cry]](https://www.theautomotiveindia.com/forums/images/smilies/Cry.gif "Cry [cry]") . If i had ordered today, i would have got 400rs off on the same !
. If i had ordered today, i would have got 400rs off on the same !![[anger]](https://www.theautomotiveindia.com/forums/images/smilies/Anger.gif "Anger [anger]") [one of my bad habit]
[one of my bad habit]![[;)]](https://www.theautomotiveindia.com/forums/images/smilies/Wink.gif "Wink [;)]")