Thread Starter
#1
.
To me, Head lights are the most beautiful part of a vehicle.
Dull, foggy, yellowish lens would make the car look ugly and will reflect how the car being cared by the owner.
Beyond the aesthetics, they perform worse, ruining the overall image of the vehicle, also have a safety hazard.![[evil]](https://www.theautomotiveindia.com/forums/images/smilies/Evil.gif "Evil [evil]")
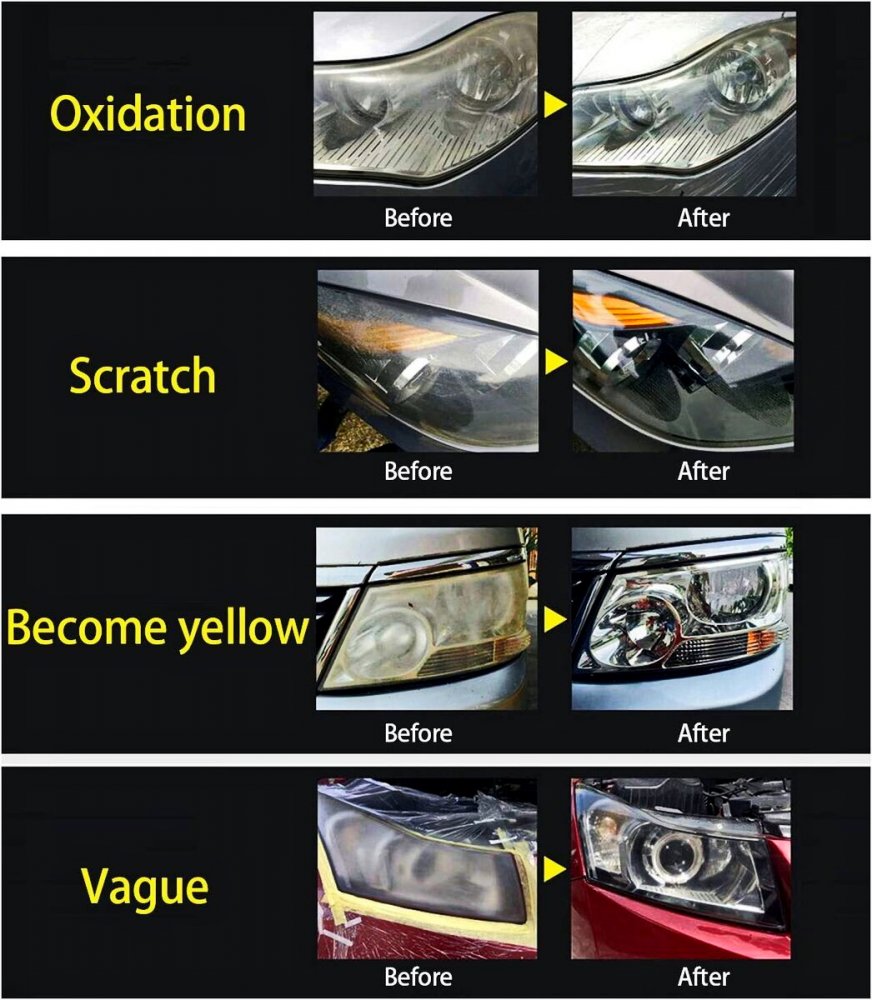
WHY DO HEADLIGHTS BECOME BLIND?
The modern vehicle headlight lenses are made out of high quality transparent plastic, acrylic materials (plexiglass) with a protective clear coat. They are designed to tolerate the optimum heat produced by recommended inner OE bulbs and outer natural environment.
The car is also constantly exposed to the sun, rain, car exhaust and all sorts of dirt, debris.
These would also expedite the deterioration :
1. Replacing with higher watt headlight bulbs.
2. Uncaring to protect the lenses during aftermarket painting job.
3. Cleaning it with poor quality, hard water.
4. Parking the car in open, very hot & in a dirty environment.
5. Affixing stickers, spraying harsh chemical color powders during festivals & paint thinner to clean the surface.
6. Internal condensation, water damage due to defective headlight assembly.
Plastic gets oxidized in UV radiation, the longer transparent plastic is exposed to the sun, the faster it becomes dull/yellow.
CAN WE RESTORE THE LENS?
Before carrying out restoration, please find out the condition and category in which the lens belongs:
Grade I
The age of the vehicle within 5 years, where the lenses are appearing not as new. The issue would be on the external layer.
Head light lens restoration may work good for Grade I vehicles.
Grade II
The age of the vehicle is around 10 years or more where the lenses are almost blind. The issue might be over both inner and outer layers.
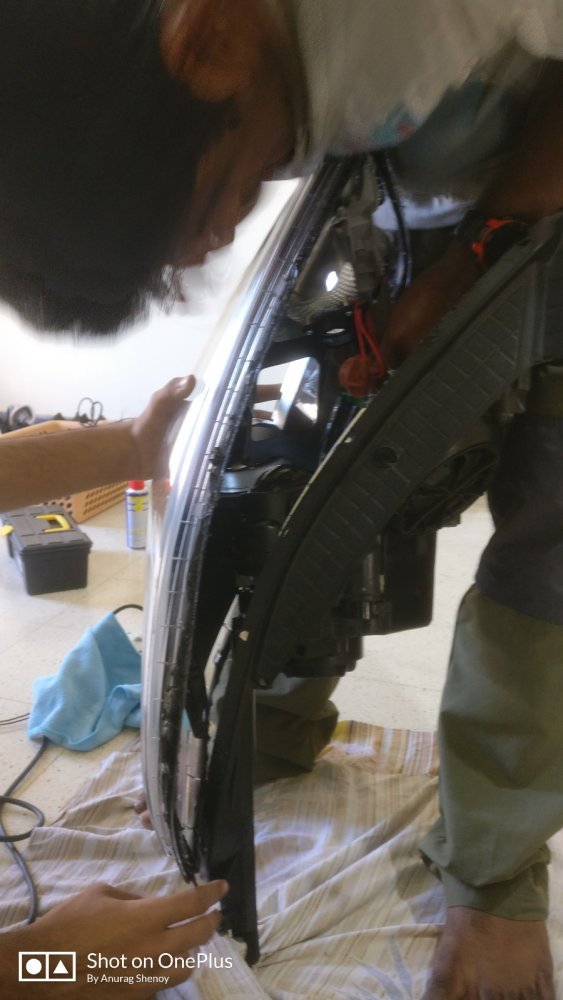
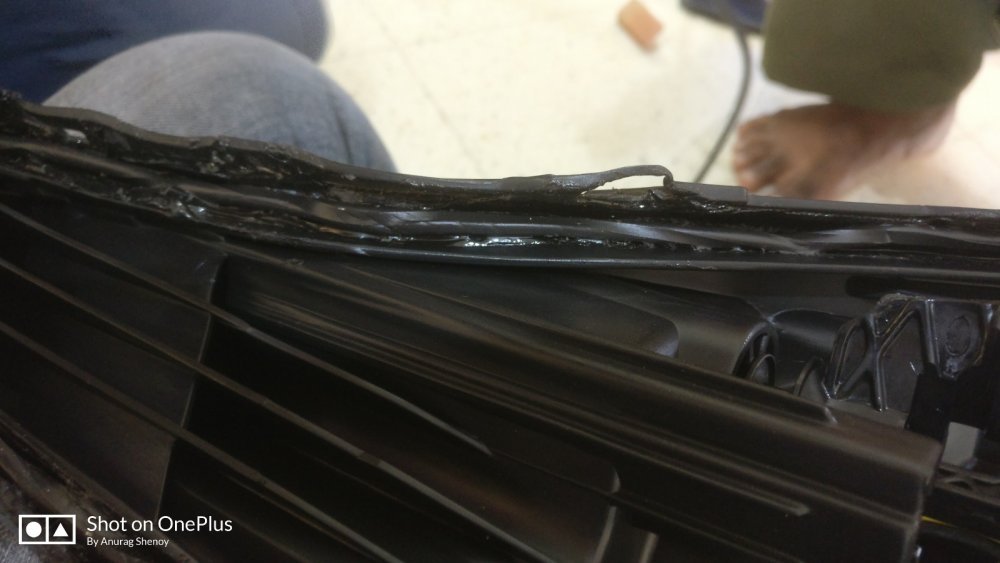
The Grade II may require complete opening, detaching the lens from the head light assembly and cleaning both the inner and outer layers.
The damage caused while detaching the parts, resealing the butyl bond, and the expense incurred will all discourage us; make to go with a new one!
Go with such process unless it is difficult to get such OE / Aftermarket Headlights. Even if restoration is required only for the outer layer, mostly we would be 'fairly satisfied' with the result.![[sad]](https://www.theautomotiveindia.com/forums/images/smilies/Sad.gif "Sad [sad]")
Grade III
Grade III refers to Very old, classic and vintage’ vehicles. Generally, their head light lenses are made out of glass. Glass won't oxidize, no matter how old they are. They could get dirty, but a good cleaning, would look like new.
In case of other than glass, we need to do the process meant for Grade II, as replacing with a new one would not be possible.
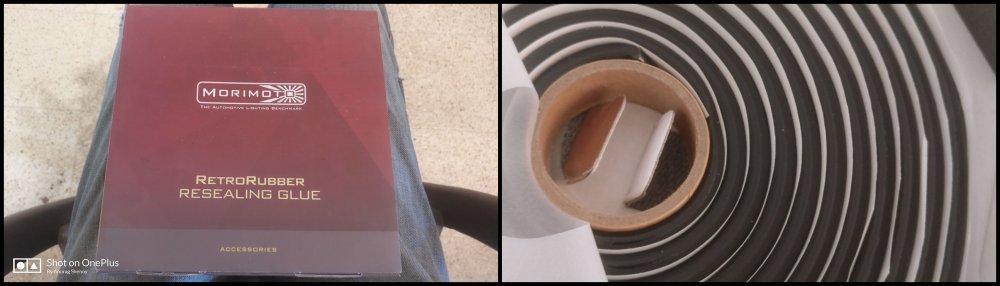
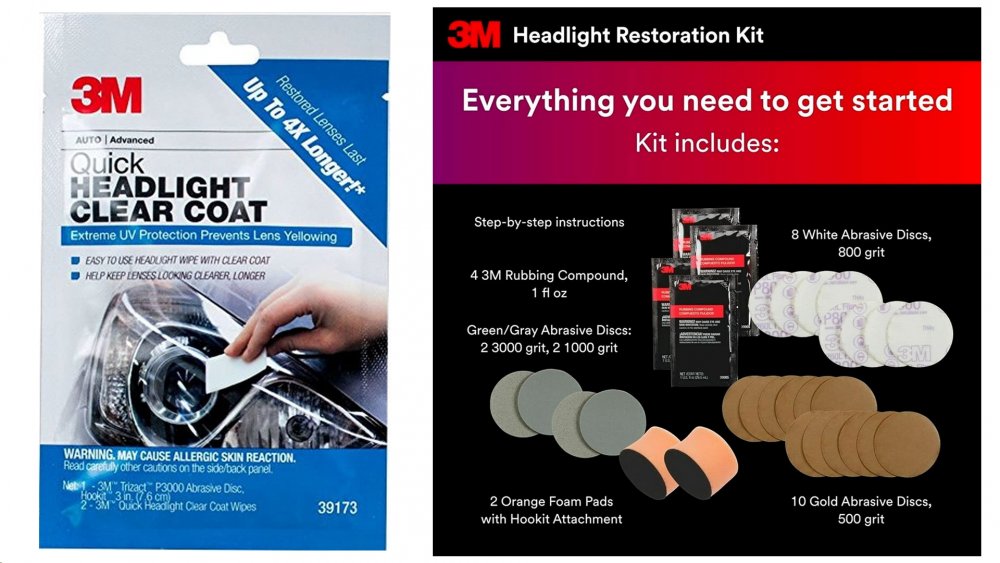
TOOLS REQUIRED:
THE PROCESS
READ HERE (LINK) the experience of CRACING in our forum. Please also view the videos below.

INTERESTING VIDEOS:
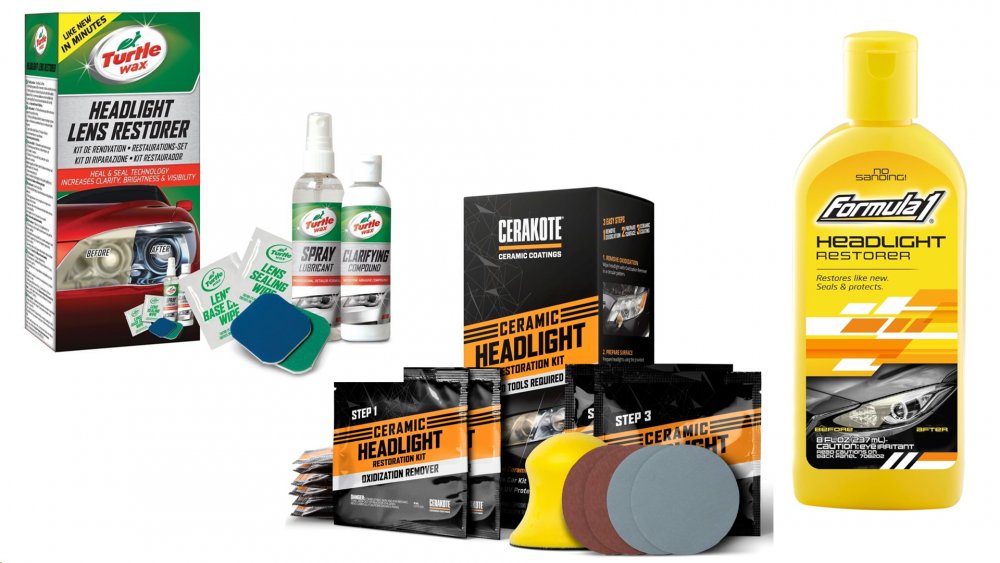
PRODUCTS ONLINE
.
To me, Head lights are the most beautiful part of a vehicle.
Dull, foggy, yellowish lens would make the car look ugly and will reflect how the car being cared by the owner.
Beyond the aesthetics, they perform worse, ruining the overall image of the vehicle, also have a safety hazard.
WHY DO HEADLIGHTS BECOME BLIND?
The modern vehicle headlight lenses are made out of high quality transparent plastic, acrylic materials (plexiglass) with a protective clear coat. They are designed to tolerate the optimum heat produced by recommended inner OE bulbs and outer natural environment.
The car is also constantly exposed to the sun, rain, car exhaust and all sorts of dirt, debris.
These would also expedite the deterioration :
1. Replacing with higher watt headlight bulbs.
2. Uncaring to protect the lenses during aftermarket painting job.
3. Cleaning it with poor quality, hard water.
4. Parking the car in open, very hot & in a dirty environment.
5. Affixing stickers, spraying harsh chemical color powders during festivals & paint thinner to clean the surface.
6. Internal condensation, water damage due to defective headlight assembly.
Plastic gets oxidized in UV radiation, the longer transparent plastic is exposed to the sun, the faster it becomes dull/yellow.
CAN WE RESTORE THE LENS?
Before carrying out restoration, please find out the condition and category in which the lens belongs:
Grade I
The age of the vehicle within 5 years, where the lenses are appearing not as new. The issue would be on the external layer.
Head light lens restoration may work good for Grade I vehicles.
Grade II
The age of the vehicle is around 10 years or more where the lenses are almost blind. The issue might be over both inner and outer layers.
The Grade II may require complete opening, detaching the lens from the head light assembly and cleaning both the inner and outer layers.
The damage caused while detaching the parts, resealing the butyl bond, and the expense incurred will all discourage us; make to go with a new one!
Go with such process unless it is difficult to get such OE / Aftermarket Headlights. Even if restoration is required only for the outer layer, mostly we would be 'fairly satisfied' with the result.
Grade III
Grade III refers to Very old, classic and vintage’ vehicles. Generally, their head light lenses are made out of glass. Glass won't oxidize, no matter how old they are. They could get dirty, but a good cleaning, would look like new.
In case of other than glass, we need to do the process meant for Grade II, as replacing with a new one would not be possible.
TOOLS REQUIRED:
- Clean Water with Car Shampoo (no carnauba wax) - Using water and sandpaper is also called 'wet sanding', is to lubricate, reduce friction, prevent accidental damage from heat buildup.
- Clay Bar- Not a must but a better initial process.
- Spray Bottle
- Microfiber Towels
- Isopropyl Alcohol - To degrease the surface, remove all the oils that remain on the headlights after the compound and polishing step.
- Masking Tape - Protect adjacent structures from accidental damages.
- Sandpaper 400/600/1000/2000 of Various Grit / May require a sanding drill Machine. We need to start with 400 grit until our headlight looks nice and hazy on the whole surface, to make sure no remaining yellowing, old plastic, old film, or clear coat before we go for the finer grit sandpapers.
- 2K Rubbing Compound for Manual Process or Heavy Cut /Soft Cut Compound with Soft /Coarse Pad & a Polisher Machine. If you do not have a polishing machine , then you can also do it by hand. but it takes much longer duration. Afraid of elbow grease ? You can get a headlight restoration kit that is used with a drill.
- AIO Cleaner
- Quality Ceramic Coating Liquid. This sealant creates a time capsule effect, preventing wear and tear to keep them looking pristine and crystal-clear for months–or even years. Avoid clear-coat paint, as it is not intended to work properly on plastic.
THE PROCESS
READ HERE (LINK) the experience of CRACING in our forum. Please also view the videos below.
- Aftermarket restoration/ Intervention is recommended only for those 'still young' lenses or where replacement is impossible. Otherwise, the process may not make those results long lasting against natural deterioration.
- Always replace with OEM Spare while replacing Old Headlights, as counterfeits will soon become yellowish.
- When replacing with aftermarket stylish headlights like projector ones, go with reliable brands for more longevity.
- Always insist for the 'removal and refit ' of all the lights during repainting / painting after accident. Note, covering with newspaper never serve the purpose.
- Always work out the cost of tools & labor involved before carrying out a DIY.
- Check before DIY / seeking professional help for complete restoration (both inner & outer) whether it is value for money - considering the age of the car / part for a defect free & a long lasting effect.
- Don’t be carried by product manufactures marketing gimmicks!
- Make sure, you apply acrylic plastic friendly compound whenever you try a new chemical.
- Avoid wrapping PPF as it would dull and tends to become yellow over a period of time.
- Please read and follow carefully the instruction process that should be carried out while sanding; the type of movements whether circular/horizontal/vertical based on the grit used and the pressure applied whether soft/medium or more required. Picking up the heaviest grit compound or sanding pad in a kit can strip away more of the headlight lens than necessary, cutting deep into the plastic and creating rough abrasions that can be difficult to smooth.
- In professional method they use 4 different sanding grids to remove hardest to fine residues; process 2 different stages of buff polishing. Note, Headlight restoration process doesn't vanish deep scratches/cracks.
- The need for repeat headlight restoration depends on exposure to elements and usage. Generally, restoring headlights every two years or when significant dullness or yellowing is observed is advisable.
INTERESTING VIDEOS:
PRODUCTS ONLINE
.
Last edited:
![[frustration]](https://www.theautomotiveindia.com/forums/images/smilies/Frustration.gif "Frustration [frustration]")
![[thumbsup]](https://www.theautomotiveindia.com/forums/images/smilies/Thumbs%20Up.png "Thumbs Up [thumbsup]")